SBAA463A january 2021 – april 2023 TMAG5170 , TMAG5170-Q1 , TMAG5170D-Q1 , TMAG5173-Q1 , TMAG5273
1.2 Challenges of Angular Measurements
There are a few challenges that must be addressed when calculating the angle using two Hall-effect sensors.
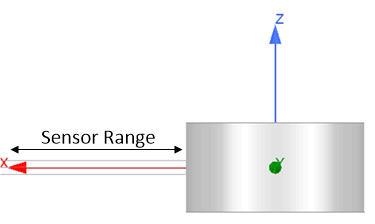
Firstly, proper alignment requires enough PCB area to properly place both sensors at a reasonable distance from the magnet. Consider a NdFeB type magnet with a radius and thickness each of 3.125 mm (0.125 in).
 Figure 1-3 Example Magnet
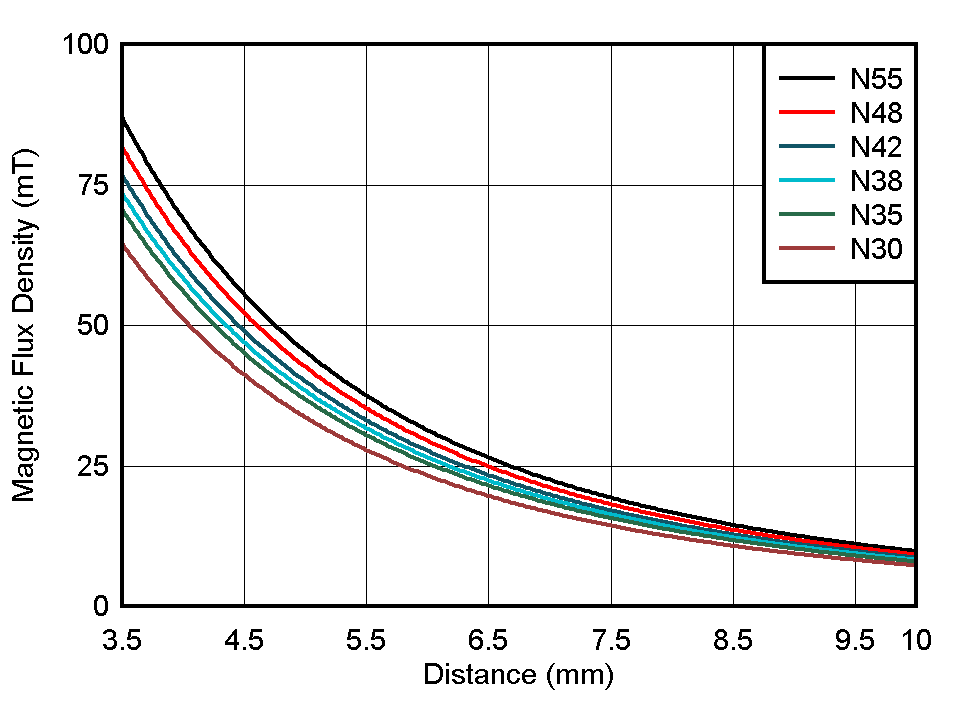
We can analyze the observed input as the distance from the surface of the magnet to the sensor is varied, which is represented by "Sensor Range" in Figure 1-3. If the material grade of the magnet is also changed, we obtain a spacing profile for the various sensitivity options for any given sensor. Consider for example, a sensor with a peak input range of ±50 mT. Supposing a 10% buffer is provided to avoid risk of clamping the outputs, we obtain the field behavior shown in Figure 1-4.
 Figure 1-4 Magnetic Flux Density
vs Distance for Various Magnet Materials
Figure 1-4 Magnetic Flux Density
vs Distance for Various Magnet MaterialsNotice the sensing range for the N35 magnet is 4.5 mm, whereas the N55 magnet has a target separation of 5 mm from the sensor. This distance will have a direct impact on the mechanics of the design within any target application. Any two-sensor solution will require enough physical space to place both sensors at the selected range. At this distance, even small changes in mechanical spacing can have a significant impact on the observed magnitude. Mismatch in spacing of the two sensors will lead to errors.
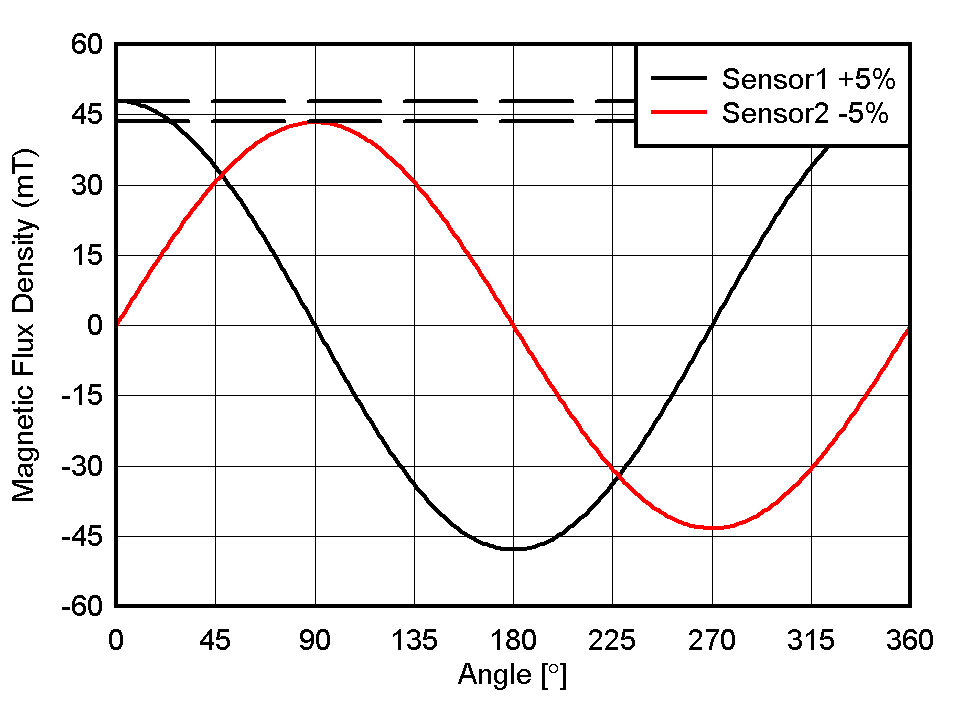
Secondly, it is important to account for device sensitivity variations. Consider a sensor with maximum sensitivity error of ±5%. In the worst-case scenario, one sensor will report a full scale output with 52.5 mT applied while the other reports with 47.5mT. When using the N35 magnet with an expected input of 45 mT, the output plots when rotating the magnet would appear as in Figure 1-5.
 Figure 1-5 Detected Two Sensor
Input with Sensor Mismatch
Figure 1-5 Detected Two Sensor
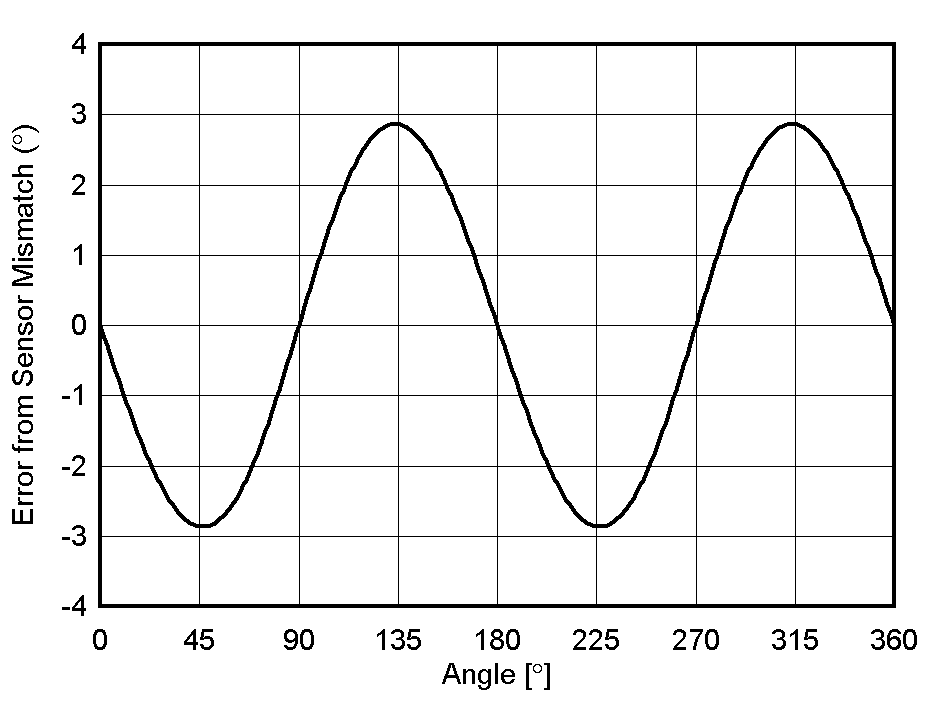
Input with Sensor MismatchThe angle error that results from this sensitivity error can be determined using the arctan calculation. Figure 1-6 shows a cyclically repeating error with a period of 180°. The minimum errors correspond to the zero crossings of either B-field input. In this instance, the peak angle error resulting from this sensitivity mismatch is 2.86º.
 Figure 1-6 Calculated Angle Error
From Sensor Mismatch
Figure 1-6 Calculated Angle Error
From Sensor MismatchIt is normal to expect in any system that there will be additional errors in magnet alignment and centering that may result in offset, wobble, or tilt. Alignment errors in assembly may impact the 90º spacing between sensors, or the physical assemblies may not be perfectly aligned. All manufacturing tolerances will have an impact on the system and it is expected to see additional errors that require calibration for optimal performance.