SBAU392A July 2022 – January 2023 AFE7950 , TRF1208
- TRF1208-AFE7950-EVM Evaluation Module User's Guide
- Trademarks
- 1EVM Overview
- 2Hardware Setup (TSW14J56 Used as an Example)
- 3Latte Overview
- 4TRF1208-AFE7950-EVM Automatic Configuration
- 5Status Check and Troubleshooting Guidelines
- 6TRF1208-AFE7950-EVM Manual Configuration
- 7Setup the TSW14J5x With the HSDC Pro
- 8Revision History
4.1 Steps to Start Automatic Configuration
- Within the Microsoft®Windows® PC, start
the HSDC PRO software by going to Start > Texas Instruments > High
Speed Data Converter Pro. As shown in Figure 4-1, ensure that the High-Speed Data Converter Pro started properly. Take
note of the Serial Numbers of the TSW14J56 EVM after the device is
connected.
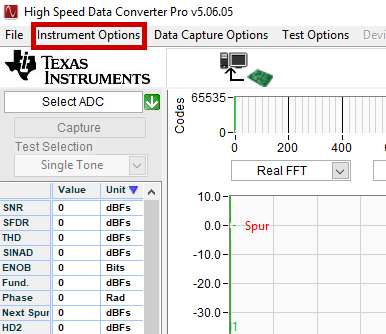 Figure 4-1 Connecting to
TSW14J56 From HSDC PRO
 - Press the OK button to proceed the connection of the TSW14J56 EVM to the PC.
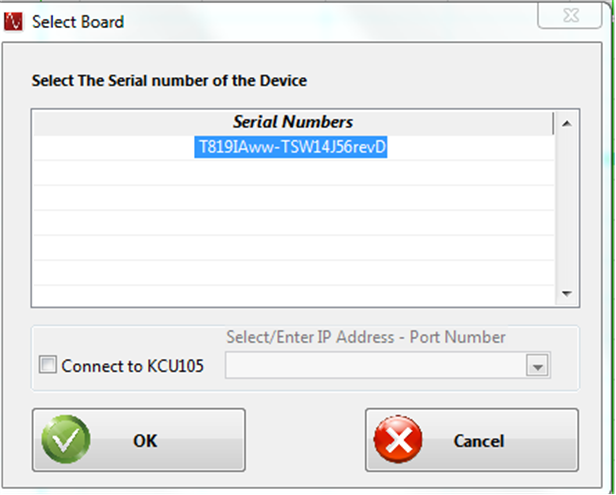 Figure 4-2 HSDC Pro Connect to Board
 - Within the Microsoft Windows PC, start the Latte software by going to Start > Texas Instruments > Latte. Ensure that the Latte software had started properly.
- On the left hand side of the Latte, within the
Scripts window, expand AFE79xx > Automation >
AFE79xx_TSW14J56_Mode1.py. Figure 4-3 shows the python script.
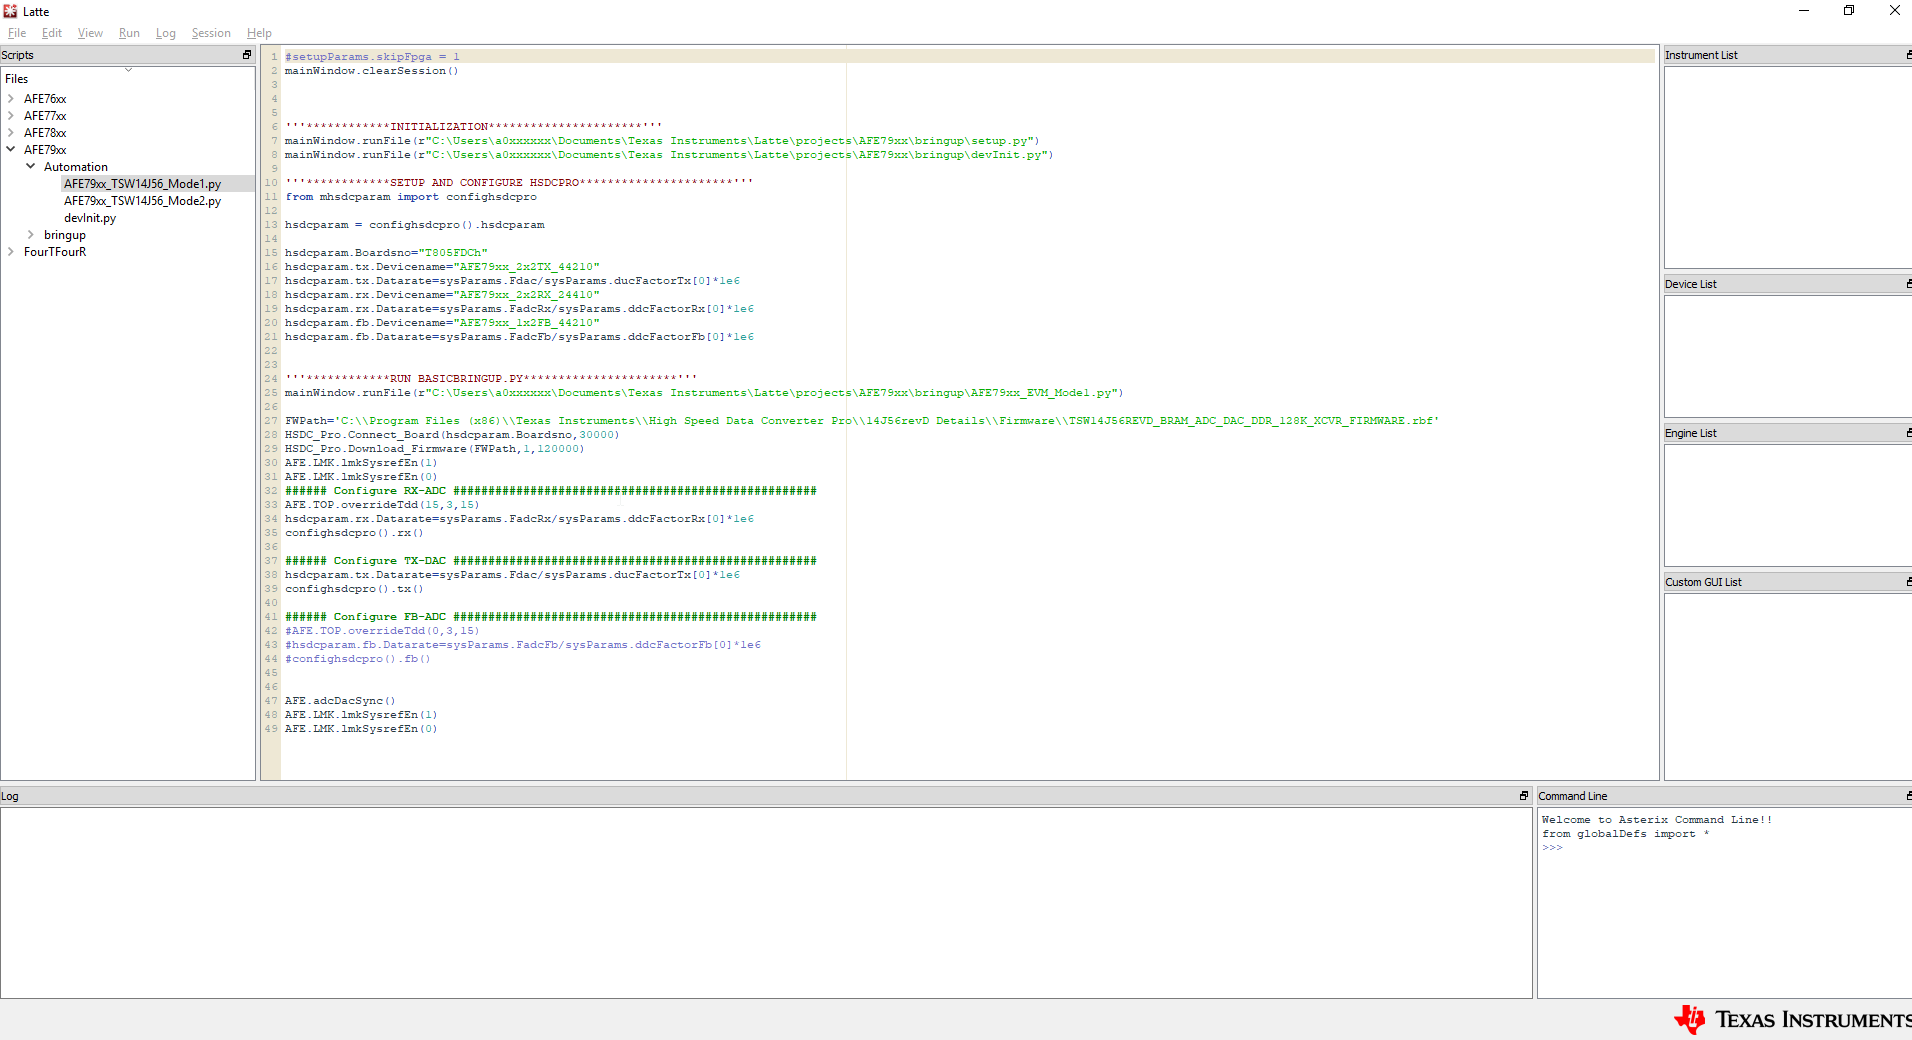 Figure 4-3 AFE79xx Mode 1
Automatic Configuration Script
 - Three parameters within the AFE79xx_TSW14J56_Mode1.py must be changed per the directory being used by the High-Speed Data Converter Pro software and the Latte software.
- As shown in Figure 4-4, change item #1 and #2 to reflect the location of the Latte install
directory for the setup.py and devInit.py. Usually the area where
a0xxxxxx must be replaced with the Windows user ID login.
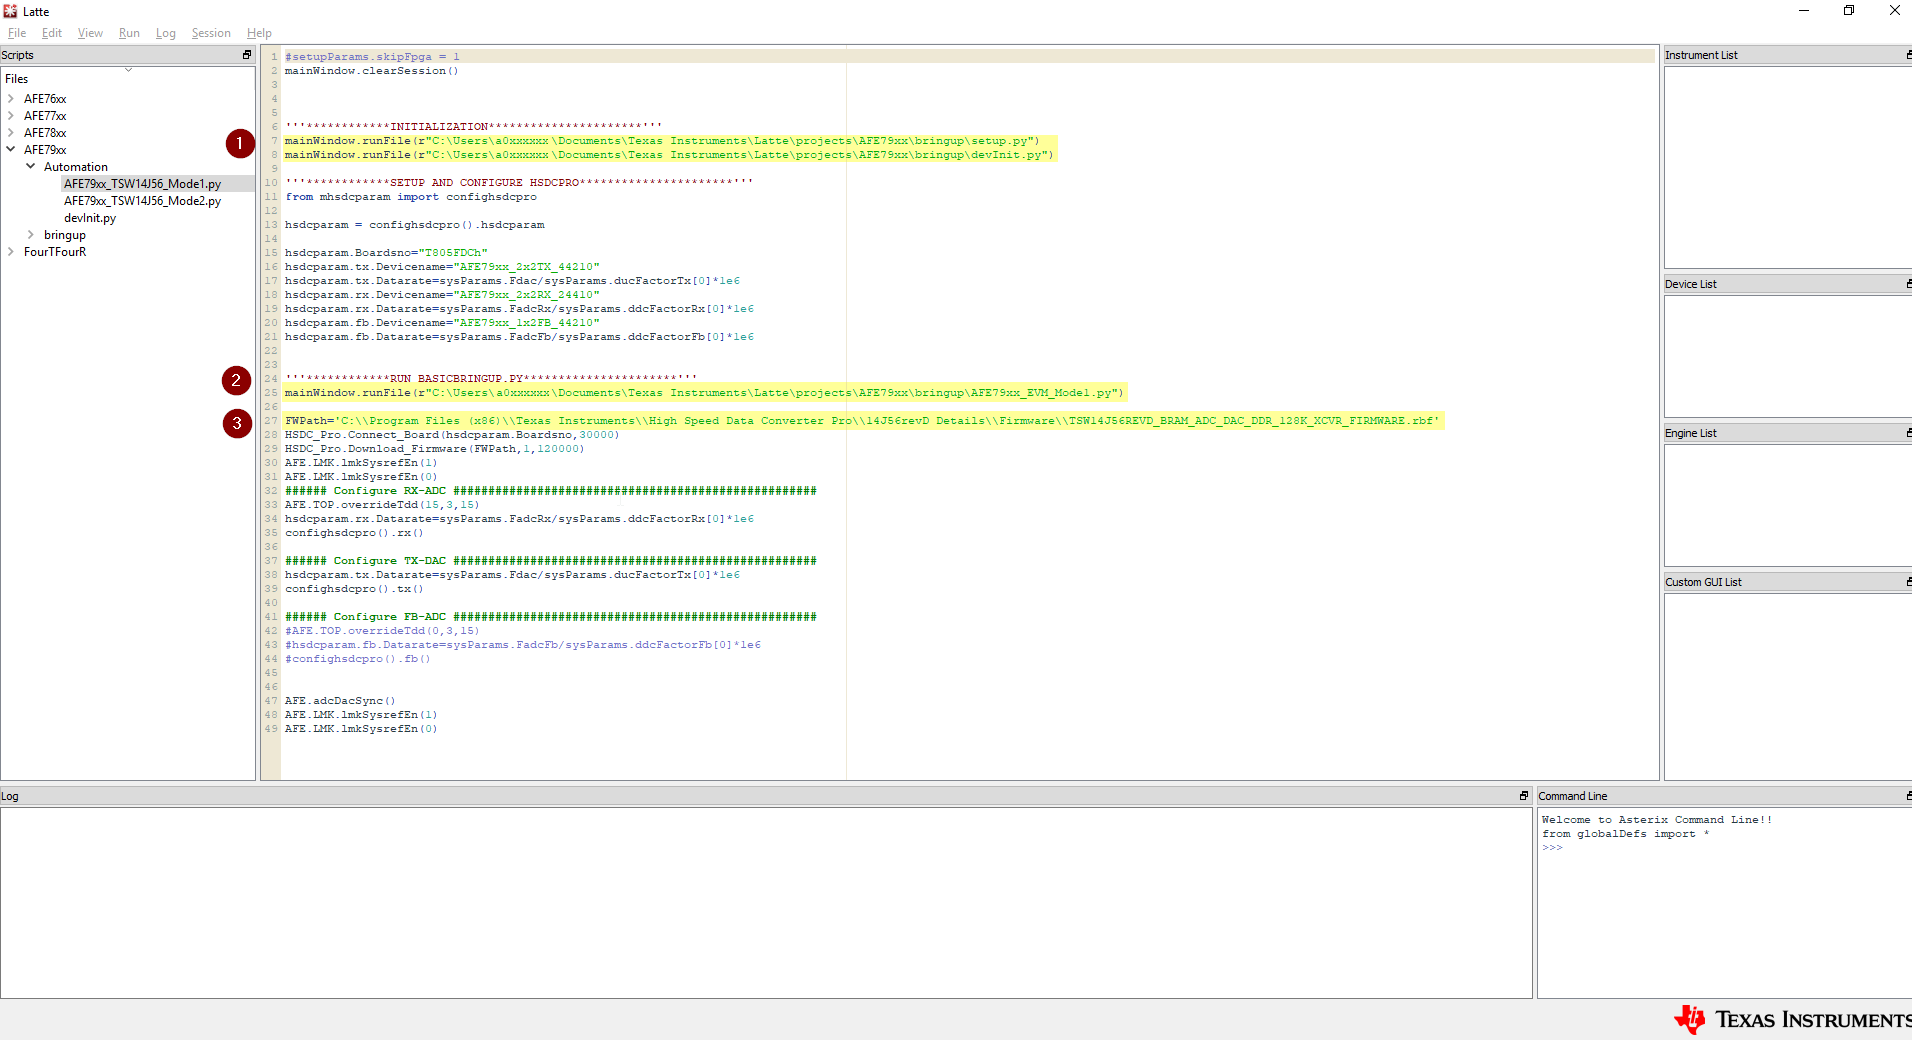 Figure 4-4 Directory
Parameter to be Changed in the Automation Script
 - As shown in Figure 4-4, change item #3 to reflect the location of the High-Speed Data Converter Pro directory for the TSW14J56 firmware.
- As shown in Figure 4-5, enter the serial number of the TSW14J56 EVM per the highlighted location
in .
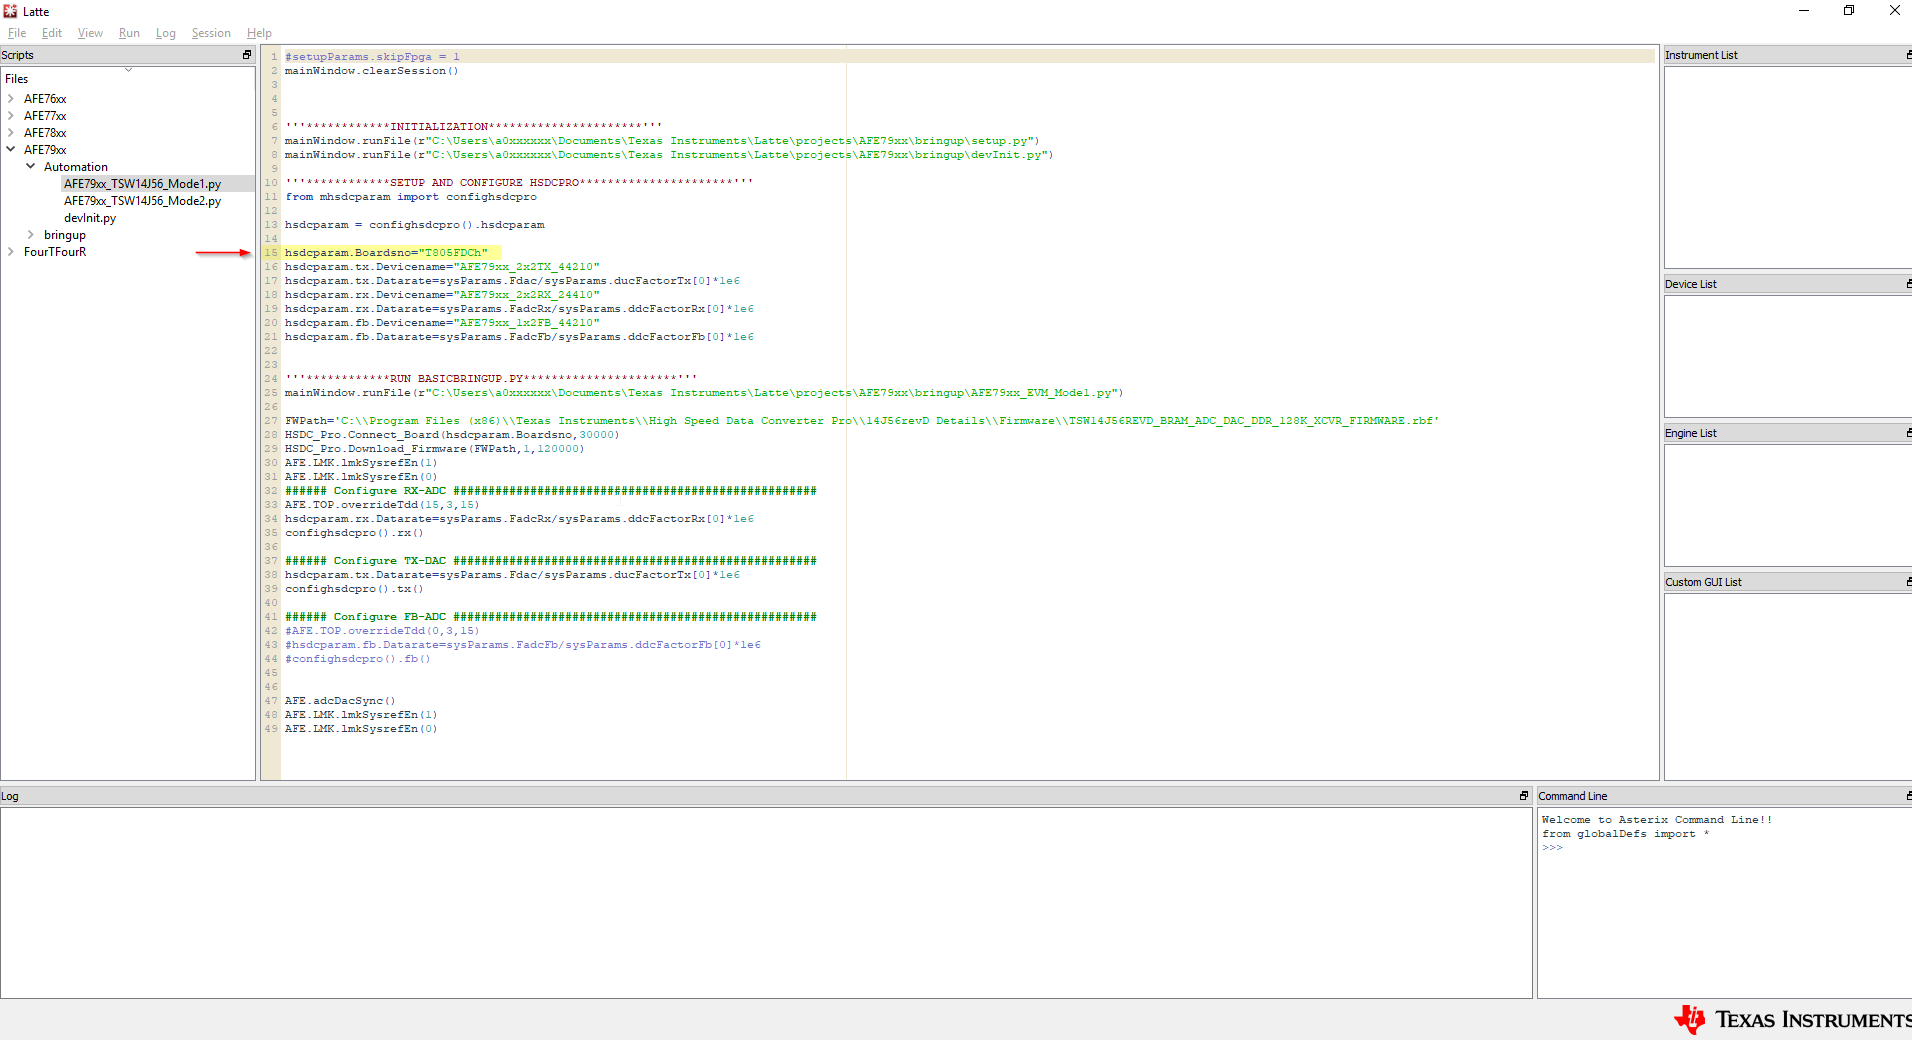 Figure 4-5 TSW14J56 EVM
Serial Number Location
 - With the AFE79xx_TSW14J56_Mode1.py highlighted, press the F5 button to execute the script. The script will automate both High-Speed Data Converter Pro software and Latte software to automatically bring up the JESD204B link.
- As shown in Figure 4-6 and Figure 4-7 expect the following two error messages after the script runs.
 Figure 4-6 Latte Error
1
 Figure 4-7 Latte Error
2
 - The default TRF1208-AFE7950-EVM has the following RF frequency matching network:
- RXA (TRF1208): 2.3 GHz
- RXB (TRF1208): 5 GHz
- RXC (TRF1208): 8 GHz
- RXD: None
- FB1 (TRF1208): 6 GHz
- FB2 (Differential connectors): 6 GHz
- TXA (TRF1208): 6 GHz
- TXB (Balun): TBD GHz
- TXC (Balun): 6 GHz
- TXD (Balun): TBD GHz
- The example script to change the NCO to match the default RF frequency matching network is the following:
AFE.updateTxNco(0,6000,0,0) AFE.updateTxNco(1,6000,0,0) AFE.updateTxNco(2,6000,0,0) AFE.updateTxNco(3,6000,0,0) AFE.updateRxNco(0,2300,0,0) AFE.updateRxNco(1,5000,0,0) AFE.updateRxNco(2,8000,0,0) AFE.updateRxNco(3,6000,0,0) AFE.updateFbNco(0,6000,0) AFE.updateFbNco(1,6000,0) - As shown in Figure 4-8, enter the commands in the command line prompt or execute AFE79xx_DC101_NCO_Setup.py (under Automation Folder of AFE79xx) in the Latte through F5 key.
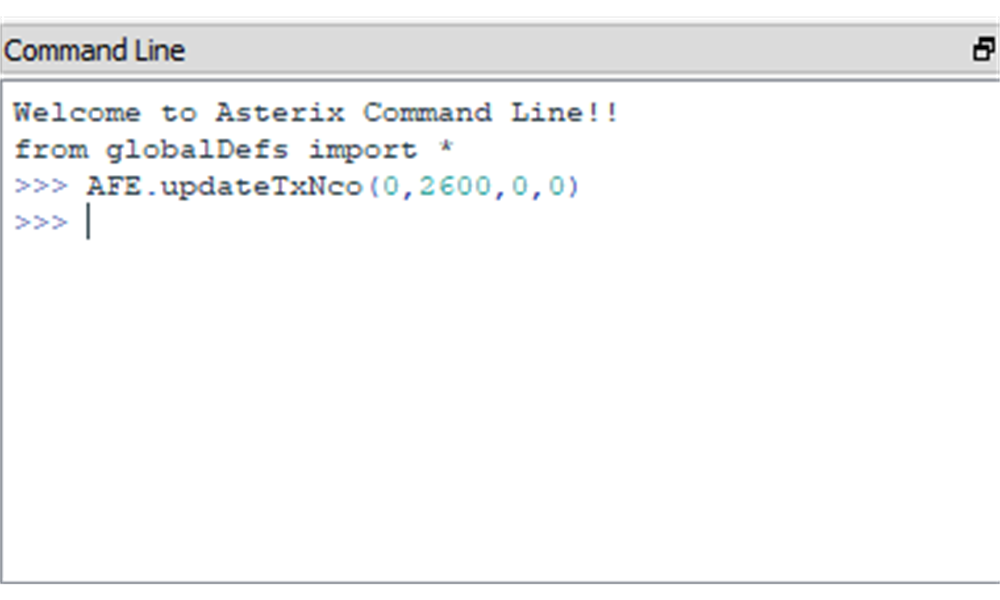 Figure 4-8 Latte Command Prompt for Updating TXNCO