SLAU857A May 2021 – July 2021 MSP430FR2476 , MSP430FR2512 , MSP430FR2522 , MSP430FR2532 , MSP430FR2533 , MSP430FR2632 , MSP430FR2633 , MSP430FR2672 , MSP430FR2673 , MSP430FR2675 , MSP430FR2676
6.5 Rapid Development
Before developing your own hardware board, you can rapidly create a project, configure touch capabilities parameters, and start validation or simple development based on the MSP hardware validation platform and CapTIvate Design Center.
- Create the new project on CapTIvate Design Center.

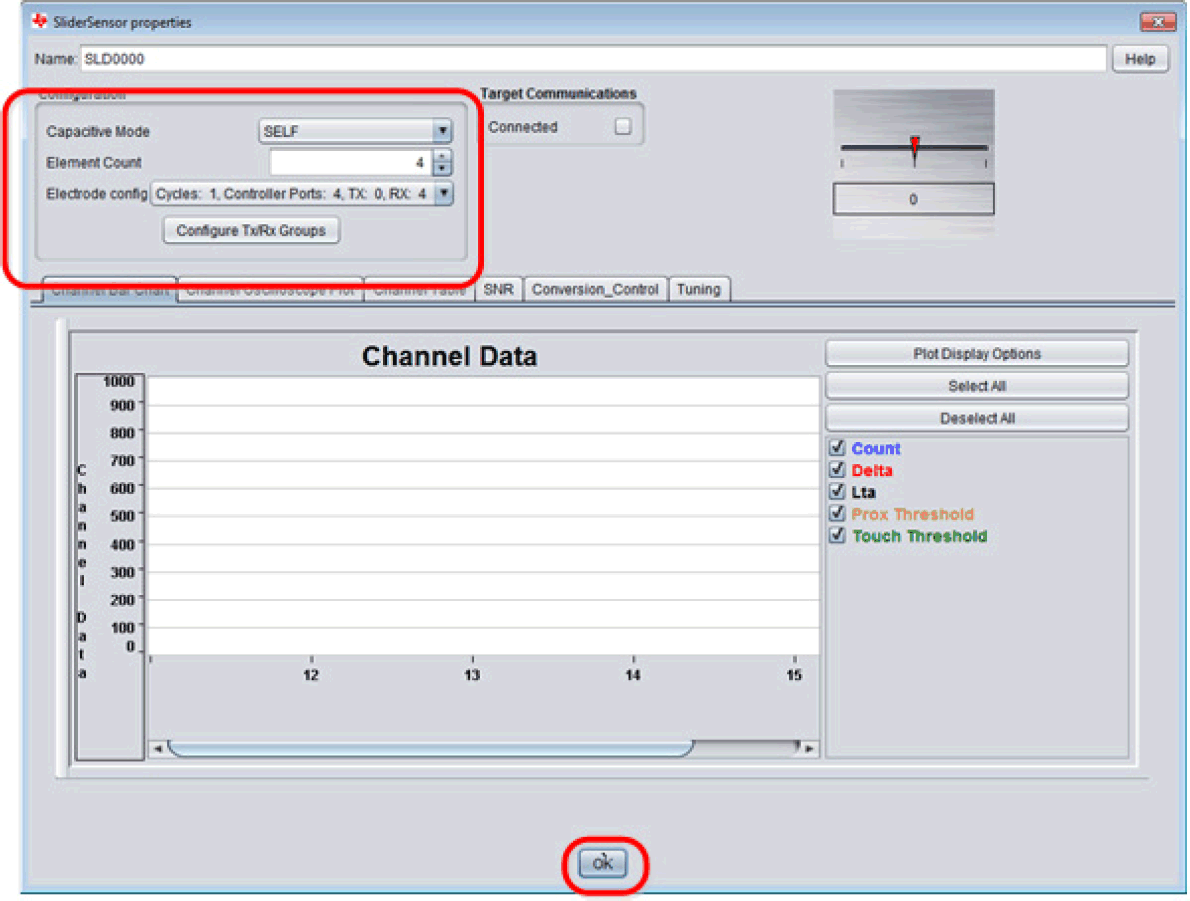
- Place a slider sensor in the design area.

- Configure the slider sensor on properties dialog.
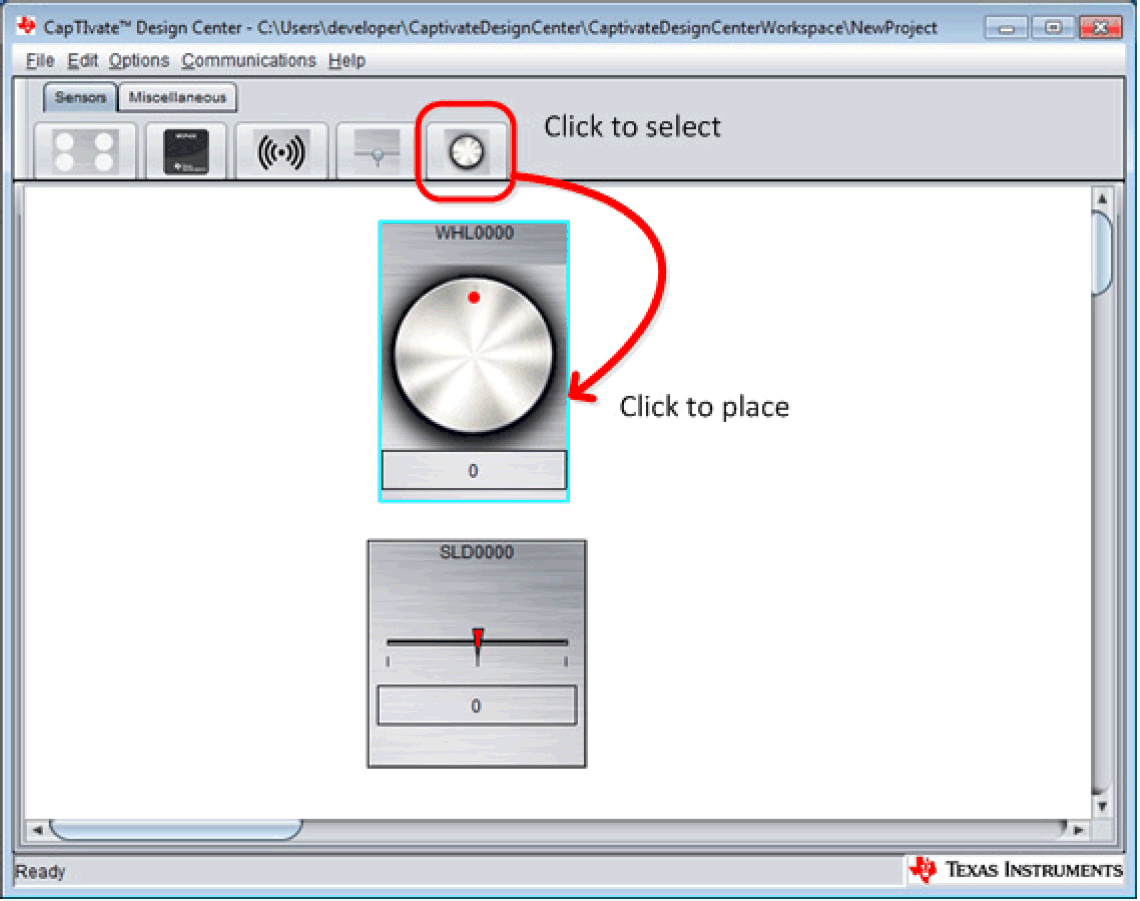
- Place a wheel sensor in the design area.
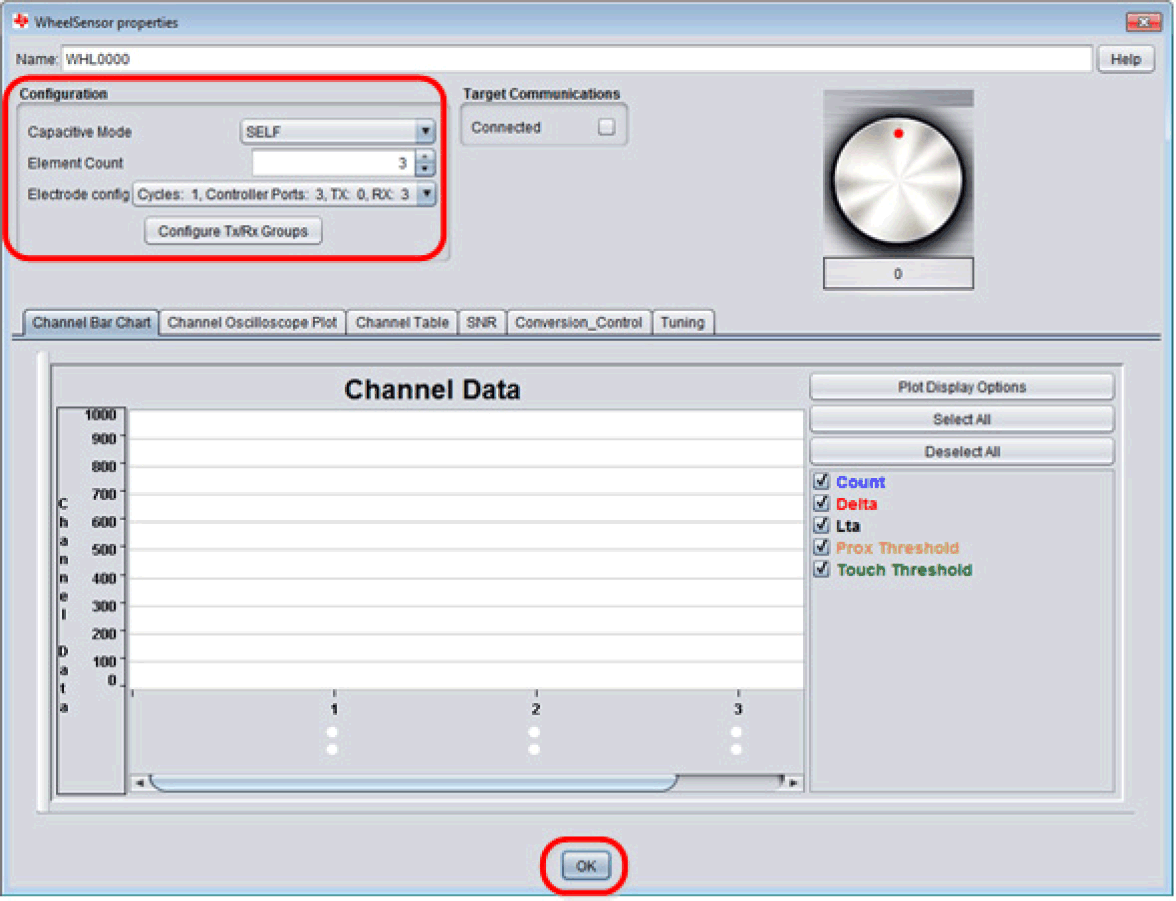
- Configure the wheel sensor on properties dialog.
- Place a button group (keypad) sensor in the design area.
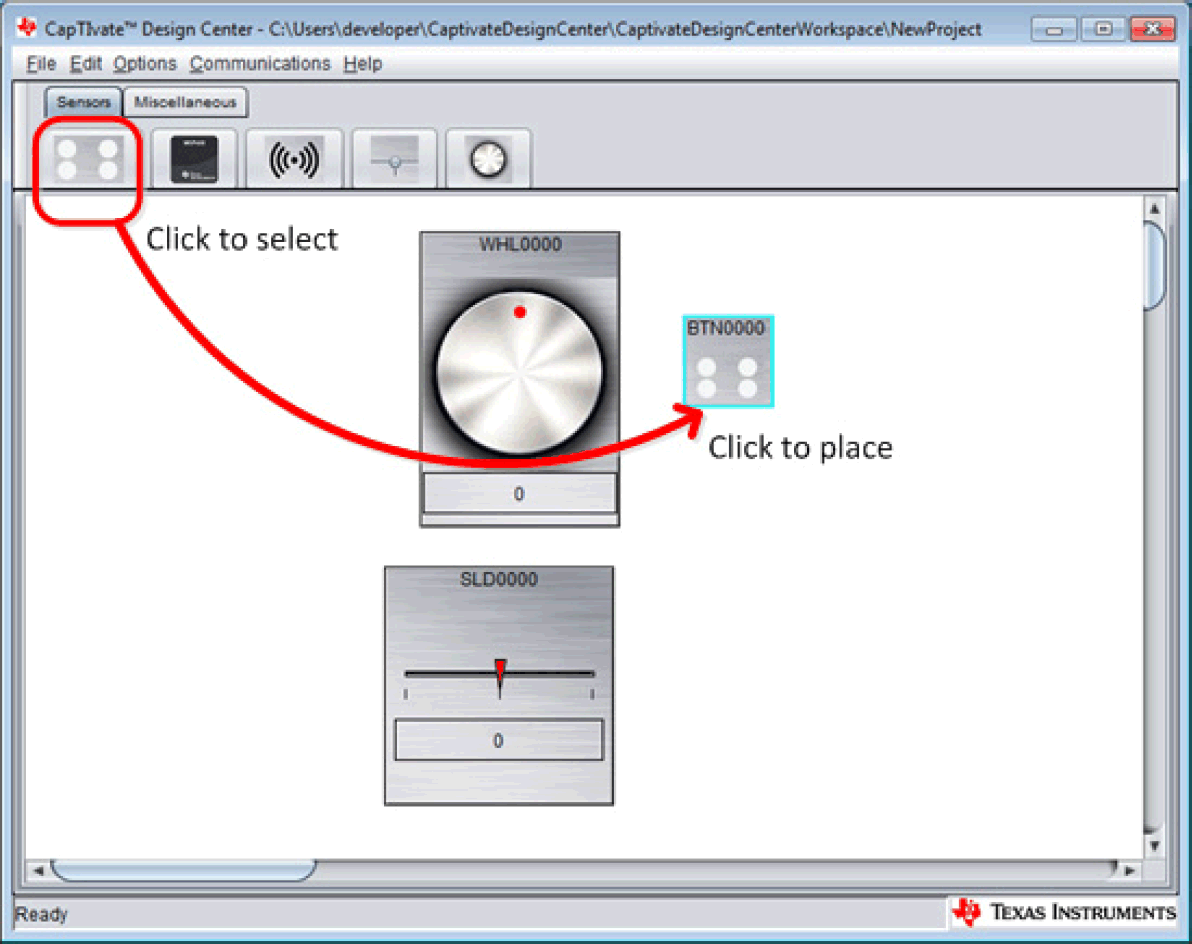
- Configure the button group sensor on properties dialog.

- Place a proximity sensor in the design area.
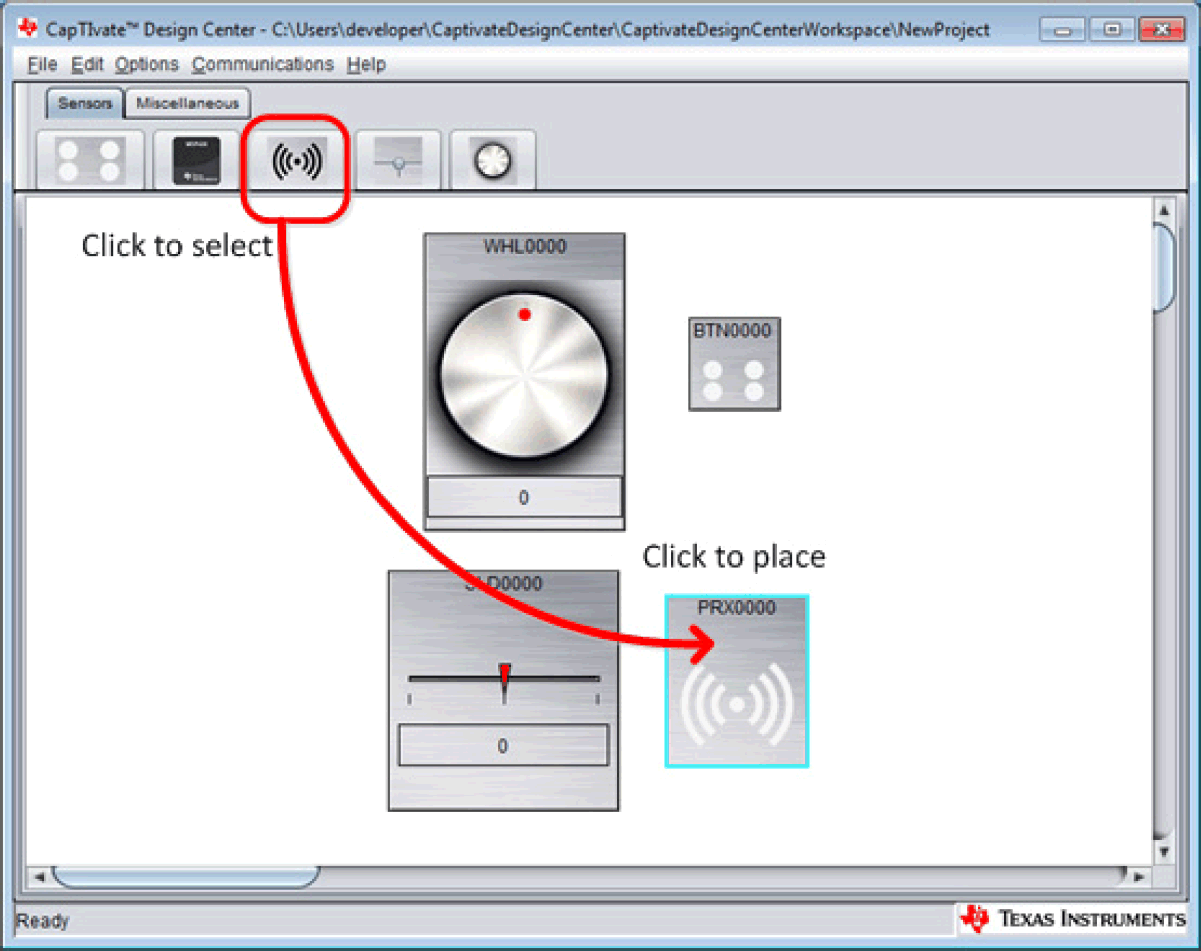
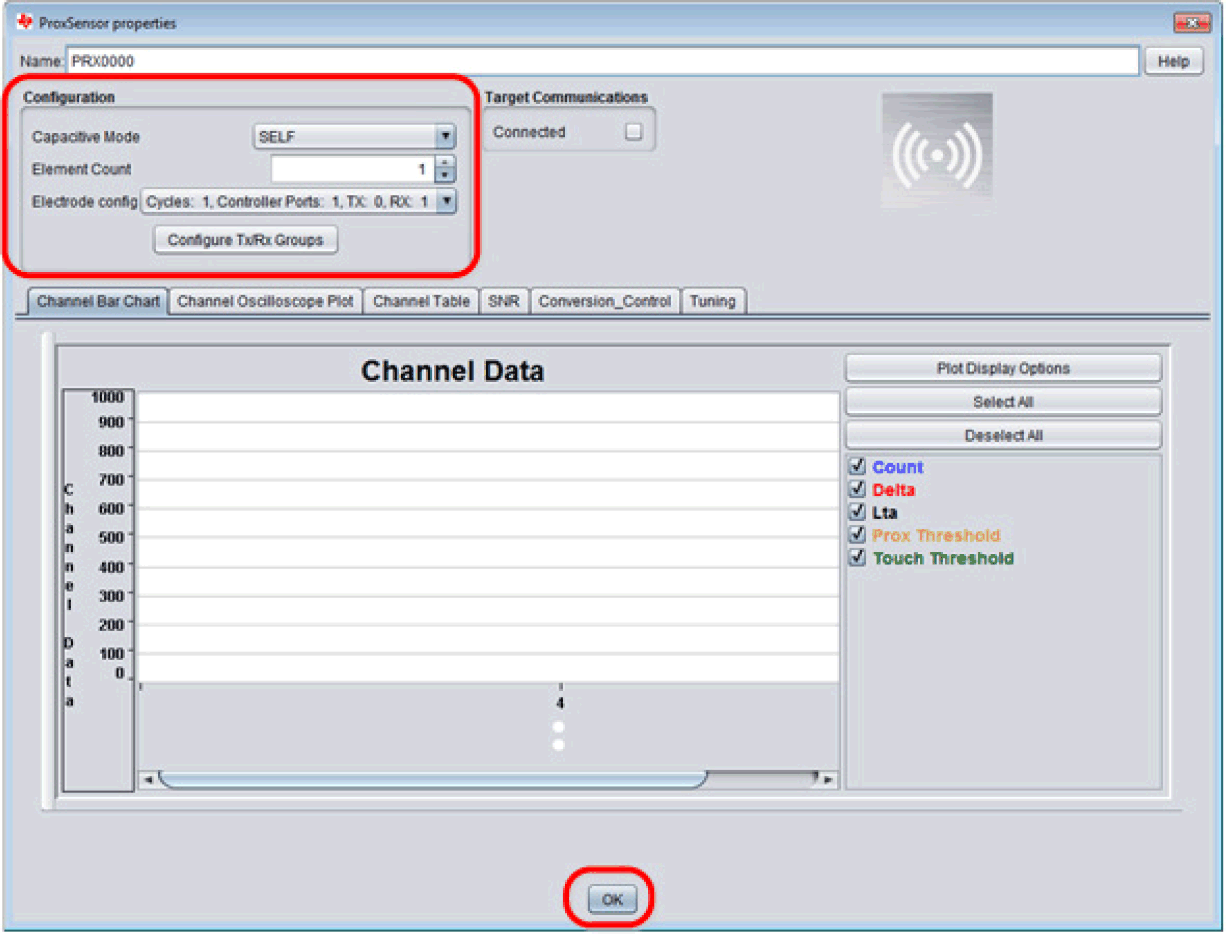
- Configure the proximity sensor on properties dialog.
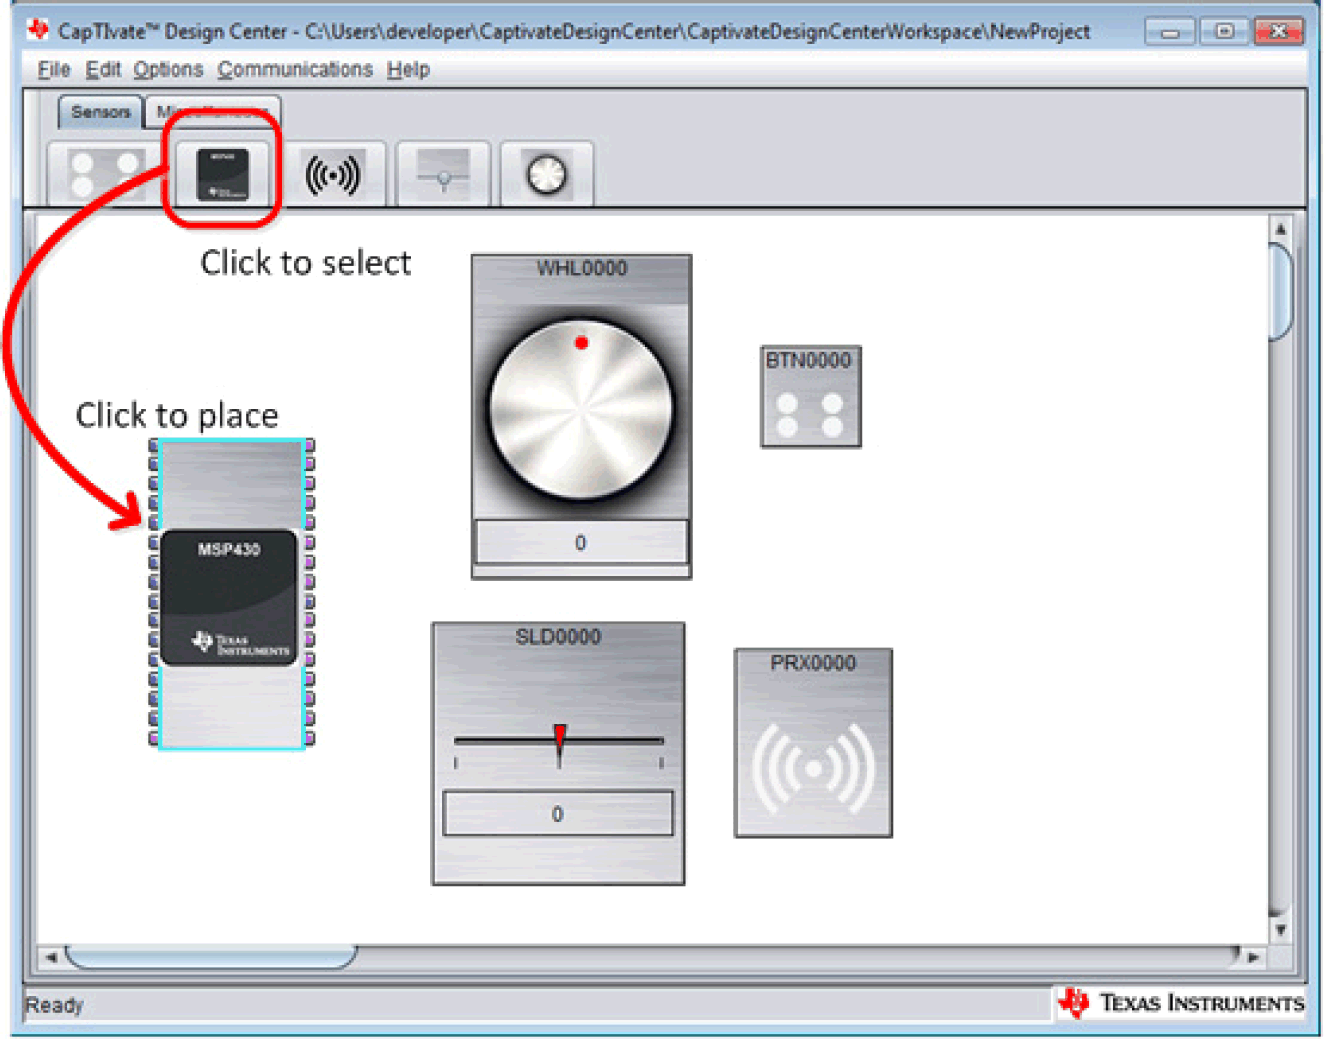
- Select and place the MSP430 controller.
- Connect sensors to MSP430 capacitive touch I/O ports.
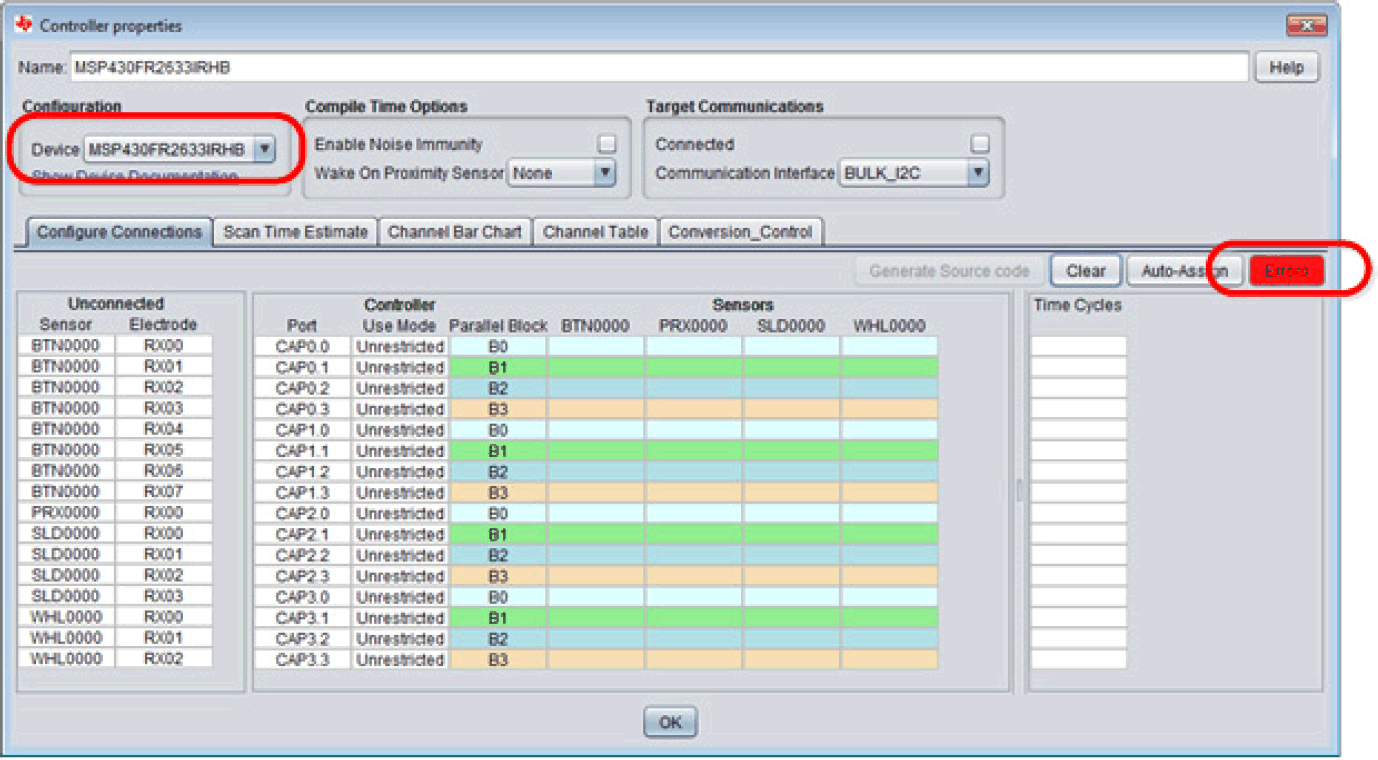
Double-click on the MSP430 controller object in the design area to display its properties. Configure the MSP430 controller as MSP430FR2633IRHB (32-pin QFN package). Note that the “Errors” LED is red, indicating that there are still unconnected sensor ports.
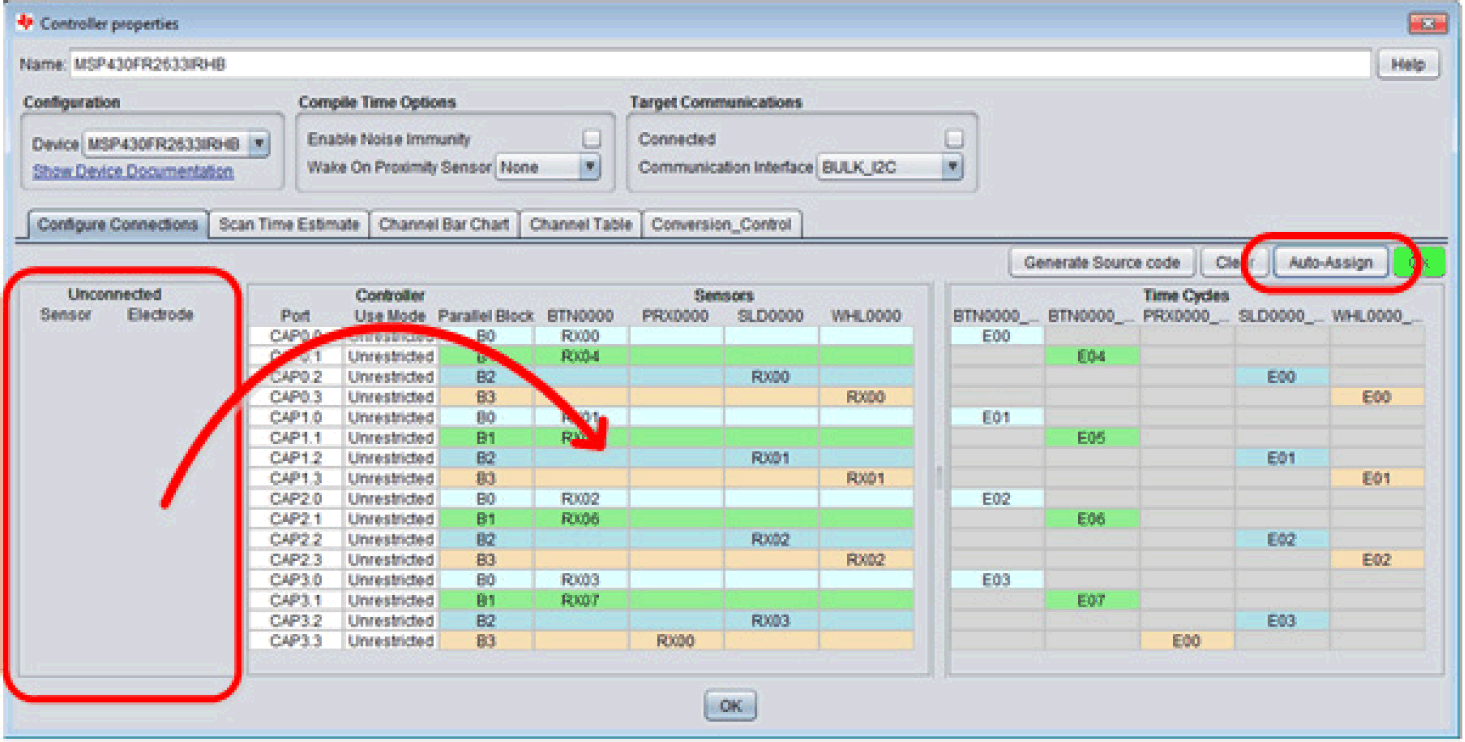
Select the “Auto-Assign” button to automatically assign all the sensor ports to appropriate ports on the MSP430. Note that the “Errors” LED turns green and “OK”, indicating that all sensor ports have been assigned to controller ports.
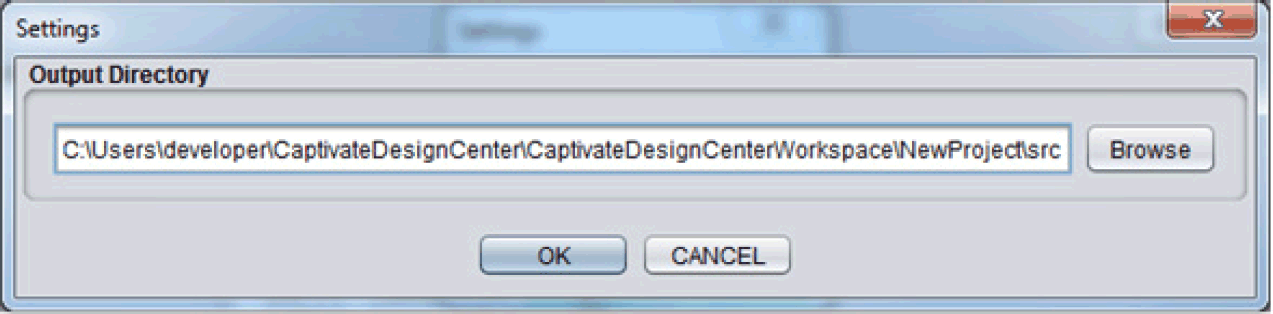
- Generate source code.
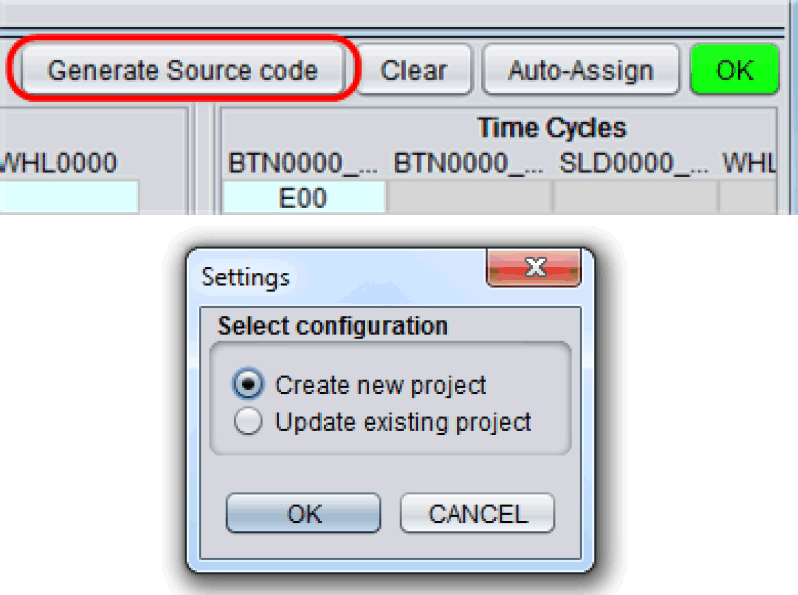
Saving the source code on default location of CapTIvate Design Center is recommended.
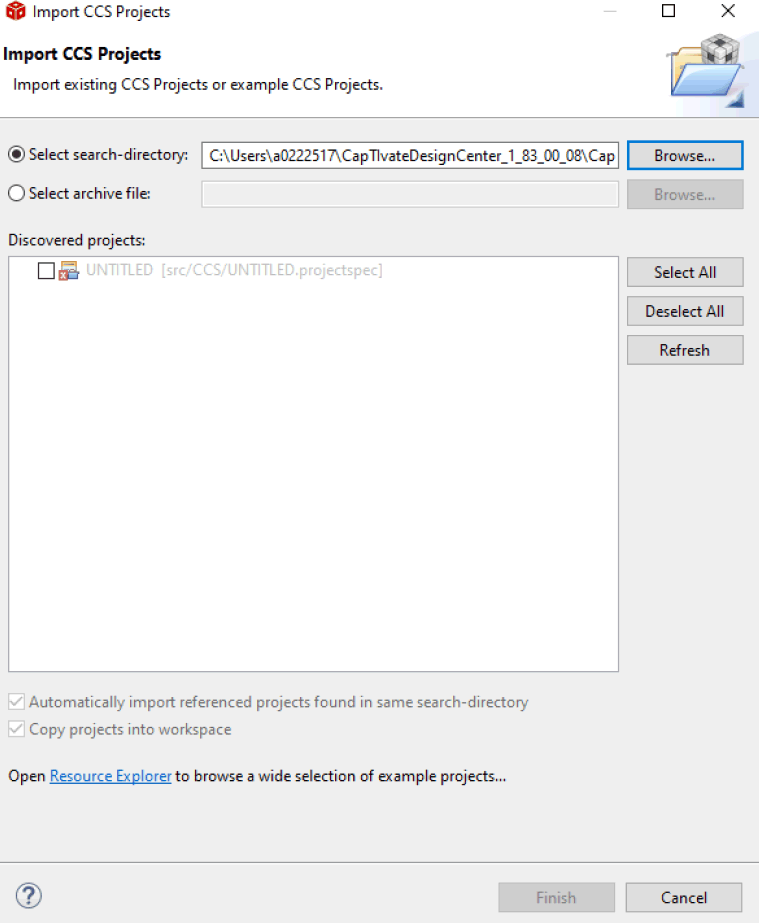
- Import the project to CCS and start development
After completing the rapid evaluation process according to Section 6.4, the project generated after adjusting the parameters on CapTIvate Design Center is imported into CCS to add system functionality.
Note: If the CCS icon is grayed out, there is a project with the same name in the workspace or CCS directory.
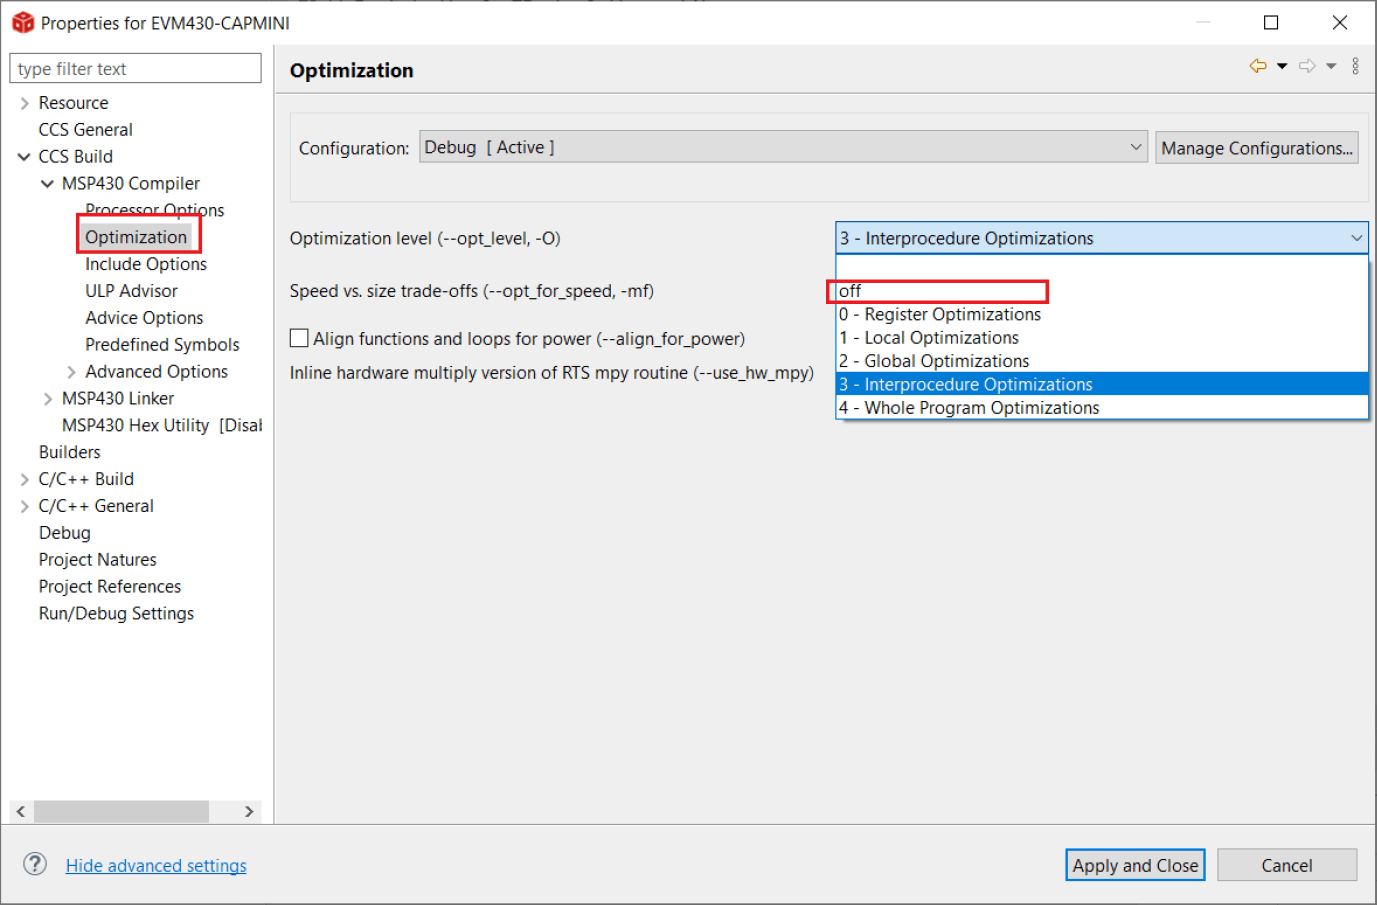
To reduce code size, select the highest level of code compilation optimization. TI recommends turning off optimization during development.