SPNA244 September 2020 TM4C1230D5PM , TM4C1230D5PM , TM4C1230E6PM , TM4C1230E6PM , TM4C1230H6PM , TM4C1230H6PM , TM4C1231C3PM , TM4C1231C3PM , TM4C1231D5PM , TM4C1231D5PM , TM4C1231D5PZ , TM4C1231D5PZ , TM4C1231E6PM , TM4C1231E6PM , TM4C1231E6PZ , TM4C1231E6PZ , TM4C1231H6PGE , TM4C1231H6PGE , TM4C1231H6PM , TM4C1231H6PM , TM4C1231H6PZ , TM4C1231H6PZ , TM4C1232C3PM , TM4C1232C3PM , TM4C1232D5PM , TM4C1232D5PM , TM4C1232E6PM , TM4C1232E6PM , TM4C1232H6PM , TM4C1232H6PM , TM4C1233C3PM , TM4C1233C3PM , TM4C1233D5PM , TM4C1233D5PM , TM4C1233D5PZ , TM4C1233D5PZ , TM4C1233E6PM , TM4C1233E6PM , TM4C1233E6PZ , TM4C1233E6PZ , TM4C1233H6PGE , TM4C1233H6PGE , TM4C1233H6PM , TM4C1233H6PM , TM4C1233H6PZ , TM4C1233H6PZ , TM4C1236D5PM , TM4C1236D5PM , TM4C1236E6PM , TM4C1236E6PM , TM4C1236H6PM , TM4C1236H6PM , TM4C1237D5PM , TM4C1237D5PM , TM4C1237D5PZ , TM4C1237D5PZ , TM4C1237E6PM , TM4C1237E6PM , TM4C1237E6PZ , TM4C1237E6PZ , TM4C1237H6PGE , TM4C1237H6PGE , TM4C1237H6PM , TM4C1237H6PM , TM4C1237H6PZ , TM4C1237H6PZ , TM4C123AE6PM , TM4C123AE6PM , TM4C123AH6PM , TM4C123AH6PM , TM4C123BE6PM , TM4C123BE6PM , TM4C123BE6PZ , TM4C123BE6PZ , TM4C123BH6PGE , TM4C123BH6PGE , TM4C123BH6PM , TM4C123BH6PM , TM4C123BH6PZ , TM4C123BH6PZ , TM4C123FE6PM , TM4C123FE6PM , TM4C123FH6PM , TM4C123FH6PM , TM4C123GE6PM , TM4C123GE6PM , TM4C123GE6PZ , TM4C123GE6PZ , TM4C123GH6PGE , TM4C123GH6PGE , TM4C123GH6PM , TM4C123GH6PM , TM4C123GH6PZ , TM4C123GH6PZ
6.4 Using the CAN Bootloader
Program the object file “uart_to_can\debug\uart_to_can.out” into one EK-TM4C123GXL board on your CAN network. Identify which COM port is assigned to this board. Program the object file “boot_can\debug\boot_can.out” into one or more other EK-TM4C123GXL Launchpads on your CAN network. Code Composer Studio only recognizes one Launchpad at a time, so it may be necessary to connect to each Launchpad individually. Once all of the Launchpads are programmed, the demo can be run without the use of Code Composer Studio.
The Launchpad with “uart_to_can.out” should be connected to the PC so you have access to its serial port. The other Launchpads can be connected to a PC or a wall USB charger for power only.
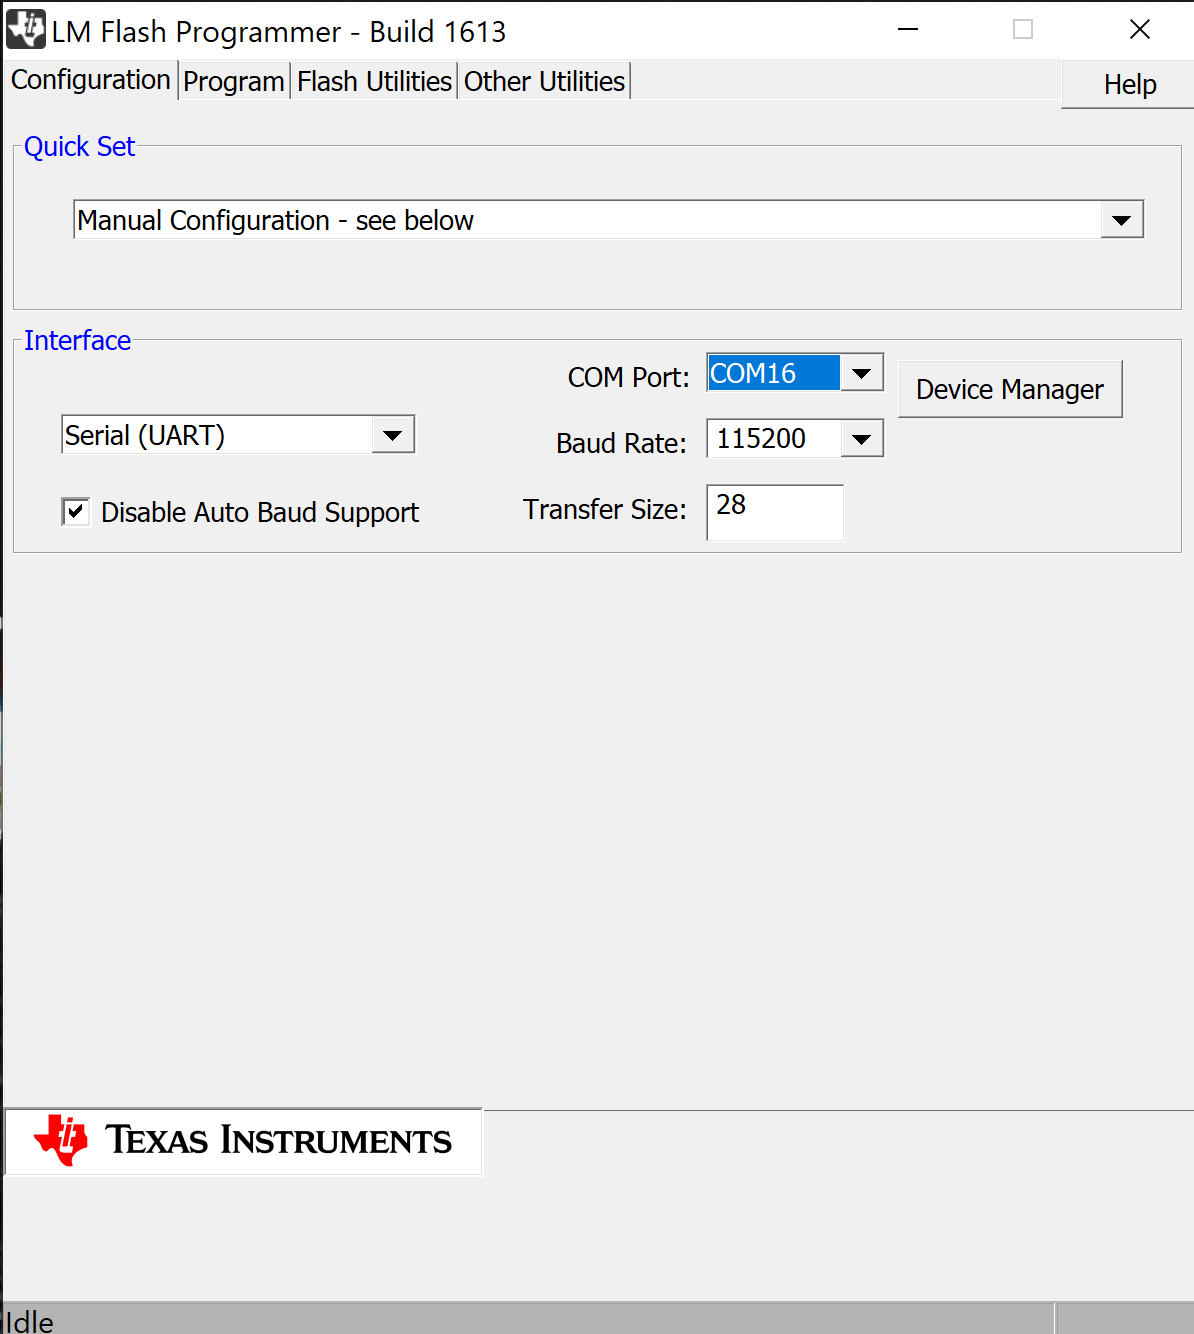
Open LM Flash Programmer and configure it for using the UART interface at 115200 baud. It should use the same COM port as the one attached to the Launchpad with the “uart_to_can.out” program.
 Figure 6-1 Configuring LM Flash
Programmer
Figure 6-1 Configuring LM Flash
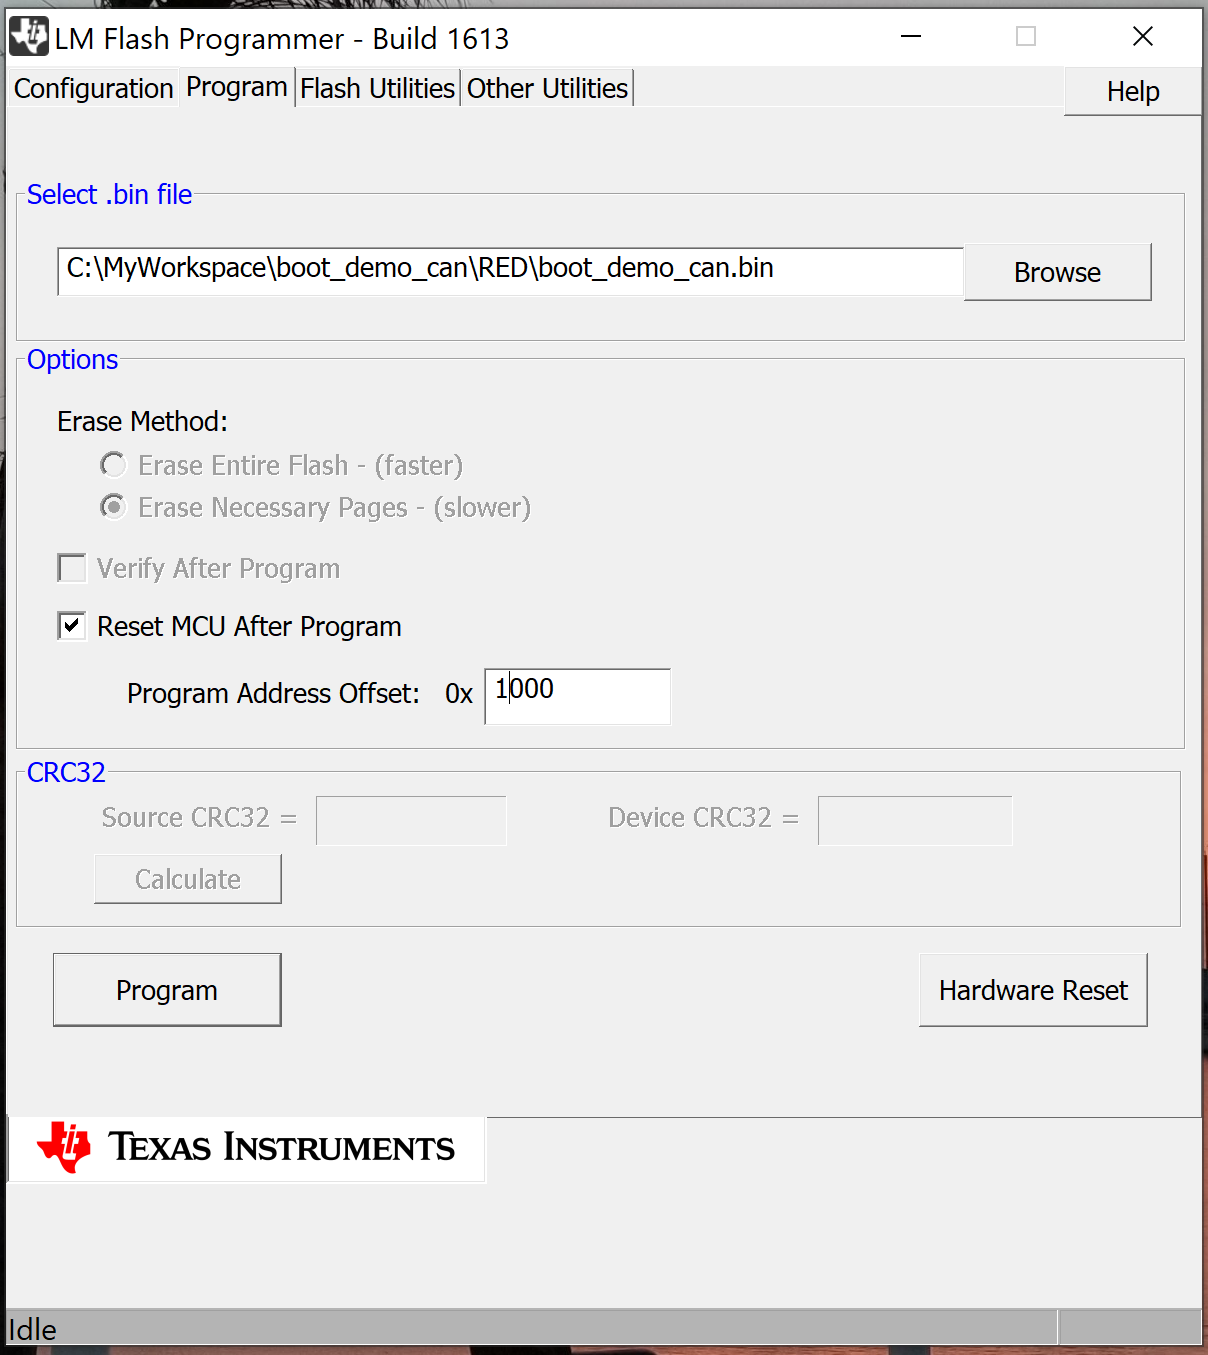
ProgrammerOn LM Flash Programmer select the “Program” tab and browse to the “boot_demo_can\RED\boot_demo_can.bin” file. Set the “Program Address Offset:” to 0x1000. Press the “Program” button.
 Figure 6-2 Programming With LM Flash
Programmer
Figure 6-2 Programming With LM Flash
ProgrammerWhen programming is complete, you will see the tri-color LED on the board with the boot loader blinking red. This device is now running the application code that was programmed through the CAN bootloader. This application code blinks the tri-color LED red, but it also is looking for a specific CAN frame that will cause the CPU to jump back to the CAN bootloader. A CAN frame with arbitration ID of 0x1F028000 and the first data byte equal to 0x2 will cause this unit to return to the CAN bootloader.
Open a command window on the PC and change to the directory with the example projects. In that directory is a PC executable program “SendCANID.exe” and three .bat files. From the command window enter “StopRed COMnn” substituting the number of your COM port for “nn’. You should see a result similar to those below and the red LED should stop blinking.
C:\MyWorkspace>StopRed COM16
C:\MyWorkspace>SendCANID COM16 0x1F028000 0x02
Program to select CAN ID for download, Version 1.00
Opened serial port COM16 successfully
Sent ID: 0x1F028000 Data: 0x02
Received: 0xCC
C:\MyWorkspace>
Now that the LaunchPad has been reverted to executing the CAN bootloader, you can use LM FlashProgrammer to change the application code. Try programming “boot_demo_can\BLUE\boot_demo_can.bin”.
Using this example application code and bootloader code, a single unit on a CAN bus can be put in CAN bootloader mode and updated. Each device on the CAN bus can be updated one at a time. The can_to_uart code does not support updating multiple devices at the same time. To do that the can_to_uart code and the CAN bootloader would need to be modified to support multiple status responses to each CAN command.
As an additional feature, if the “uart_to_can” program receives from the “SendCANID” program the ID 0xFFFFFFFF and data 0x00, then the “uart_to_can” program will jump to its ROM serial bootloader allowing the “uart_to_can” program to be updated or overwritten.