SSZTA89 april 2017 CC2640
Other Parts Discussed in Post: CC2640
Co-authored by Bhargavi Nisarga, Systems Engineer at TI
Why HMI? - Adding the Interface
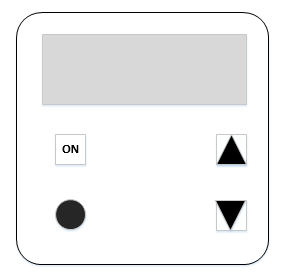
Figure 1 shows a typical human machine interface (HMI), including knobs and buttons for user control and a liquid crystal display (LCD) for data/state visualization.
 Figure 1 An HMI for a smart thermostat
Let’s focus on the input and output parts of the HMI and how to add them to your smart thermostat application.
Ways to Control Your Application
Another option is a knob. Unlike a button, a knob is normally not configured to generate an interrupt; instead, the central processing unit (CPU) periodically wakes up and checks the current state of the knob. This procedure is called polling.
The general concept of a capacitive touch button is similar to a resistive button. With a capacitive touch button, the touch generates a detectable change in capacitance. To be able to detect changes in capacitance requires constant monitoring. The CapTIvate technology implemented on some MSP430FR2x microcontrollers (MCUs) already includes a controller that monitors the capacitive touch buttons (instead of using the CPU). Meanwhile, the CPU can either sleep or conduct different tasks, thus enabling lower power consumption and better performance.
Haptics
LCDs
- Multiplexing to reduce the number of pins that control the various segments on an LCD screen. A larger LCD screen with more segments requires more controls to drive the LCD. Having higher multiplexing options (like four- or even eight-mux mode) can help significantly reduce the number of device pins needed to interface with segment LCDs.
- A charge pump that provides a regulated voltage to the LCD that is independent of the device supply voltage. This is especially useful to maintain good contrast in battery-powered systems, even as the battery drains.
- Biasing components generate bias voltages from the regulated LCD supply to generate the necessary LCD waveforms for driving LCD segments.
Many MSP430™ MCUs support integrated LCD drivers with the features we’ve discussed. Some device drivers support other LCD features: contrast control, blinking memory to switch between two images and ultra-low power features such as adjustable charge-pump voltage and variable charge-pump duty cycle.
Dot-matrix displays are becoming increasing popular; these displays support both characters and graphics. Dot-matrix displays have pixels arranged in rows and columns, and the number of bits used to represent a pixel determines the number of colors or shades allowed for that pixel. MCUs interface to dot-matrix displays through the Serial Peripheral Interface (SPI) or 8-/16-bit parallel interfaces (if faster drawing or updates are needed). Graphics libraries help simplify and accelerate dot-matrix LCD software development. The MSP432™ MCU is capable of driving color QVGA LCDs at high refresh rates. Check out additional resources below for more details.
Here are the key takeaways from the fourth blog post of this series:
- HMI provides a control and status interface to smart thermostat applications.
- Control inputs include buttons and knobs realized via mechanical, capacitive or inductive interfaces.
- Haptics effects can provide a mechanical-like feel to touch interfaces.
- LCDs can display application status information.
Stay tuned for the fifth blog post of this series, which will cover smart connectivity features.
Additional Resources
- TI touch solutions:
- Get more details about TI’s CapTIvate technology and how to get started with it.
- Learn about inductive touch buttons and other TI capacitive touch solutions.
- Haptics resources:
- For more haptics-related information, see the TI landing page as well as :
- More information on MSP430 MCU LCD:
- Download the MSP430FR4xx Device User’s Guide and check out the “LCD controller” section”
- See these application reports:
- MSP432 MCUs driving color QVGA LCD at high refresh rates using SimpleLink™ Bluetooth®low energy CC2640 device and SimpleLink MSP432 SDK: