SPMA083 January 2022 TM4C129CNCPDT , TM4C129CNCPDT , TM4C129CNCZAD , TM4C129CNCZAD , TM4C129DNCPDT , TM4C129DNCPDT , TM4C129DNCZAD , TM4C129DNCZAD , TM4C129EKCPDT , TM4C129EKCPDT , TM4C129ENCPDT , TM4C129ENCPDT , TM4C129ENCZAD , TM4C129ENCZAD , TM4C129LNCZAD , TM4C129LNCZAD , TM4C129XKCZAD , TM4C129XKCZAD , TM4C129XNCZAD , TM4C129XNCZAD
- Trademarks
- 1Implementation
-
2Example Walk Through
- 2.1 Build Environment
- 2.2 Importing the Examples into Code Composer Studio
- 2.3 Setting Keys and Variables
- 2.4 Running the shared_key_image_encrypt Tool
- 2.5 Running the Shared Key Serial Boot Loader
- 2.6 Returning to the Boot Loader
- 3Summary
2.2 Importing the Examples into Code Composer Studio
There are six CCS project examples attached as collateral to this document. Project collateral discussed in this document can be downloaded from the following URL: https://www.ti.com/lit/zip/spma083. The projects can be unzipped into a folder or kept in the zip file. Both formats can be imported to the CCS.
- To import the project into CCS,
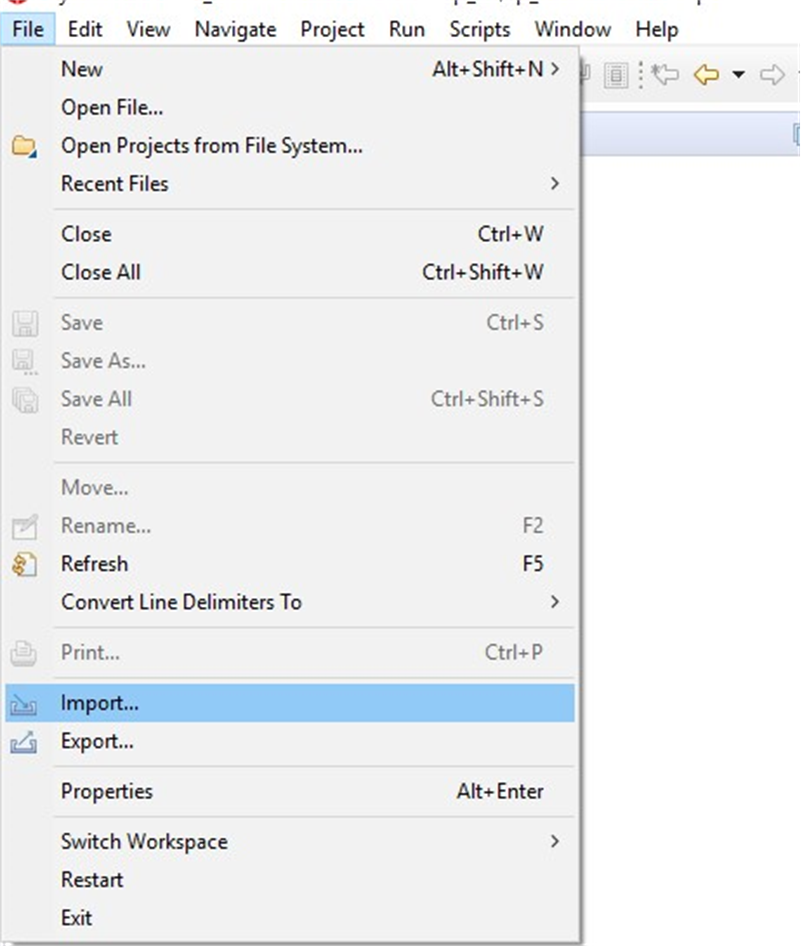
first select “File” -> ”Import”.
 Figure 2-1 Import CCS Projects
Step 1.
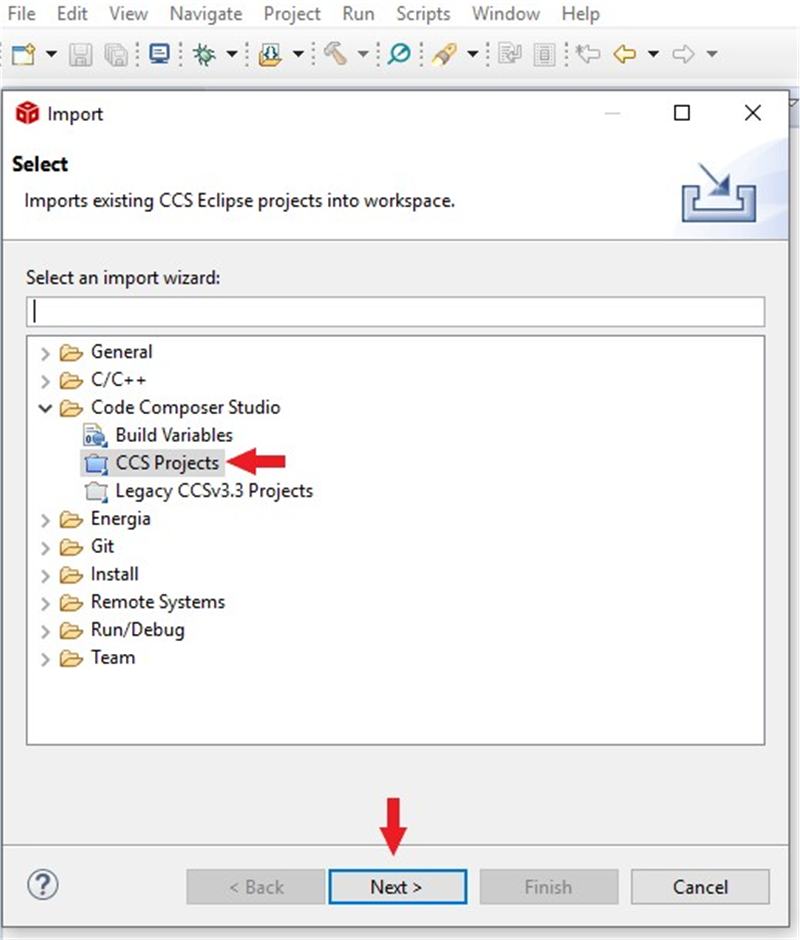
 - Select
“CCS Projects” to import the examples and then click “Next”.
 Figure 2-2 Import CCS Projects
Step 2.
 - Next,
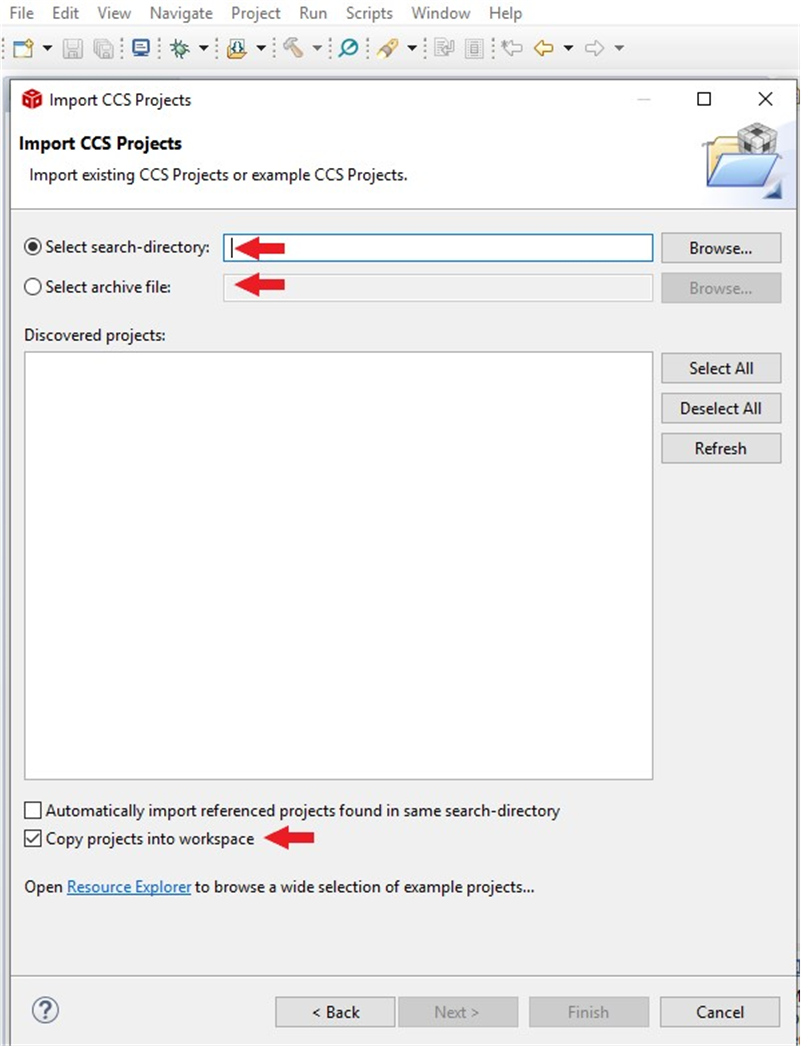
provide the path to either the unzipped project by selecting the first radio
button or import the zip file directly by selecting the second radio button.
Select the “Copy projects into workspace” box.
 Figure 2-3 Import CCS Projects
Step 3.
 - After
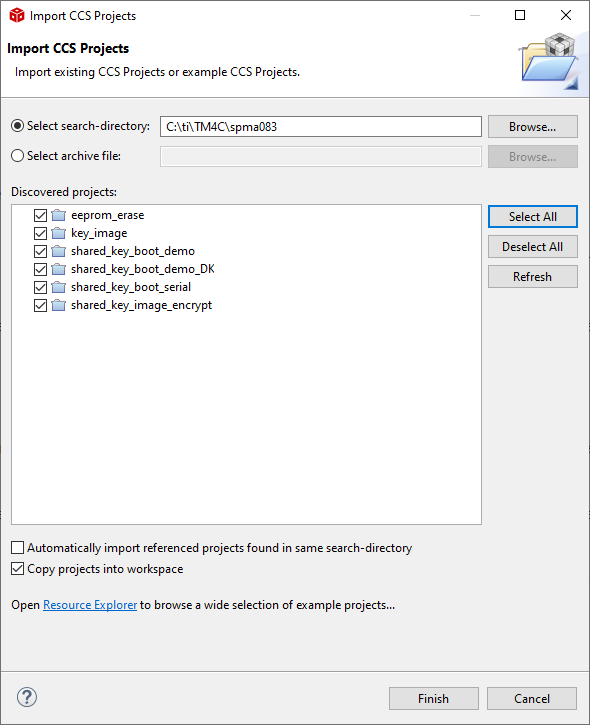
the project path is provided, a total of six discovered projects will show up.
First click the “Select All” button and then click the “Finish” button to
complete the import.
 Figure 2-4 Import CCS Projects
Step 4.