SPRADC9 july 2023 AM62A3 , AM62A7
3.2 Model Training and Compilation
The model is trained using TI Edge AI Studio Model Composer, an online application that provides a full suite of tools required for development of edge AI models including data capturing, labeling, training, compilation and deployment. For a detailed tutorial about using the Model Composer, see the Quick Start Guide. The Model Composer user interface shows tabs on the top of the window which are logically sorted to match the normal steps of model development for Edge AI applications. Users with no or low AI experience can simply follow these tabs to train and compile their model. Next are the steps followed to train and compile the model using Model Composer:
- Open Model Composer and create a
new project with “Object Detection” as Task Type as shown in Figure 3-1.
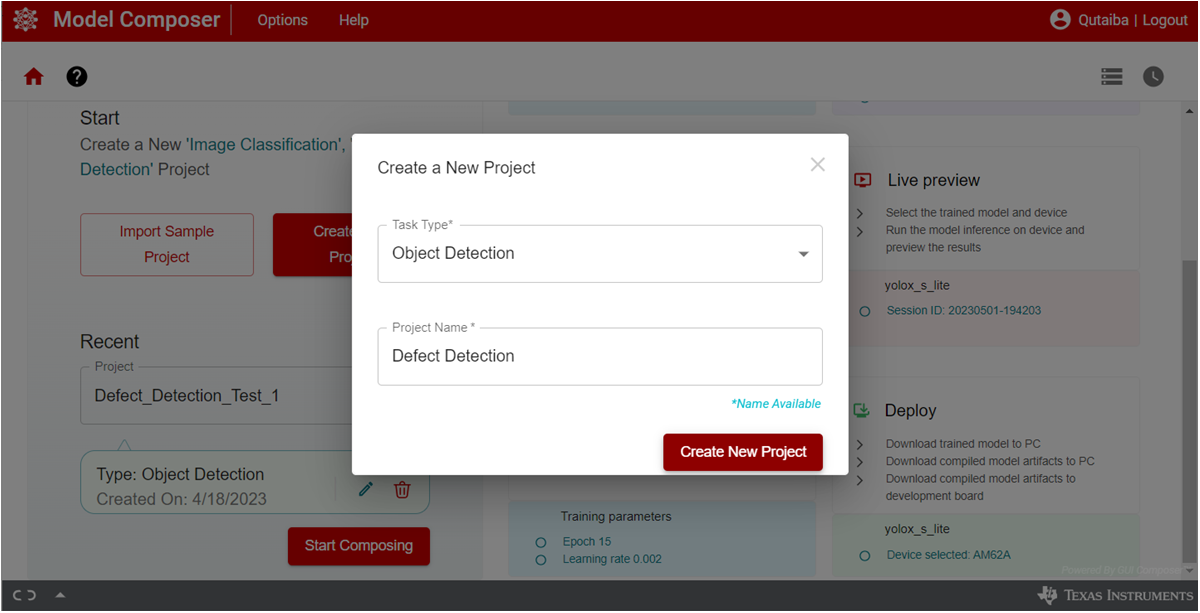 Figure 3-1 TI Edge AI Studio:
Model Composer, Create a New Project
 - Upload
the dataset to the project. On the “Capture” tab, open the “Input Source” menu
and choose “Import Annotated Archive dataset” option as shown in Figure 3-2. Select the dataset and upload it to the project. The dataset should be
compressed in tar or zip format. The defect detection dataset of 4800 pictures
with the associated coco format annotation json file are compressed as a tar
file and used in this step.
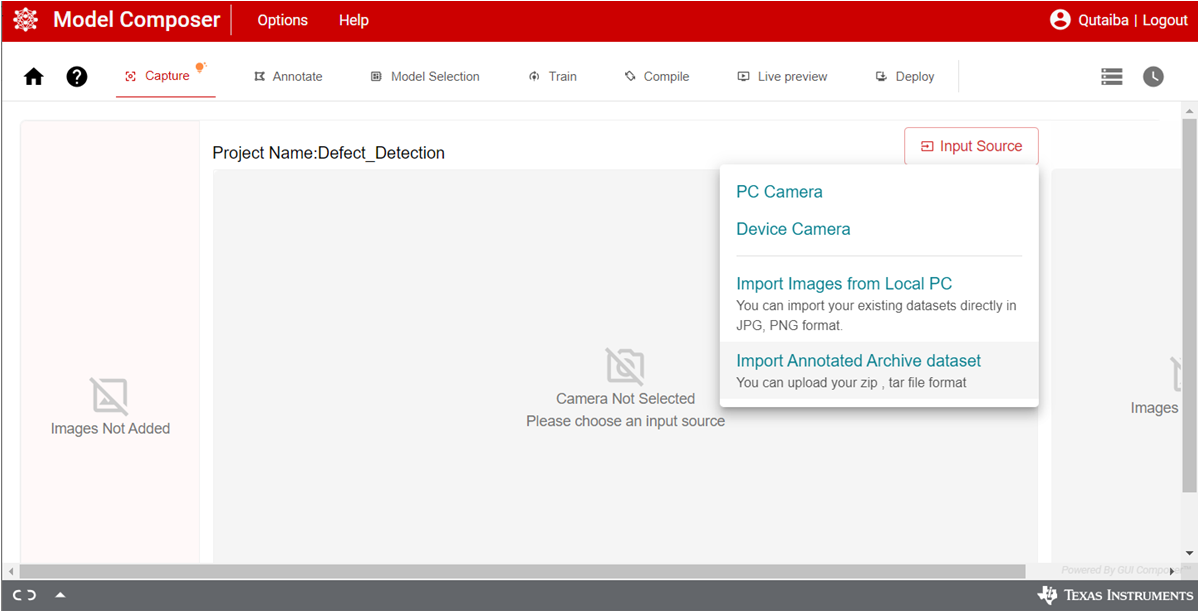 Figure 3-2 TI Edge AI Studio:
Model Composer, Import Dataset
 - The Model Composer directly
recognizes the coco format annotation json file and add the annotations to their
respective files as can be seen in the “Annotation” tab as shown in Figure 3-3. Note that the Model composer provides tools for data capture and annotation
which are handy but they are not used in this project as a custom augmentation
process is used out of the model composer.
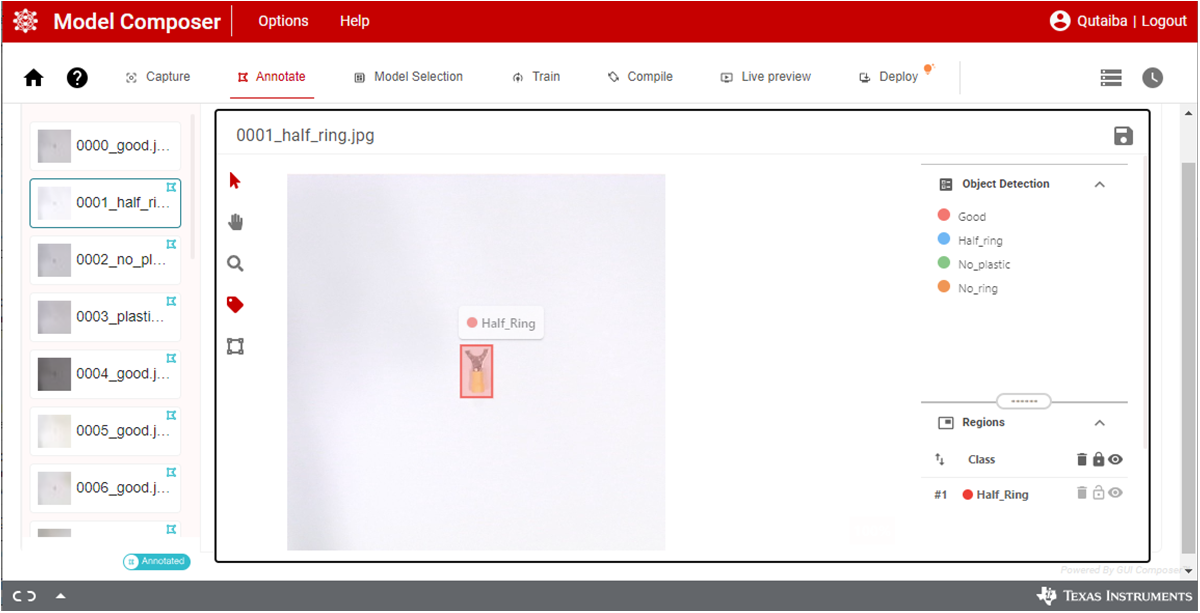 Figure 3-3 TI Edge AI Studio:
Model Composer, Data Annotation
 - Move to the “Model Selection” tab
and select AM62A in the Device selection panel and the yolox_nano_lite in the
Model selection panel as shown in Figure 3-4.
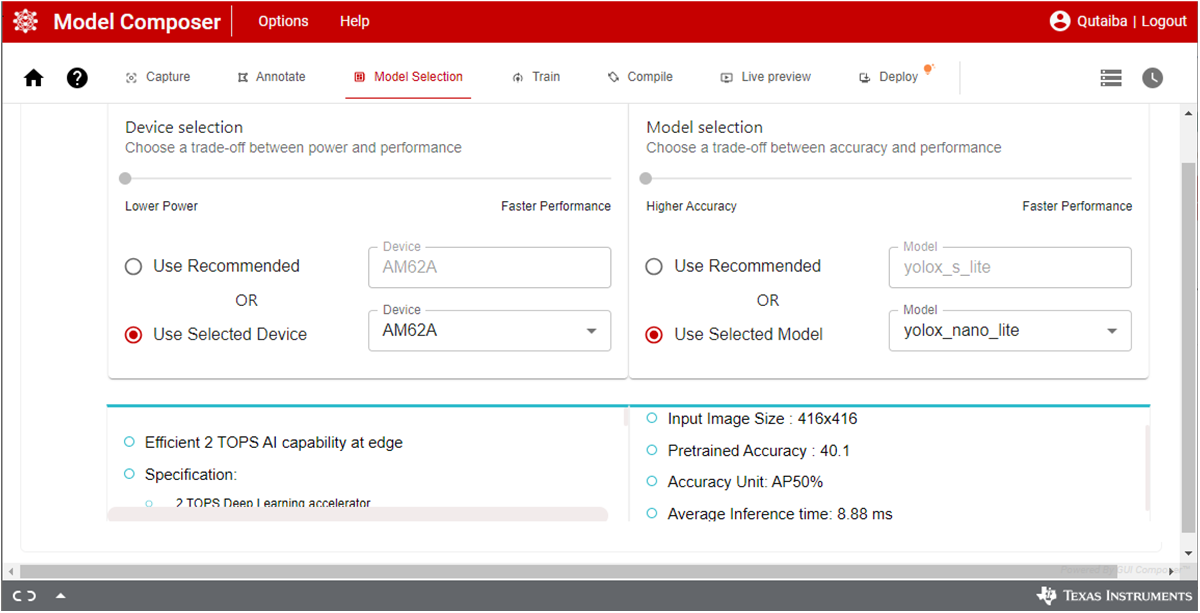 Figure 3-4 TI Edge AI Studio:
Model Composer, Model Selection
 - Move to
the “Train” tab and select the desired training parameters as shown in Figure 3-5. The following are the parameters used to train the model in this project.
Feel free to experiment with other parameters which might fit your model and
tasks.
- Epochs: 10
- Learning Rate: 0.002
- Batch size: 8
- Weight decay: 0.0001
When satisfied with the parameter, click “Start Training” icon. The Model Composer, in the background, divides the dataset into three parts for training, testing and validation. As the training is underway, the performance is shown as a graph of Accuracy vs Epoch. The model in this project achieved 100% accuracy on the training.
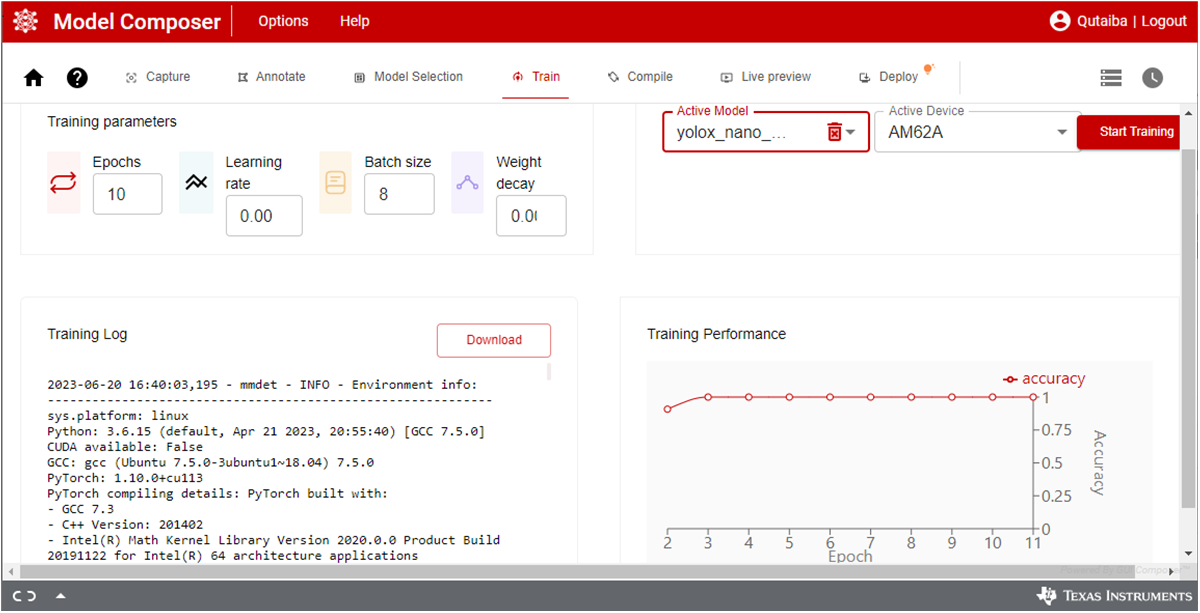 Figure 3-5 TI Edge AI Studio:
Model Composer, Model Training
 - After training is completed, the
mode is compiled to generate the artifacts for the model which are required to
execute on the Deep Learning Accelerator of AM62A. Move to the “Compile” tab and
select the desired compilation parameters as shown in Figure 3-6. Several factors are considered when selecting the compilation parameters
including model type, the targeted accuracy, performance, and size of dataset.
The model in this project is compiled with the default preset parameters as
follows:
- Calibration Frames: 10
- Calibration Iterations: 10
- Detection Threshold: 0.6
- Detection Top K: 200
- Sensor Bits: 8
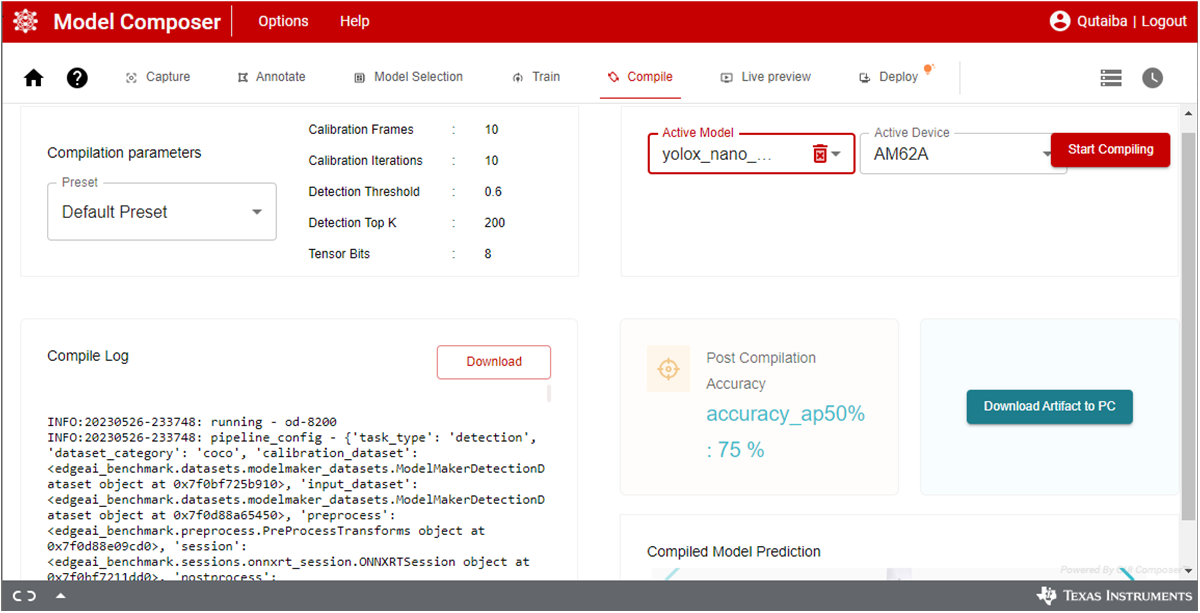 Figure 3-6 TI Edge AI Studio:
Model Composer, Model Compilation
 - When
compilation is completed, the artifacts are downloaded to AM62A. The model
composer has tools for Live Preview and Deployment. The Live preview is used to
test the model directly on the app as shown in Figure 3-7. This tool provides an easy method to check the model before deployment. This
requires a camera to be connected to the AM62A EVM and that the AM62A EVM is
connected to the same network as the hosting PC. The “Deploy” tool is used to
download the compiled model artifacts directly to the EVM assuming that it is
connected to the same network as the hosting PC. Alternatively, the model
artifacts can be downloaded to the hosting PC as a tar file and then it can be
transferred to the desired EVM.
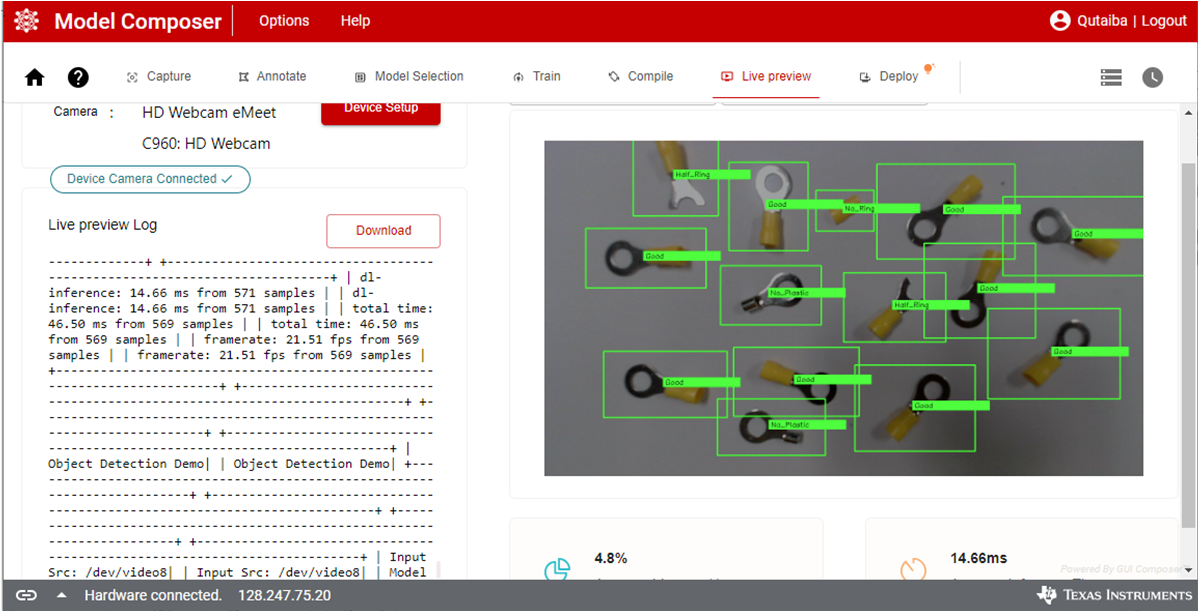 Figure 3-7 TI Edge AI Studio:
Model Composer, Live Preview
The steps presented above provided comprehensive details to train and compile the model using Edge AI Studio model composer. At this point, the model artifacts are downloaded to the targeted EVM and are ready to be used in the end application.