SLUUC74 May 2021 BQ25720 , BQ25723
2.4.2 OTG Function
Use the following for OTG function settings:
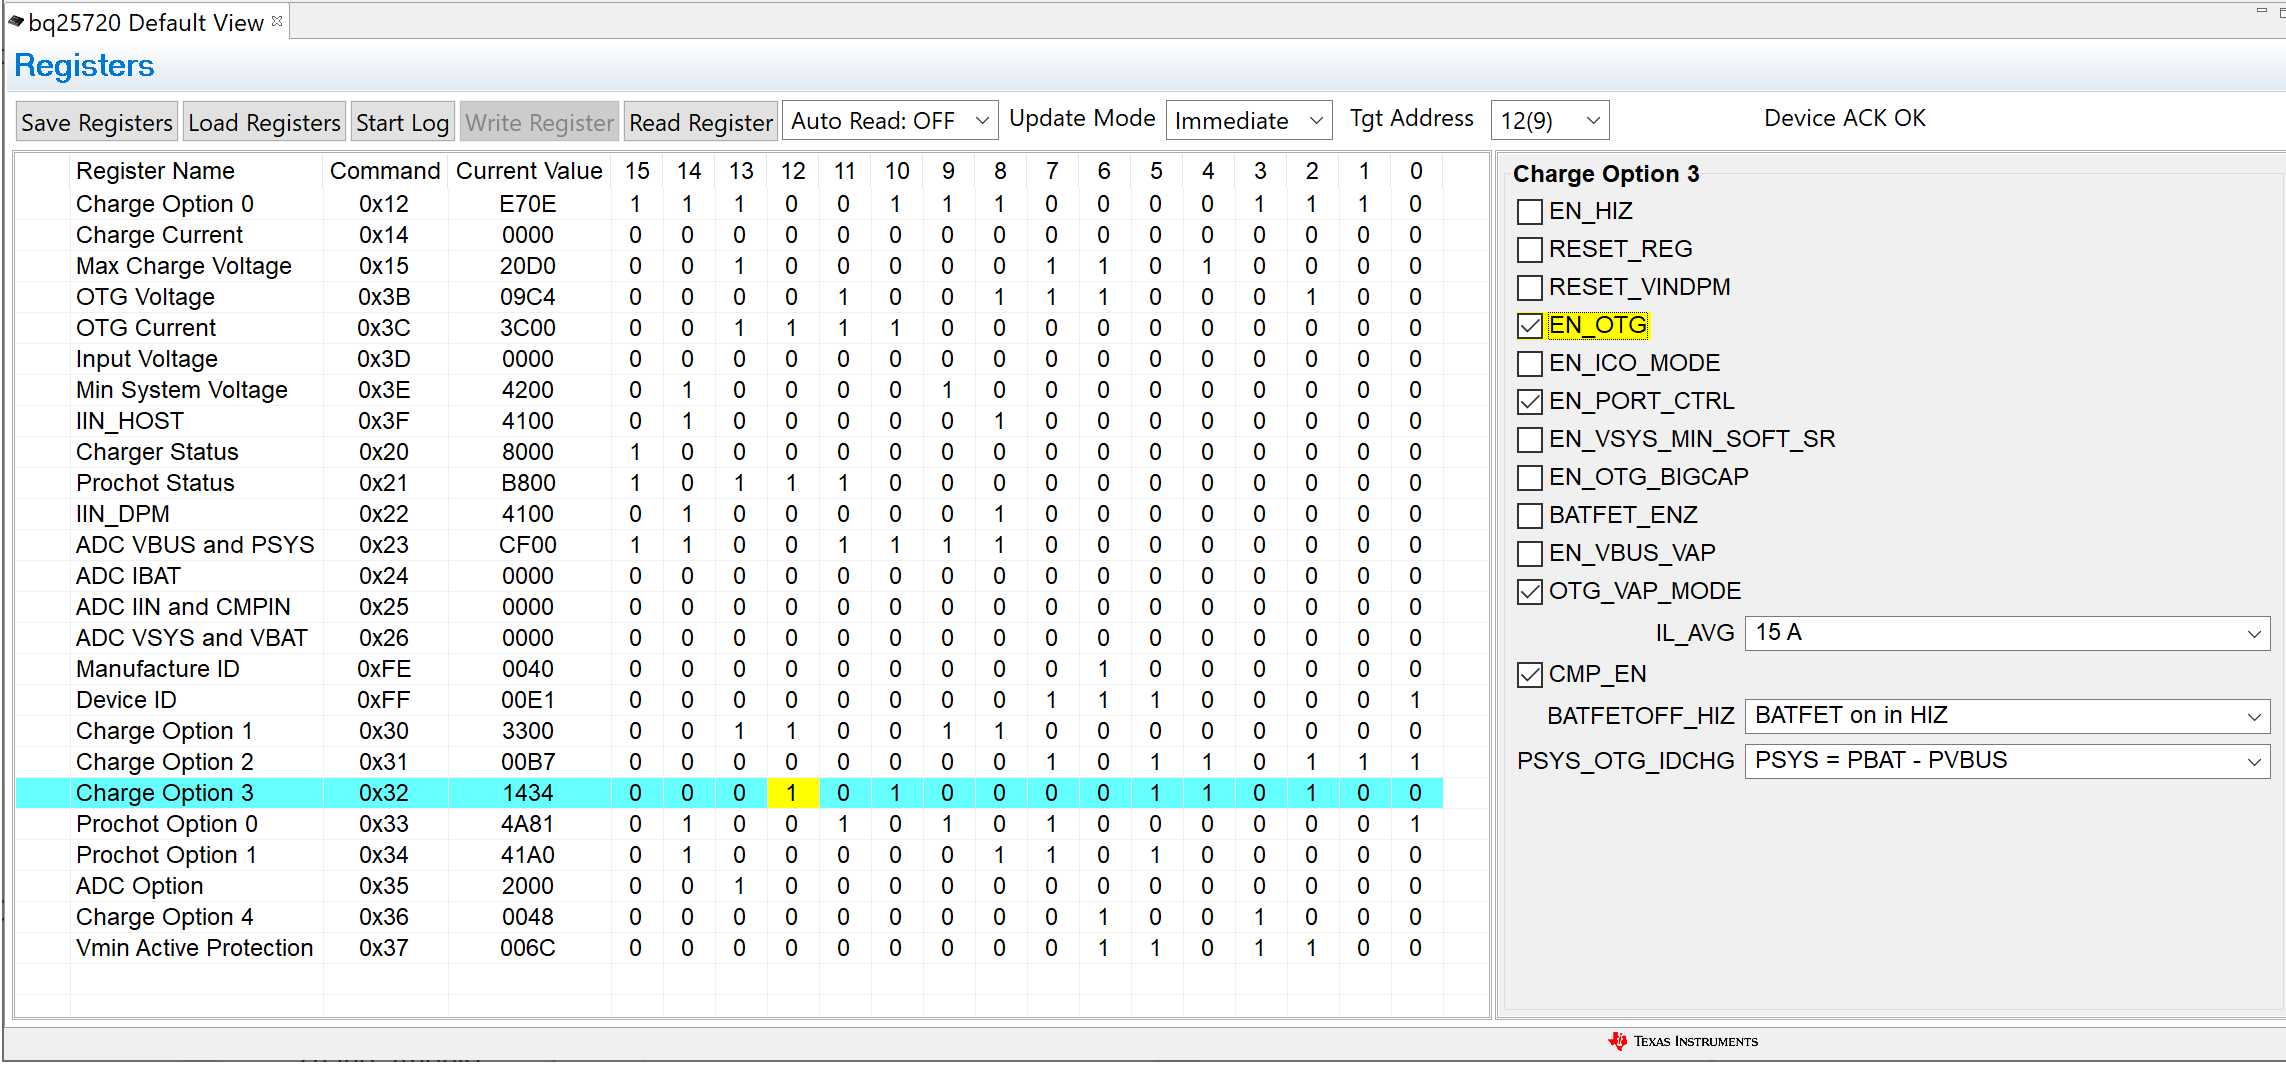
- Connect a 7-V power supply to the VBAT load.
Remove the VIN power supply from J1. (The connection must be physically removed from the board). - Write “20D0” to the Charge Voltage Register.
- Write “09C4” to the OTG voltage register.
- Write “4000” to the OTG current registers.
- Remove JP2 to enable the OTG function.
- Select EN_OTG in Charge Option 3.
Measure → V(J1(VIN)) = 5 V ±1 V Figure 2-4 EN_OTG