SLAU318G July 2010 – March 2016
-
MSP-EXP430G2 LaunchPad™ Development Kit
- Trademarks
- 1 Preface: Read This First
- 2 MSP-EXP430G2 LaunchPad™ Development Kit Overview
- 3 Installation
- 4 Getting Started With MSP-EXP430G2 LaunchPad™ Development Kit
- 5
Develop an Application With the MSP-EXP430G2 LaunchPad™ Development Kit
- 5.1 Developing an Application
- 5.2 Program and Debug the Temperature Measurement Demo Application
- 5.3 Disconnect Emulator From Target With Jumper J3
- 5.4 Program Connected eZ430™ Target Boards
- 5.5 Connecting a Crystal Oscillator
- 5.6 Connecting a BoosterPack™ Plug-in Module
- 5.7 Supported Devices
- 5.8 MSP-EXP430G2 On-Board Emulator
- 6 MSP-EXP430G2 Hardware
- 7 Suggested Reading
- 8 Frequently Asked Questions (FAQ)
- Revision History
5.2 Program and Debug the Temperature Measurement Demo Application
The source code of the demo application can be found in the Software Examples zip folder. Download the project folder and unpack it to a location of your choice. For this demo, Code Composer Studio v4 or newer must be installed.
The demo application can be loaded to the CCS workspace by clicking File→Import. Select the location of the extracted project files and import Existing projects into Workspace. Now the MSP-EXP430G2-Launchpad project appears inside the CCS workspace. The project must be marked as the active project to start programming and debugging the device.
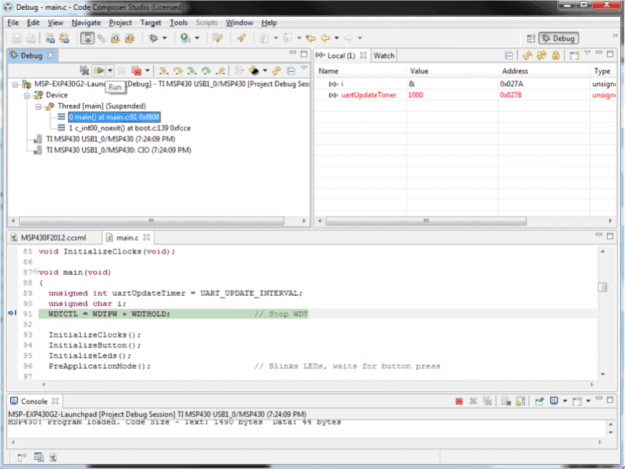
Connect the LaunchPad development kit with an inserted MSP430G2553 device to the host PC and click the Debug button on the CCS Toolbar. The MSP-EXP430G2 LaunchPad development kit is initialized and the download of the compiled demo application starts. The CCS view switches to a debugging interface once the download is completed and the application is ready to start. Figure 3 shows Code Composer Studio v4 with the MSP-EXP430G2 LaunchPad development kit demo application in debug view.
 Figure 3. Code Composer Studio™ v4 in Debugging Mode