SLUAAP5 july 2023 UCD3138 , UCD3138064 , UCD3138064A , UCD3138128 , UCD3138128A , UCD3138A , UCD3138A64
4.2 New Target Configuration in CCS
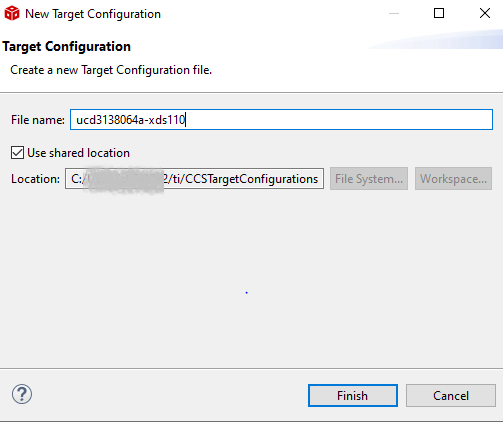
On the menu on the top of CCS, click View > Target Configurations. In the target configurations pane, right click on User Defined, select New target configuration. Give the configuration a meaningful name, (for example, emulator type) and the UCD variant in the name, as shown in Figure 4-1. Click Finish.

Figure 4-1 New Target Configuration
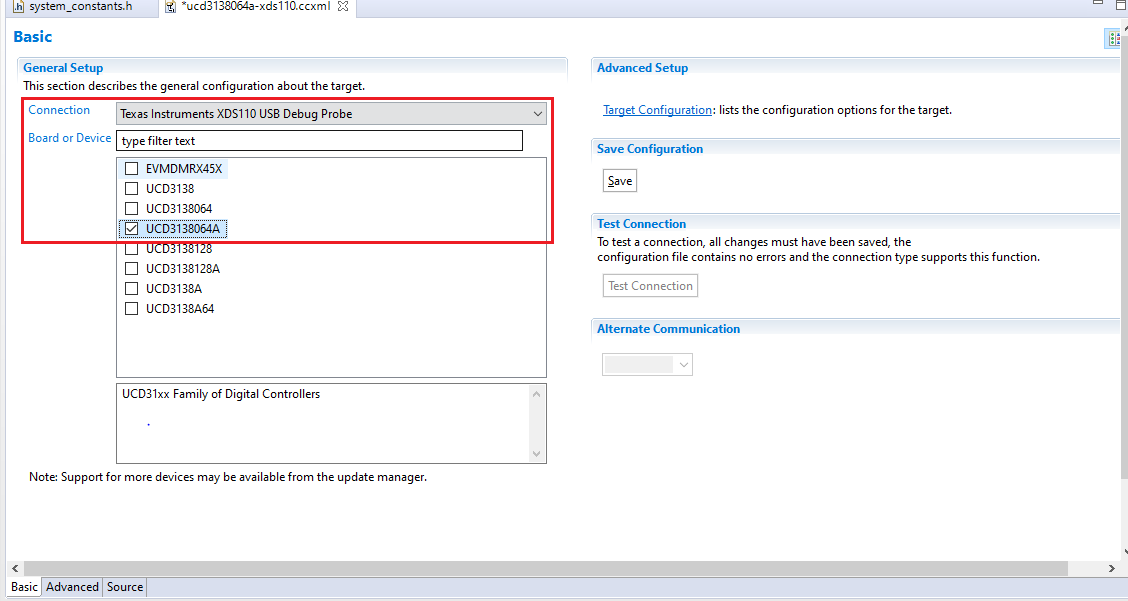
In the Connection and Board or Device item, select the proper emulator type and UCD variant respectively. Take the JTAG XDS110 and UCD3138064A as an example.

Figure 4-2 Emulator Type and UCD Variant Selection
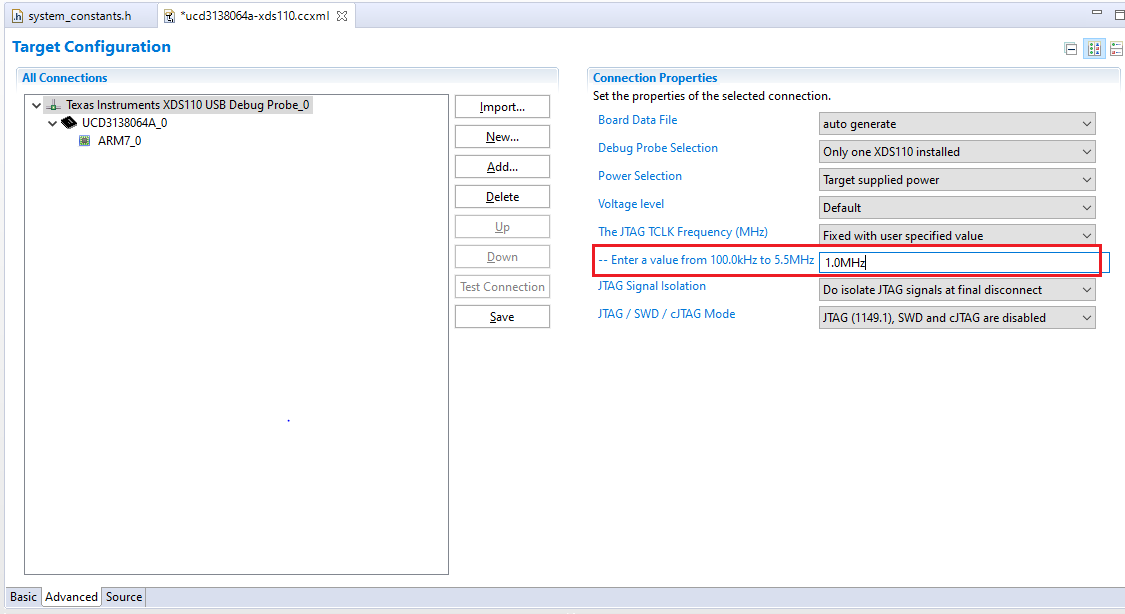
From the Advanced tab, change the TCLK frequency from 5.5 MHz to 1.0 MHz. Experiment with values larger than 1 MHz, but less than 5.5 MHz. Click Save.

Figure 4-3 TCLK Frequency Configuration
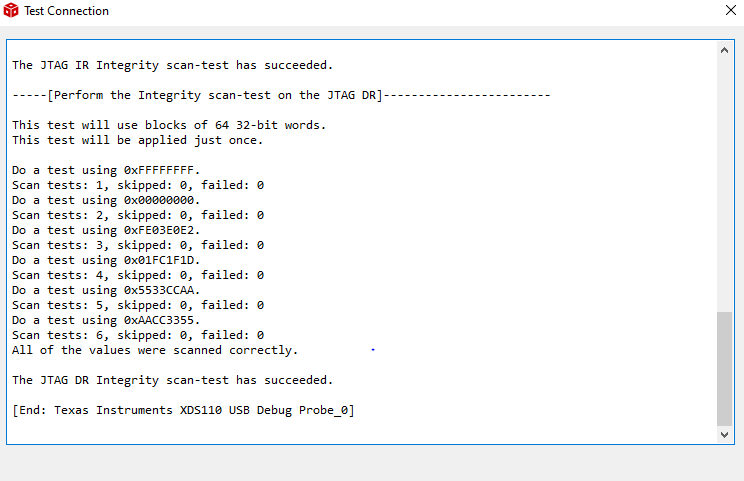
Click Test Connection. When the test is complete, scroll down to the bottom of the pop-up window and observe the message as shown in Figure 4-4. If the message does not appear, there is an issue with either the physical connection or the setup.

Figure 4-4 Success on JTAG Connection