SLUUCR0A September 2023 – December 2023
3.2.3 Charger Mode Verification
Use the following steps for charger mode verification:
- PS #1 is on from Section 3.2.1. In the EVM
software, click
 twice.
- Verify that all Fault
statuses read Normal.
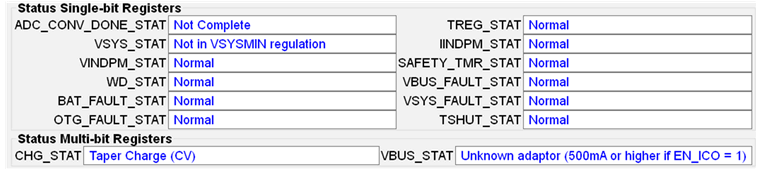
- Verify that all Fault
statuses read Normal.
- To confirm SYS voltage regulation,
enable Load #1 (see Section 2.4) and take DMM measurements as follows:
- Measure → VSYS (SYS-TP14 and PGND-TP27 or TP29) = 3.65V ±0.3V.
- Measure → VBAT (BAT-TP13 and PGND-TP27 or TP29) = 2.5V ±0.2V.
- Measure → IBAT = 200 mA ±50mA.
- To confirm battery charge current regulation, change Load #1 to
3.7V and take DMM measurements as follows:
- Measure → VSYS (SYS-TP14 and PGND-TP27 or TP29) = 3.8V ±0.3V.
- Measure → VBAT (BAT-TP13 and PGND-TP27 or TP29) = 3.7V ±0.2V.
- Measure → IBAT = 480 mA ±100mA.
- To confirm input current limit operation, in the EVM software on
the 16-bit tab, set fast charge current to 1040 mA and then take DMM measurement
( or PS #1 measurement if accurate) as follows:
- Measure → IIN = 500 mA ±200mA.