SLVUBX9 October 2020 TPS2640
4.4.4 Output Short-Circuit Protection Test
Follow the instructions to verify the output short-circuit protection feature of the device:
- Set up the oscilloscope as listed in Table 4-10. Table 4-10 TPS2640EVM Output Short-Circuit Protection Test
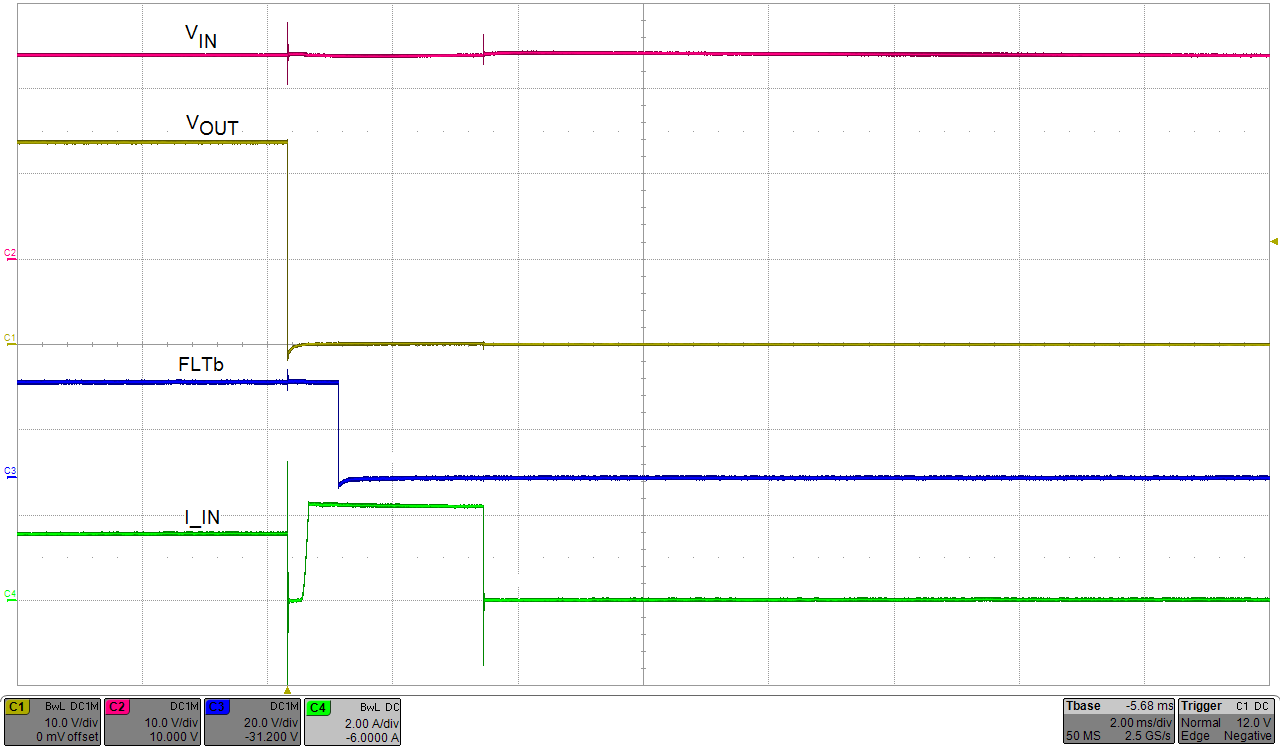
Oscilloscope Setting CH1 Probe Points CH2 Probe Points Channel 1 = 10 V / div VOUT1 (TP3) VOUT2 (TP12) Channel 2 = 10 V / div VIN1 (TP2) VIN2 (TP11) Channel 3 = 20 V / div FLTb1 (TP1) FLTb2 (TP10) Channel 4 = 2 A / div Input current into T1 +Ve wire Input current into T3 +Ve wire Trigger source = Channel 1 Trigger level = 12 V ±1 V Trigger polarity = Falling Trigger mode = Single Time base 2 ms / div - Set the load resistance to 16 Ω ±1 Ω and the power supply voltage to 24 V.
- Enable the load and the power supply.
- Use either wire or FET to short the output to ground and verify the output
short-circuit response waveform as shown in Figure 4-7.
 Figure 4-7 Output Short-Circuit Protection