SPMA083 January 2022 TM4C129CNCPDT , TM4C129CNCPDT , TM4C129CNCZAD , TM4C129CNCZAD , TM4C129DNCPDT , TM4C129DNCPDT , TM4C129DNCZAD , TM4C129DNCZAD , TM4C129EKCPDT , TM4C129EKCPDT , TM4C129ENCPDT , TM4C129ENCPDT , TM4C129ENCZAD , TM4C129ENCZAD , TM4C129LNCZAD , TM4C129LNCZAD , TM4C129XKCZAD , TM4C129XKCZAD , TM4C129XNCZAD , TM4C129XNCZAD
- Trademarks
- 1Implementation
-
2Example Walk Through
- 2.1 Build Environment
- 2.2 Importing the Examples into Code Composer Studio
- 2.3 Setting Keys and Variables
- 2.4 Running the shared_key_image_encrypt Tool
- 2.5 Running the Shared Key Serial Boot Loader
- 2.6 Returning to the Boot Loader
- 3Summary
2.5.1.1.1 Erasing Flash and EEPROM With Code Composer Studio
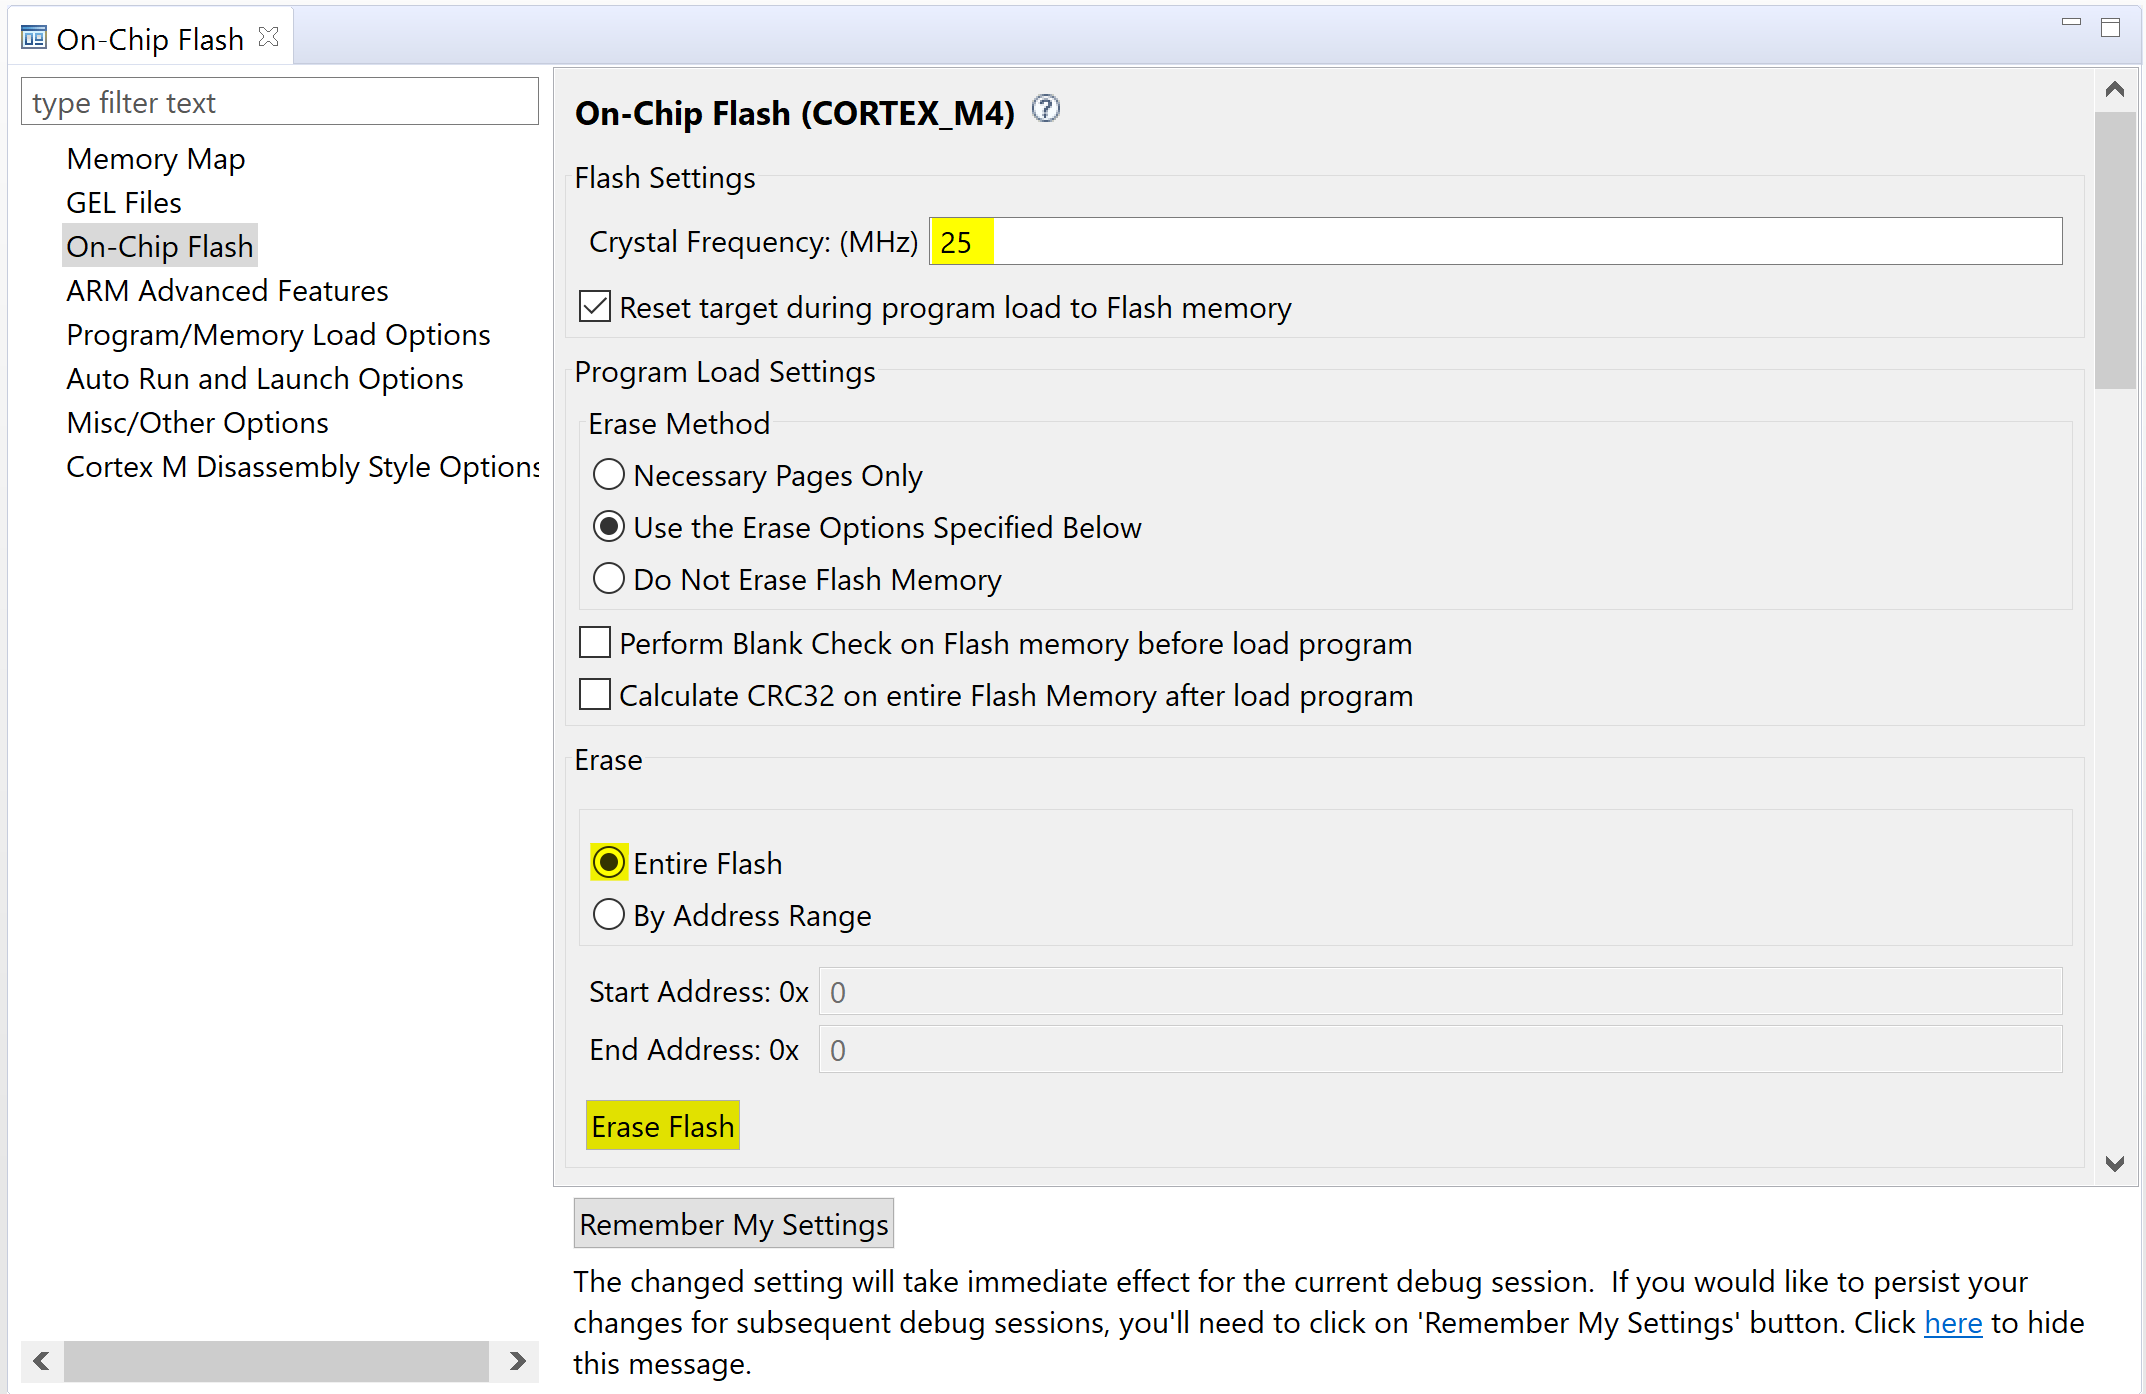
- To erase the flash, select “Tools” -> “On-Chip Flash” from the pulldown menu. Enter the proper crystal frequency. It is 25 MHz for the EK-TM4C129EXL LaunchPad Development Kit. In the erase section make sure “Entire Flash” is selected, then click the “Erase Flash” button.
 Figure 2-15 Erasing Flash with Code Composer Studio
 - To erase the EEPROM, load and execute the eeprom_erase program that was loaded into the workspace with this document’s collateral. From the pulldown menu select “Run” -> “Load” -> “Select Program to Load”. Then click “Browse project”. Select the file eeprom_erase\Debug\eeprom_erase.out, then click “OK”.
- Click OK again to load and execute the eeprom_erase program.
 Figure 2-16 Loading eeprom_erase.out
 - Two LEDs on the LaunchPad will blink indicating that the program ran and erased the EEPROM.