SPMA083 January 2022 TM4C129CNCPDT , TM4C129CNCPDT , TM4C129CNCZAD , TM4C129CNCZAD , TM4C129DNCPDT , TM4C129DNCPDT , TM4C129DNCZAD , TM4C129DNCZAD , TM4C129EKCPDT , TM4C129EKCPDT , TM4C129ENCPDT , TM4C129ENCPDT , TM4C129ENCZAD , TM4C129ENCZAD , TM4C129LNCZAD , TM4C129LNCZAD , TM4C129XKCZAD , TM4C129XKCZAD , TM4C129XNCZAD , TM4C129XNCZAD
- Trademarks
- 1Implementation
-
2Example Walk Through
- 2.1 Build Environment
- 2.2 Importing the Examples into Code Composer Studio
- 2.3 Setting Keys and Variables
- 2.4 Running the shared_key_image_encrypt Tool
- 2.5 Running the Shared Key Serial Boot Loader
- 2.6 Returning to the Boot Loader
- 3Summary
2.4 Running the shared_key_image_encrypt Tool
After making any modifications described in section 3.3, re-compile the Debug configurations of the projects shared_key_image_encrypt and key_image. Then recompile the Debug_wKey configuration of the project shared_key_boot_serial. The debug configurations do not lock the JTAG and are for use during development. The release configurations will lock JTAG and should be used for the production version of the shared key boot loader.
- With the EK-TM4C129EXL LaunchPad Development Kit connected with a USB cable from the DEBUG port of the LaunchPad to a USB port on the PC, launch the shared_key_image_encrypt project. This can be done by highlighting the project in the Project Explorer window then clicking on the debug icon shown in yellow in Figure 2-5.
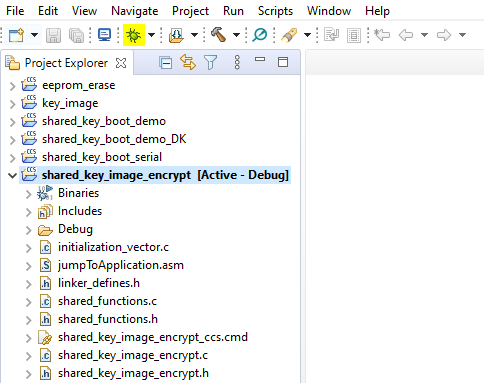 Figure 2-5 Executing the shared_key_image_encrypt Program
 - Identify that the serial port was assigned by the PC to the virtual serial port of the LaunchPad. This can be found by running Device Manager on the PC. In Figure 2-6, the LaunchPad was assigned to COM19.
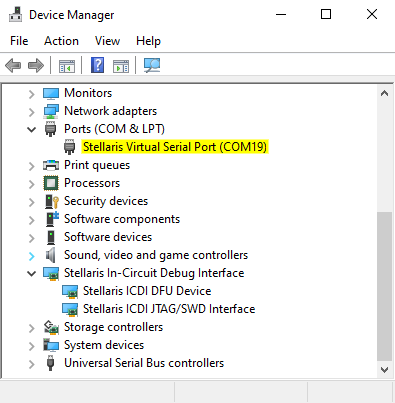 Figure 2-6 Identifying the COM Port
 - Open a terminal emulator that supports XMODEM communications. In this example “Tera Term” was used. Connect over serial to the identified COM port for the LaunchPad.
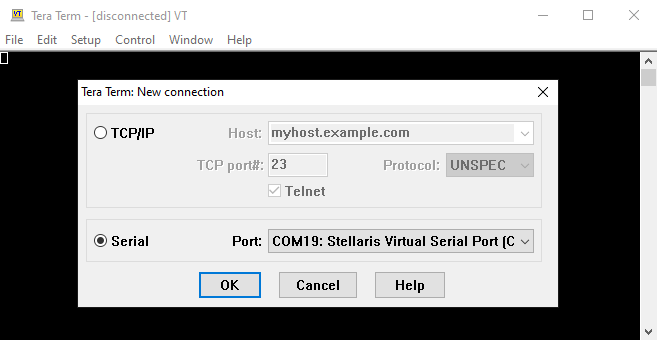 Figure 2-7 Selecting the COM Port in Tera Term
 - Configure the terminal emulator to use the serial port at 460800 baud, 8-bit data, 1 stop bit, and no parity.
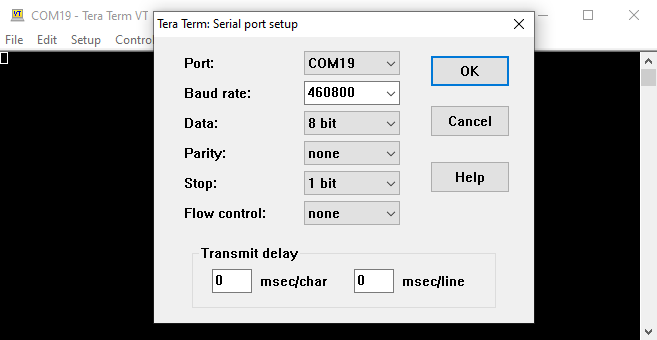 Figure 2-8 Configuring the COM Port in Tera Term
 - Execute the shared_key_image_encrypt program by clicking on the green arrow in Code Composer Studio or by pressing F8.
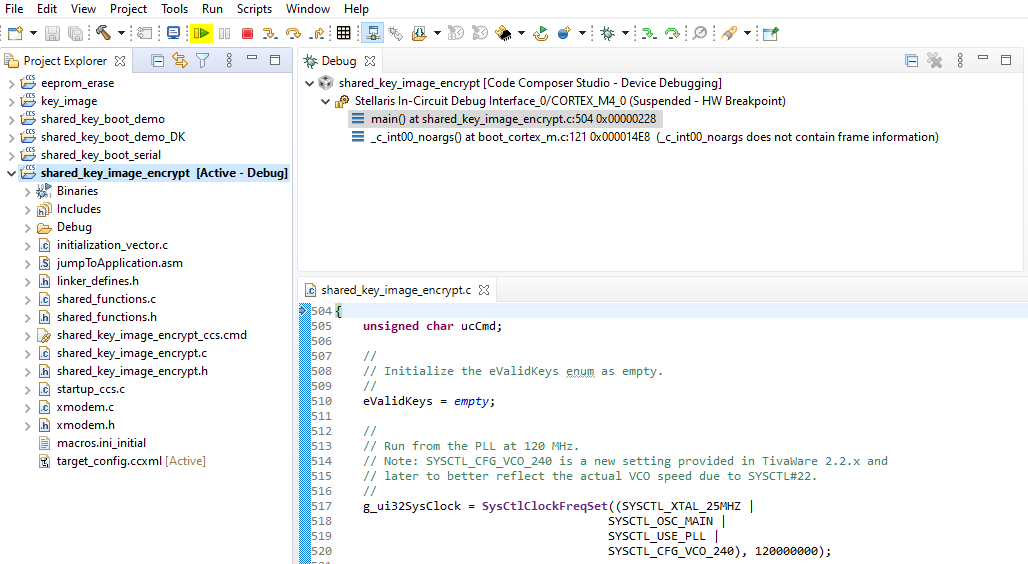 Figure 2-9 Executing the shared_key_image_encrypt Program
 - The following menu should now be displayed on the terminal.
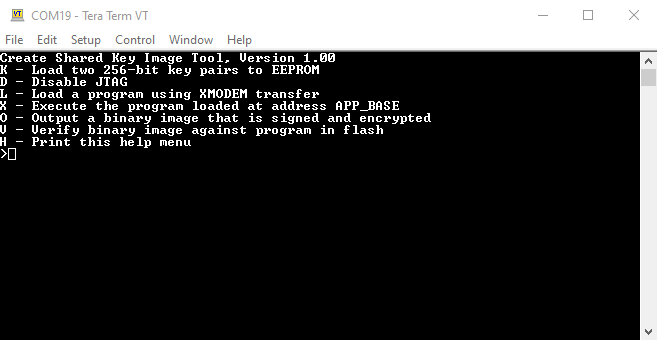 Figure 2-10 shared_key_image_encrypt Command Menu
 - To create a signed and encrypted image to be used by the boot loader follow these steps:
- Transfer the file key_image.bin from the debug subdirectory of the project key_image to the device using XMODEM protocol. Using Tera Term follow these steps:
- Type K in the terminal emulator (it takes lower-case k or upper-case K).
- Select “File” -> “Transfer” -> “XMODEM” -> “Send”.
- Browse to key_image\Debug\key_image.bin and select “Open”.
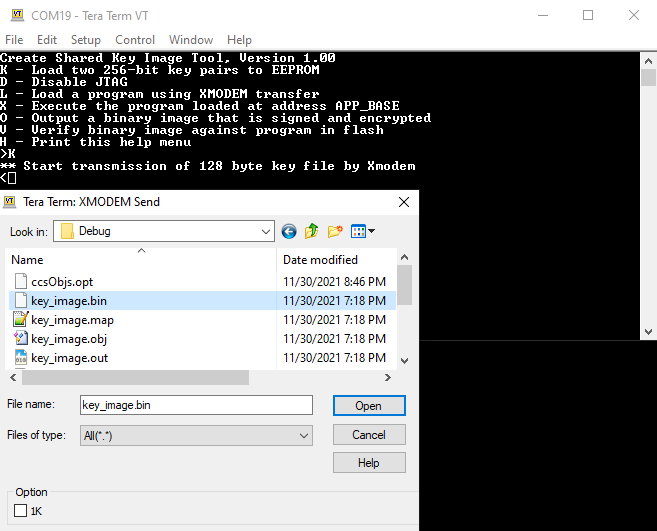 Figure 2-11 Loading the Key Image
 - The terminal should now display Keys successfully programmed into EEPROM.
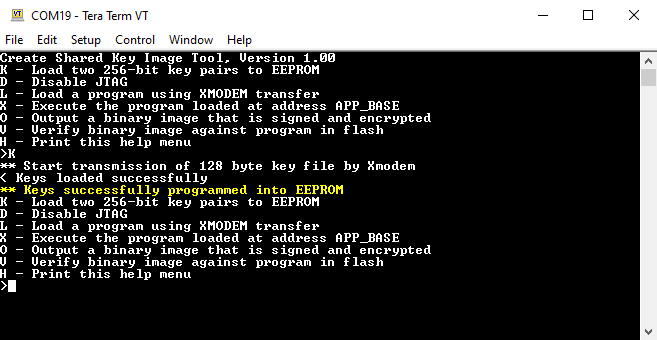 Figure 2-12 Keys Successfully Loaded
- Transfer the application image into the device. Using Tera Term follow these steps:
- Type L in the terminal emulator.
- Select “File” -> “Transfer” -> “XMODEM” -> “Send”.
- Browse to shared_key_boot_demo\Debug\shared_key_boot_demo.bin and select “Open”.
The transfer can take up to one minute for a full 1MB flash device. After completion, the message File programming complete will be displayed on the terminal.
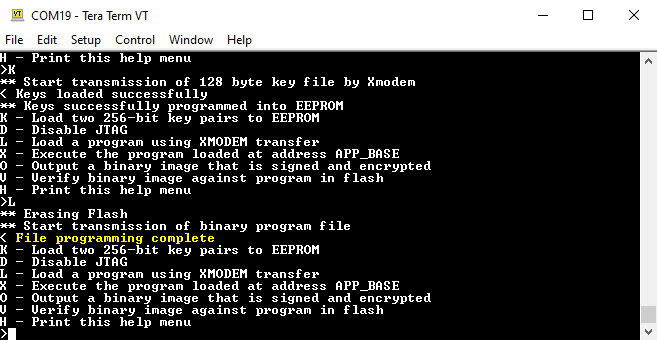 Figure 2-13 Loading the Program Image
 - Output a signed and encrypted version of the binary image. Using Tera Term follow these steps:
- Type O in the terminal emulator.
- Select “File” -> “Transfer” -> “XMODEM” -> “Receive”.
- Choose an output file name such as:
shared_key_boot_demo\Debug\shared_key_boot_demo_encrypted.bin and select “Save”.
- Optionally, it is possible to verify the encrypted file just created against the unencrypted image stored in flash by:
- Type V in the terminal emulator.
- Select “File” -> “Transfer” -> “XMODEM” -> “Send”.
- Browse to shared_key_boot_demo\Debug\shared_key_boot_demo_encrypted.bin and select “Open”.
- The transfer will take about one minute for a full 1MB flash device. After completion, the message File verification complete will be displayed on the terminal if the encrypted file's hash value was autheticated successfully.
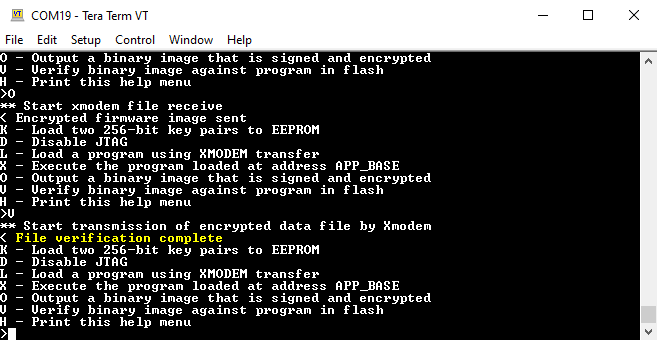 Figure 2-14 Verifying the Program Image
- Optionally, execute the application code that has been programmed into the device by:
- Type X in the terminal emulator.
- The message Hash value authenticated will be displayed on the terminal and LED D1 on the LaunchPad will be flashing.
- Reset the LaunchPad with either Code Composer Studio, or the reset button on the LaunchPad and the terminal will indicate that the program is back in the shared_key_image_encrypt tool.
- Transfer the file key_image.bin from the debug subdirectory of the project key_image to the device using XMODEM protocol. Using Tera Term follow these steps: