SWRA772 august 2023 CC2564C
- 1
- Abstract
- Trademarks
- 1 Introduction
- 2 Running the Bluetooth Code
- 3 Demo Application
- 4 Demonstrating SPP LE on an iOS Device with the LightBlue App
- 5 LightBlue as the Client/SPPLEDemo as the Server
- 6 LightBlue as the Server/SPPLEDemo as the Client
- 7 Application Commands
- 8 General Commands
- 9 BR/EDR Commands
-
10GAPLE Commands
- 10.1 Set Discoverability Mode
- 10.2 Set Connectability Mode
- 10.3 Set Pairability Mode
- 10.4 Change Pairing Parameters
- 10.5 Advertise LE
- 10.6 Start Scanning
- 10.7 Stop Scanning
- 10.8 Connect LE
- 10.9 Disconnect LE
- 10.10 Pair LE
- 10.11 LE Pass Key Response
- 10.12 LE Query Encryption
- 10.13 Set Passkey
- 10.14 Discover GAPS
- 10.15 Get Local Name
- 10.16 Set Local Name
- 10.17 Get Remote Name
- 10.18 LE User Confirmation Response
- 10.19 Enable SC Only
- 10.20 Regenerate P256 Local Keys
- 10.21 SC Generate OOB Local Params
- 10.22 Set Local Appearance
- 10.23 Get Local Appearance
- 11SPPLE Commands
- 12References
- 13Revision History
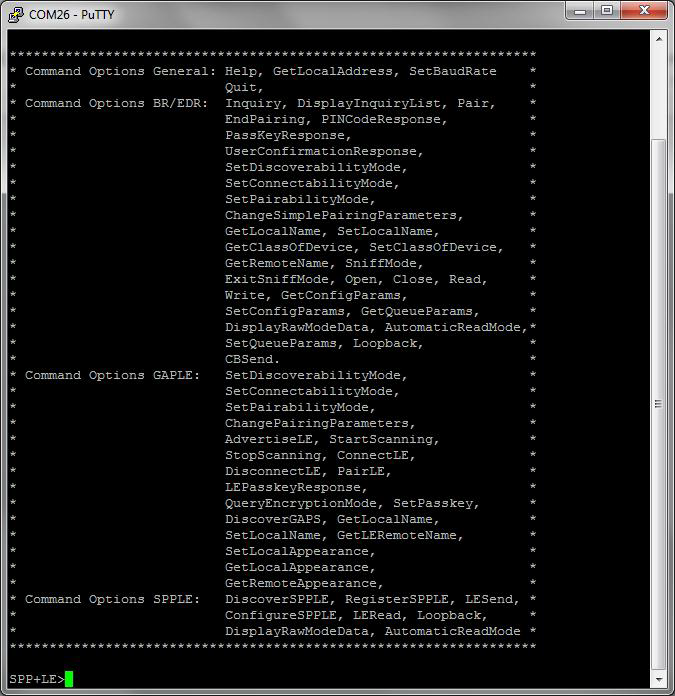
2 Running the Bluetooth Code
Once the code is flashed, connect the board to a PC using a miniUSB or microUSB cable. Once connected, wait for the driver to install. The driver appears as MSP-EXP430F5438 USB -Serial Port(COM x), Tiva Virtual COM Port (COM x),XDS110 Class Application/User UART (COM x) for MSP432, under Ports (COM & LPT) in the Device manager. Attach a Terminal program like PuTTY to the serial port x for the board. Use the serial parameters 115200 Baud (9600 for MSP430), 8, n, 1. Once connected, reset the device using Reset S3 button (located next to the mini USB connector for the MSP430) and observe the stack getting initialized on the terminal and the help screen displays, which shows all of the commands. This device becomes the server. Connect the second board via miniUSB or microUSB cable and follow the same steps performed before when running the Bluetooth code on the first board. The second device that is connected to the computer is the client.