SBAU374A May 2021 – May 2022 DAC12DL3200
- Abstract
- Trademarks
- 1Introduction
- 2Equipment
-
3Setup Procedure
- 3.1 Install the High Speed Data Converter (HSDC) Pro Software
- 3.2 Install the Configuration GUI Software
- 3.3 Connect the DAC12DL3200EVM and TSW14DL3200EVM
- 3.4 Connect the Power Supplies to the Boards (Power Off)
- 3.5 Connect the Signal Generators to the EVM (*RF Outputs Disabled Until Directed)
- 3.6 Turn On the TSW14DL3200EVM 12-V Power and Connect to the PC
- 3.7 Turn On the DAC12DL3200EVM 5-V Power Supply and Connect to the PC
- 3.8 Turn On the Signal Generator RF Outputs
- 3.9 Open the DAC12DL3200EVM GUI and Program the DAC and Clocks for Single Channel, NRZ Mode 2 Operation
- 3.10 Open the HSDC Software and Load the FPGA Image to the TSW14DL3200EVM
- 3.11 DxSTRB Timing Adjustment
- 4Other Modes of Operation
- 5Register Log File
- 6Device Configuration
- A Troubleshooting the DAC12DL3200EVM
- B DAC12DL3200EVM Onboard Clocking Configuration
4.5 Direct Digital Synthesis Mode
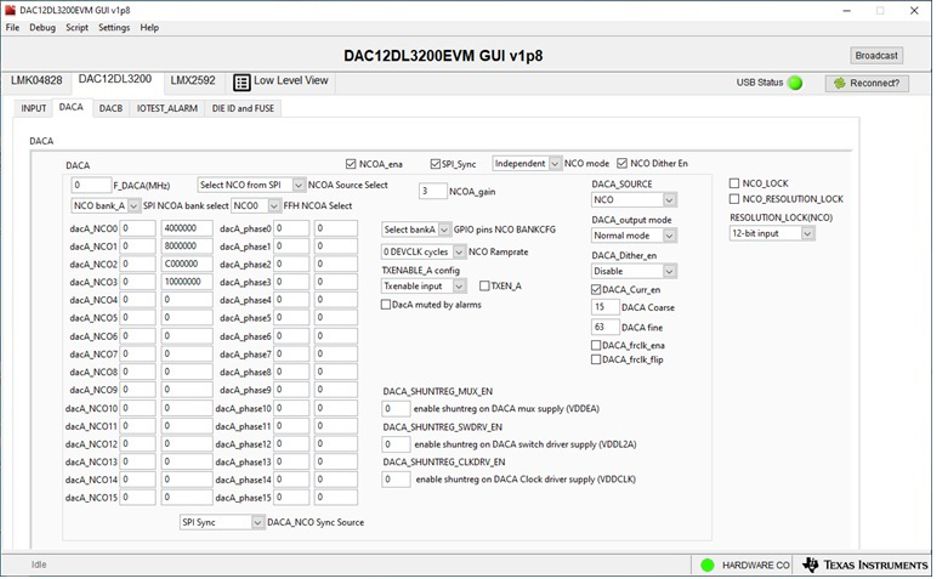
The DAC12DL3200 contains two numerically controlled oscillators (NCOs) that can optionally be used for direct digital synthesis of tones for each DAC. There are two NCO banks, each with 16 separate 32-bit NCOs. The banks can be used separately for each DAC, or together to provide 32 NCOs for one DAC. The two NCOs can be summed as a two tone source for both DACs. The NCO frequencies are set using the dac_A/B_NCO column in the DACA and DACB tabs. The phase is set using the dacA/B_phase column.
 Figure 4-2 DACA Tab With NCO
settings
Figure 4-2 DACA Tab With NCO
settingsThe GUI comes with two default NCO setting configuration files. One called "EXT_CLK_6400M_NCOA_1_4_100_400MHz.cfg" which sets the first 4 DAC NCOs to 100 MHz, 200 MHz, 300 MHz, and 400 MHz. With a 6.4-GHz external clock provided to the EVM and this configuration file loaded, the user can select any one of these four NCOs to be sent to the CHA output. The GUI box labeled SPI NCOA bank select determines which NCO is used.
The second configuration file called "LMK_100M_LMX_6400M_NCOA_1_4_100_400MHz" loads the same parameters but is used with the EVM setup in onboard clock mode.
The digital input data is not used in the NCO mode. The TSW14DL3200EVM is not required.
To enter the desired NCO frequency and phase settings, the user must first enter the DAC sample rate in the box labeled as F_DACA(MHz). The value entered is in megahertz.
The user then selects which NCOs they plan on using and enter the NCO frequency in megahertz in the first column. After entering the value, clicking anywhere in the GUI or pressing enter on the keyboard will load the required registers and update the second column with the actual register setting used to generate this frequency. The same instructions apply for setting the NCO phase. The value to be entered for phase is in radians. The valid entries are from –3.1416 to 3.1416. The equation for this setting can be found in the device data sheet.
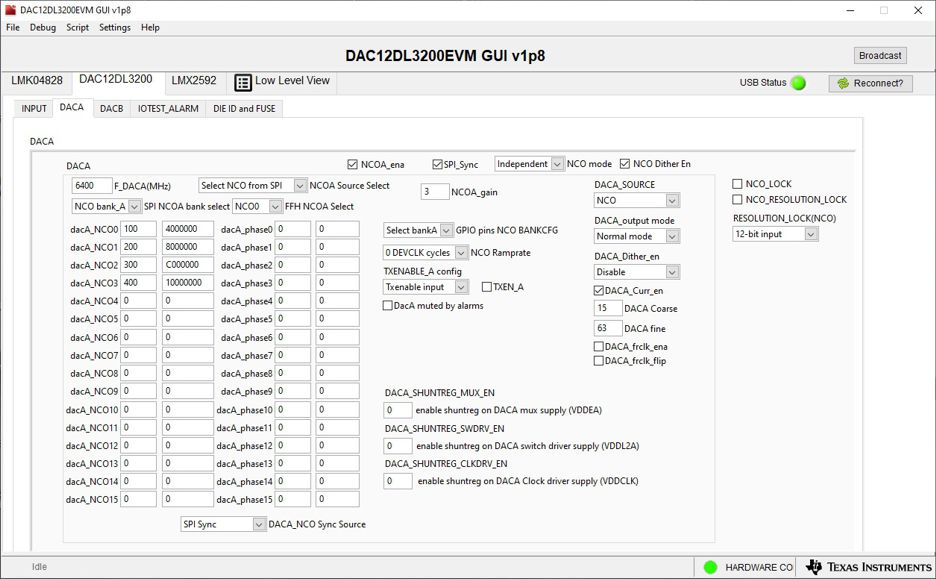
Figure 4-3 illustrates a setting with the DAC sampling at 6400 MHz and NCO0, NCO1, NCO2 and NCO3 set to 100 MHz, 200 MHz, 300 MHz, and 400 MHz.
If using the SPI_SYNC for the NCO SYNC source, after making any changes to the NCO settings, click on the SPI_SYNC button twice to synchronize the two NCOs.
 Figure 4-3 NCOA Calculation