SNAU210B March 2020 – July 2021
- Trademarks
- 1Evaluation Board Setup
- 2EVM Description
- 3Bringing LMX2594 to a Lock State
- 4Loop Filter Configuration
- 5Key Results to Expect
- A Schematic
- B Bill of Materials
- C Board Layers Stack-Up
- D Changing Reference Oscillator and Setup
- E Connecting Reference Pro
- F Ramping Feature
- G SYSREF Feature
- H Enabling Onboard DC-DC Buck Converter (TPS62150)
- Revision History
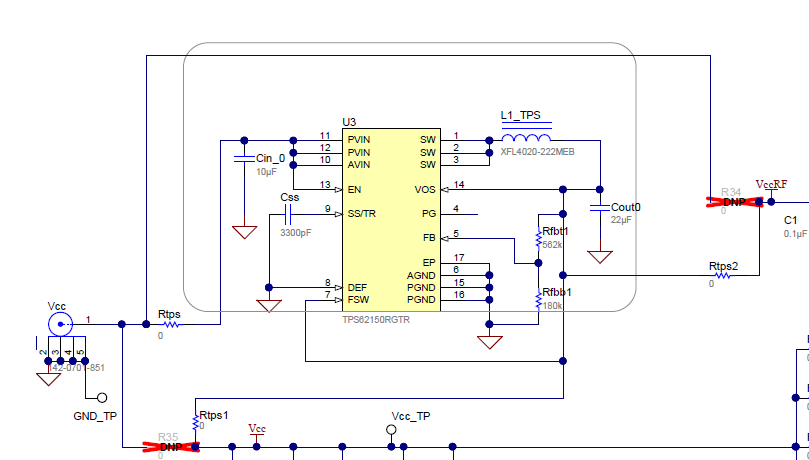
H Enabling Onboard DC-DC Buck Converter (TPS62150)
 Figure H-1 Resistor Configuration to Enable DC-DC
- MUST SWITCH R35 to Rtps1
- MUST SWITCH R34 to Rtps2
- Populate Rtps
- DC-DC circuitry was optimized for efficiency for 5 to 8 V, but a voltage of 3.3 V to 17 V can be applied to VCC SMA after resistor network is configured correctly from steps above.