SBAU230C August 2014 – March 2021 ADS8688
7.2 Modifying Hardware and Using Software to Evaluate Other Devices in the Family
The ADS8688 is part of a family of related devices. This EVM hardware and software support the entire family because all the devices are pin-for-pin compatable. Table 7-1 lists other compatible devices in the family. The following procedure shows how to modify the hardware and software to evaluate the other devices in this family.
- Desolder the ADS8688 and replace this device with the device you want to evaluate.
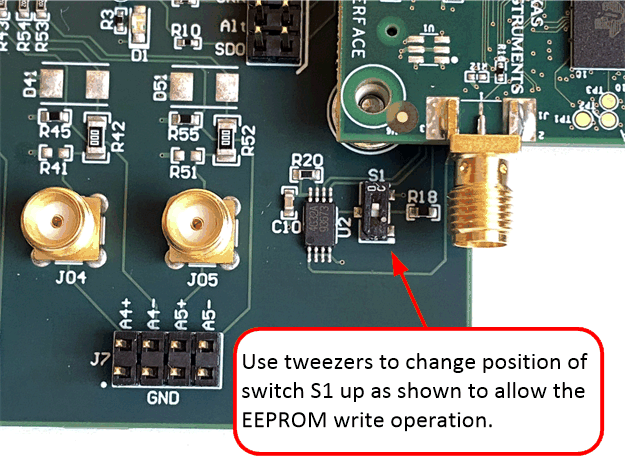
- Enable the EEPROM for writing. This process is done by changing switch S2 to the top position using tweezers.Figure 7-3 details this process.
- Connect the EVM and start the GUI as described in Section 7.1.
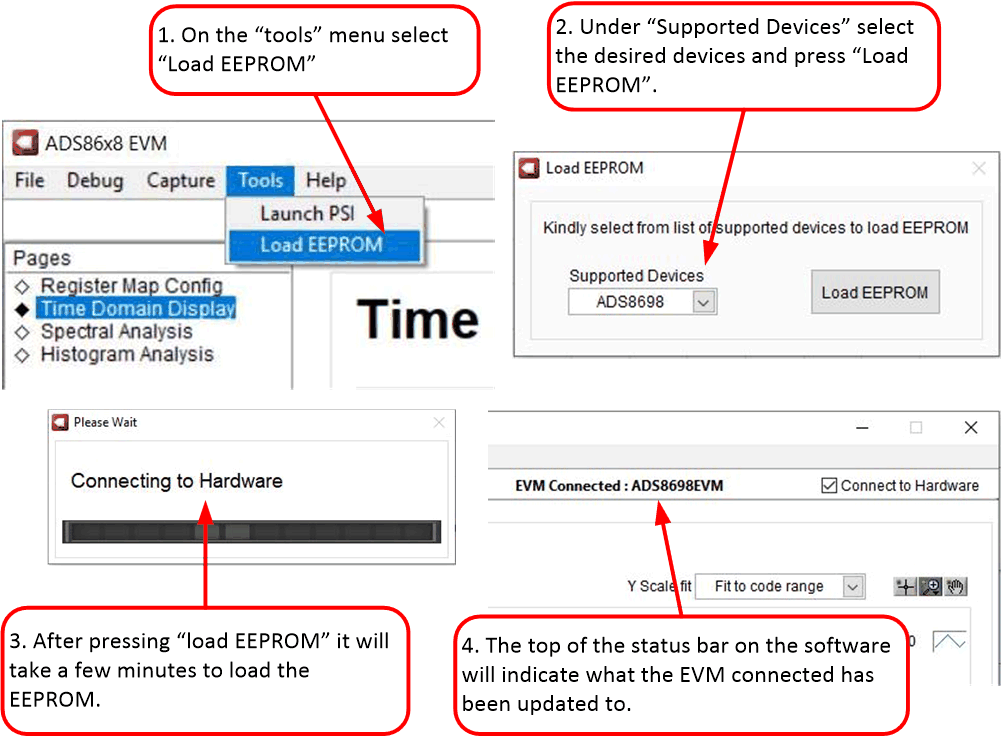
- Use the Tools menu to Load EEPROM according to the device that is currently installed. When this procedure is successfully completed, you will see the status bar at the top of the software update according to the device installed on the hardware. For details, see Figure 7-4.
Table 7-1 Compatible Devices in the
Family
| Number of Channels | Resolution | ||||
|---|---|---|---|---|---|
| 12-Bit | 14-Bit | 16-Bit | 18-Bit | ||
| 4 | ADS8664 | ADS8674 | ADS8684 | ADS8684A | ADS8694 |
| 8 | ADS8668 | ADS8678 | ADS8688 | ADS8688A | ADS8698 |
 Figure 7-3 Enable EEPROM for
Writing
 Figure 7-4 Configure EEPROM and Software
for the New Device