SLAU789A November 2023 – November 2023
4.3 Downloading Firmware
The TSW1418EVM has a Xilinx Artix 7 device that requires firmware to be downloaded every time power is cycled to operate. The firmware files needed are special .bin formatted files that are provided with the software package. The files used by the GUI currently reside in the directory called C:\Program Files (x86)\Texas Instruments\High Speed Data Converter Pro\1418 Details\Firmware.
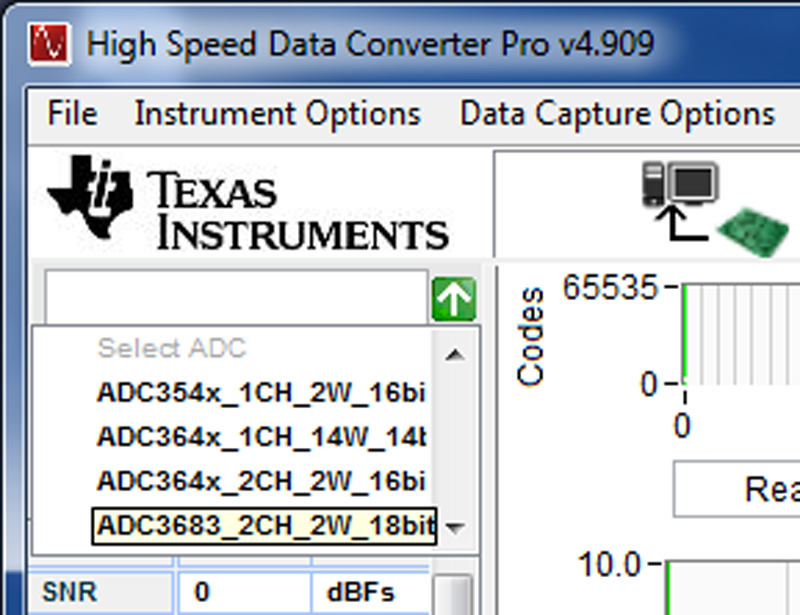
To load a firmware, after the GUI has established connection, click the Select ADC window in the top left of the GUI and select the device to evaluate; for example, ADC3683_2CH_2W_18bit, as shown in Figure 4-4.
The GUI prompts the user to update the firmware for the ADC. Click Yes. The GUI displays the message Downloading Firmware, Please Wait. The software now loads the firmware from the PC to the FPGA, a process that takes about 3 seconds. After completion, the GUI reports an interface type in the lower right corner.
 Figure 4-4 Select ADC Firmware to be Loaded
For information about the use of the TSW1418EVM with an ADC EVM, consult the High-Speed Data Converter Pro GUI User's Guide and the individual ADC EVM user’s guide, both available on www.ti.com.
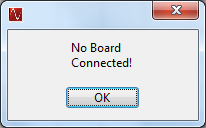
If the message appears as shown in Figure 4-5, then verify that all jumpers are in the default position and all power status LED D2 are illuminated. If certain jumpers are not installed in the proper location, then the USB controller does not boot from flash memory. If the power status LED is off, then there can be a problem with the power from the USB port, which can prevent the firmware from downloading. Unplug and reinstall the USB connector, and try to connect to the board. If this process fails, then try another USB port, or use an external 5-V DC source rated for 1 A and connected to test point TP10 (5 V) and either TP1, TP2 or TP3 (5-V return) to try to correct this problem. Before trying this option, first move the shunt on J10 to pins 1 and 2 to reroute the input power path to this test point.
 Figure 4-5 Download Firmware Error Message