SLVUBI1 May 2021
4.7 Current Limiting
Finally, it is worth mentioning the behavior of the device with regards to current limiting. Although, the recommended operating condition (ROC) of the device is to never exceed 3-A peak current, the design is robust enough to handle output currents up to the limiting mechanism of the device, which is typically 5–8 A, without damage to the DUT. This does not mean that external components cannot be damaged so it is imperative that the ratings of these components be in line with intended and, potential, unintended operational conditions.
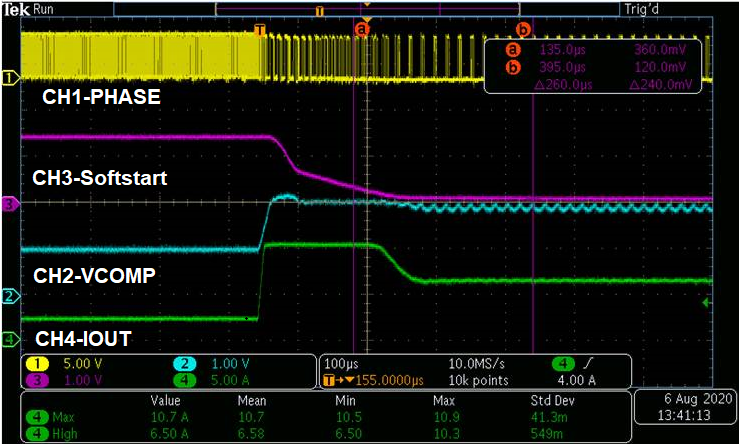
Figure 4-11 shows what happens when the high-side current limit threshold is exceeded where channel 4 is measuring the output current after the LC output filter. As the output current exceeds the limit threshold, the soft start pin (Channel 3) is pulled low causing the switching node to slow significantly. As soft start voltage drops, the charge on the LC filter is discharged until the steady state threshold current limit is maintained until the fault is removed. Once the fault is removed, and, only after the soft start pin re-establishes a voltage level equal to the VSENSE pin (VOUT), does the device start switching again.
 Figure 4-11 High-Side Current Limiting