SLVUC34 March 2021 TPS2521
5.2 Over Current Test
Use the following instructions to perform over current test on TPS25210 eFuse:
- Place jumper J5 to an appropriate position to obtain required blanking period as per Table 4-3.
- Set the input supply voltage VIN to 5 V and current limit of 10 A and enable the power supply.
- Place jumper J6 in suitable position to set required current limit as per Table 4-3.
- Now apply an over load greater than the set current limit between VOUT and PGND (Use a resistive load to apply over current).
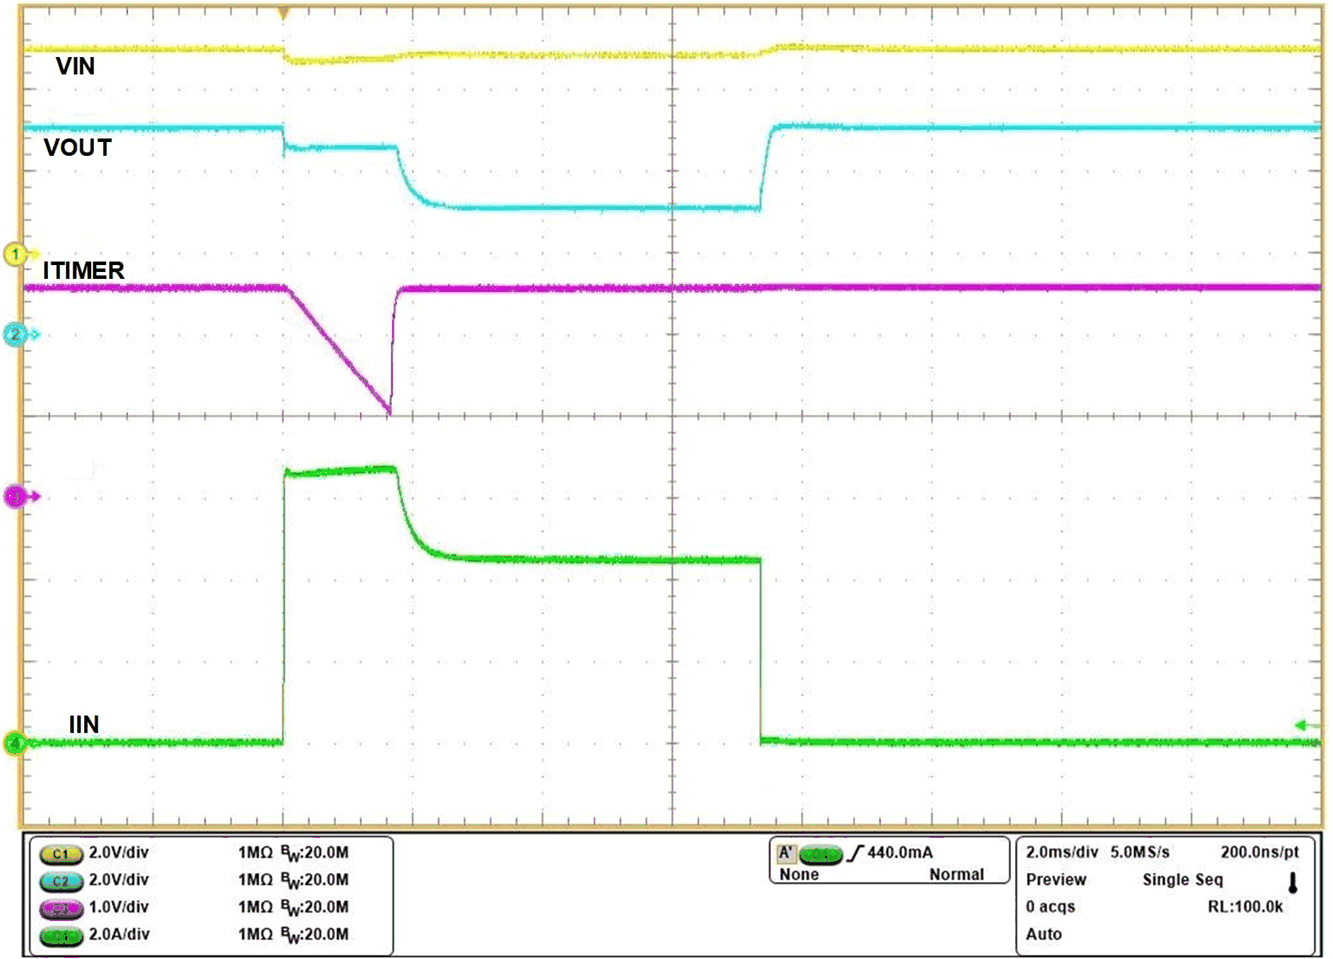
- The device responds to output over current condition by actively limiting the current after a user adjustable transient fault blanking interval. During active current limit, the output voltage will drop resulting in increased device power dissipation. If the device internal temperature exceeds the thermal shutdown threshold, the device will turn off.
Figure 5-4 shows an example of active current limit test on the TPS25210EVM
 Figure 5-4 Over Current Response of TPS25210x for 4.44-A
Current Limit Setting