SBAU206B april 2015 – may 2023 ADS1262 , ADS1263
- 1
- Abstract
- Trademarks
- 1EVM Overview
- 2Getting Started With the ADS1263EVM
-
3Analog Interface
- 3.1
Analog Input Options
- 3.1.1 ADS1263 Integrated Input Functions
- 3.1.2 Analog Sensor Connections
- 3.2 ADC Connections and Decoupling
- 3.3 Clocking
- 3.4 Voltage Reference
- 3.1
Analog Input Options
- 4Digital Interface
- 5Power Supplies
- 6Software Installation
- 7EVM Operation and GUI
- 8Bill of Materials, PCB Layout, and Schematics
- 9Revision History
7.6 Using the GUI to Control ADC2
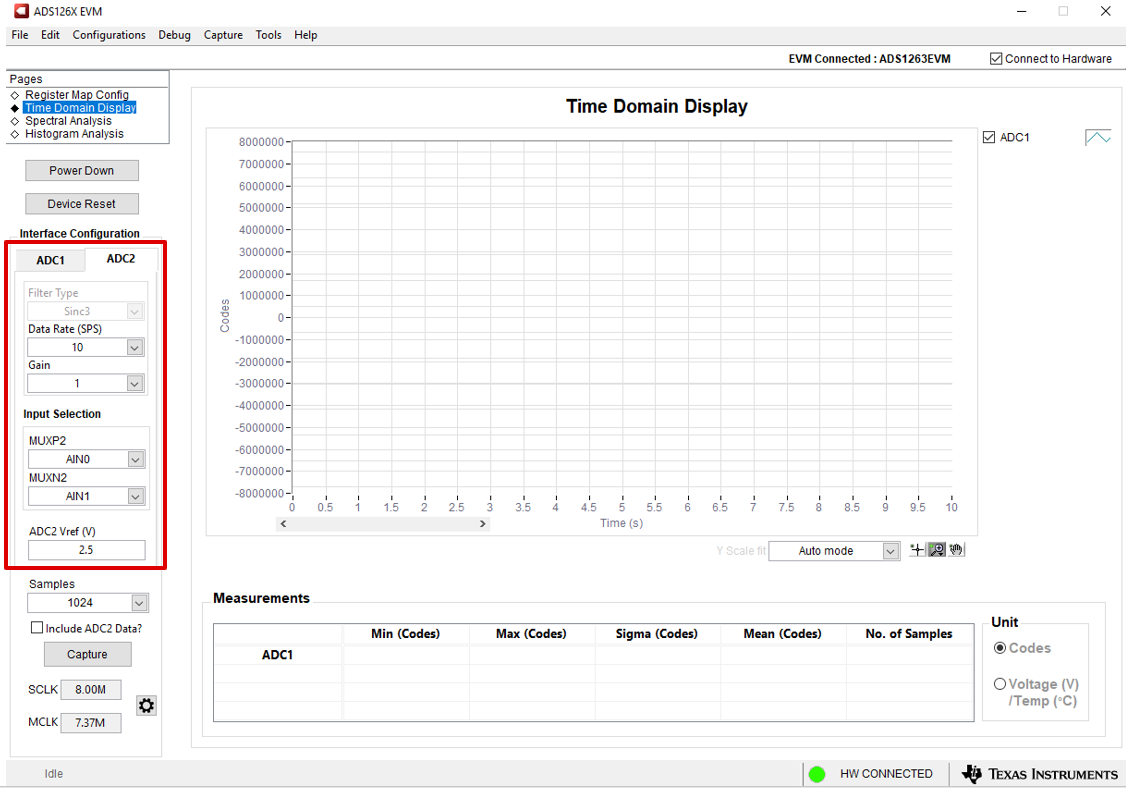
As noted throughout this document, the ADS1263 includes two ADCs: a 32-bit primary device (ADC1), and a 24-bit secondary converter (ADC2). The ADS1263EVM GUI is capable of controlling both ADC1 and ADC2 using the global settings on the left side of the GUI. Figure 7-7 highlights the controls for ADC2.
 Figure 7-7 ADS1263EVM GUI Global Settings
for ADC2
Figure 7-7 ADS1263EVM GUI Global Settings
for ADC2As Figure 7-7 shows, ADC2 can use a different data rate, gain, input channels, and reference voltage compared to ADC1. However, ADC2 can only use the Sinc3 filter, and both ADCs must use the same number of Samples. To view both ADC1 and ADC2 data in the GUI, select the Include ADC2 data? check box.
The GUI operates by converting samples at the data rate specified by ADC1, which can be different from ADC2. Therefore:
- If the data rate for ADC2 is greater than the data rate for ADC1, some new samples for ADC2 are not captured by the GUI. The GUI provides a warning when these conditions are met.
- If the data rate for ADC2 is less than the data rate for ADC1, repeat values are sampled for ADC2. These values are not shown in the GUI such that ADC2 data is only updated when the data are new.
See the ADC2 section of the ADS1263 data sheet for more information about how to configure and retrieve data from ADC2.