SPNA248 March 2021 TM4C1292NCPDT , TM4C1292NCPDT , TM4C1292NCZAD , TM4C1292NCZAD , TM4C1294KCPDT , TM4C1294KCPDT , TM4C1294NCPDT , TM4C1294NCPDT , TM4C1294NCZAD , TM4C1294NCZAD , TM4C1299KCZAD , TM4C1299KCZAD , TM4C1299NCZAD , TM4C1299NCZAD , TM4C129DNCPDT , TM4C129DNCPDT , TM4C129DNCZAD , TM4C129DNCZAD , TM4C129EKCPDT , TM4C129EKCPDT , TM4C129ENCPDT , TM4C129ENCPDT , TM4C129ENCZAD , TM4C129ENCZAD , TM4C129LNCZAD , TM4C129LNCZAD , TM4C129XKCZAD , TM4C129XKCZAD , TM4C129XNCZAD , TM4C129XNCZAD
- Trademarks
- 1 Introduction
- 2 Application Examples
- 3 Application Setup
- 4 Download and Import the Ethernet examples
- 5 Enet_tcpecho_server_lwip Example Overview
- 6 Enet_tcpecho_server_static_ip_lwip Example Overview
- 7 Enet_udpecho_server_lwip Example Overview
- 8 Enet_dns_lwip Example Overview
- 9 Enet_sntp_lwip Example Overview
- 10Enet_tcpecho_client_lwip Example Overview
- 11Enet_adcsensor_client_lwip Example Overview
- 12Enet_udpecho_client_lwip Example Overview
- 13References
5.4 Run the enet_tcpecho_server_lwip Example
Connect the EK-TM4C1294XL LaunchPad to either the Ethernet switch or the router with an Ethernet cable as shown in Figure 5-6. Run the example. With the terminal window opened, you should see the IP address (pointed by arrow 1) displayed and the server is ready as shown in Figure 5-6. Record the IP address as you will need this information on the client side. Initially the server will be in a listening state waiting for the client to connect to it. Therefore, to continue the rest of the example, a remote client needs to be setup.
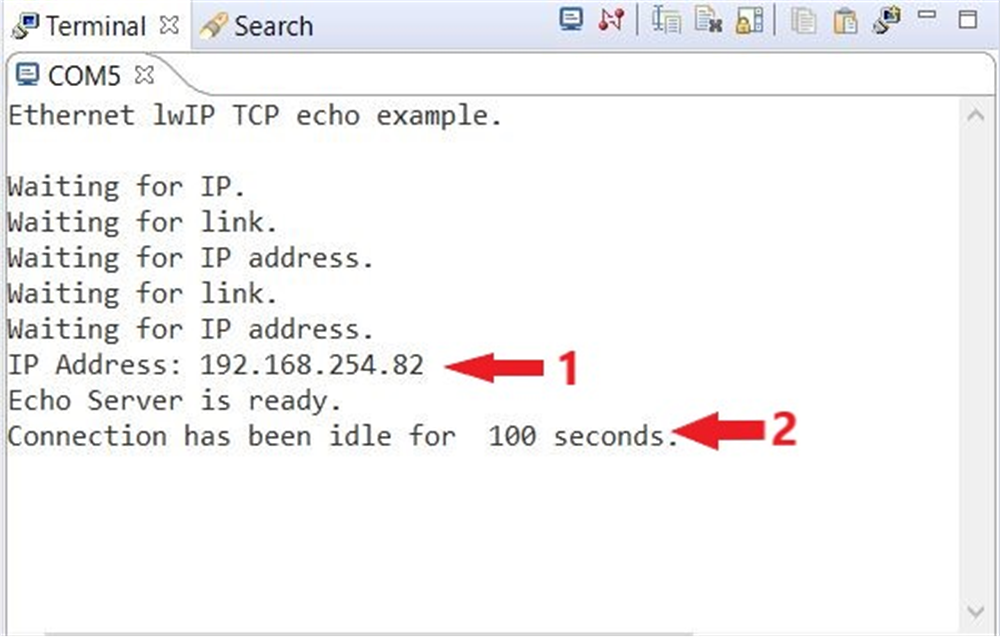 Figure 5-6 Enet_tcpecho_server_lwip
Output
Figure 5-6 Enet_tcpecho_server_lwip
OutputThe SocketTest tool is used that will act as the client running on the PC. Make sure the PC is connected to the same network as the EK-TM4C1294XL with the same subnet mask.
Follow the steps shown in Figure 5-7 to setup the client:
- Open SocketTest and enter the server IP address as well as the port number 23. Port 23 is the default Telnet port number in TCP and UDP protocols. Finally, press the “Connect” button. In a short while the connection with the server will be established and you are ready for conversion with the server.
- Go to the “Message” field and type in some messages and then hit the “Send” button.
- The message you enter will be displayed in the conversation field. When the server receives the message, it will invert the case of the message and then echo back the message to the client. The server also replies to the client the number of characters it receives.
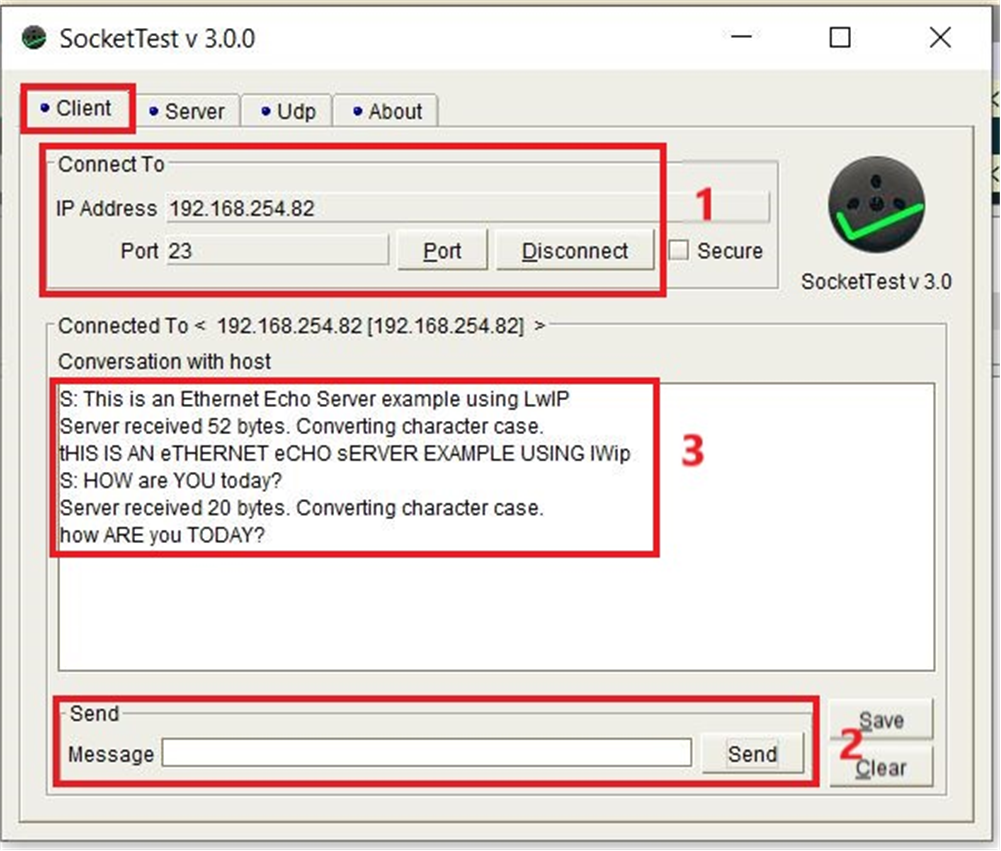 Figure 5-7 SocketTest Client Configuration
for Enet_tcpecho_server_lwip
 Examine the second message “HOW are YOU today?” that was sent by the client to the server. If you count manually, this message has a total length of 20 bytes including the two \n\r escape characters. The \n is the New Line and \r is the Carriage Return character in the ASCII table.
The server replied with a message that says “Server received 20 bytes. Converting character case. how ARE you TODAY?". First, the number of characters that was received by the server was indeed 20. The entire message that was sent back by the server has a total length of 73 bytes.
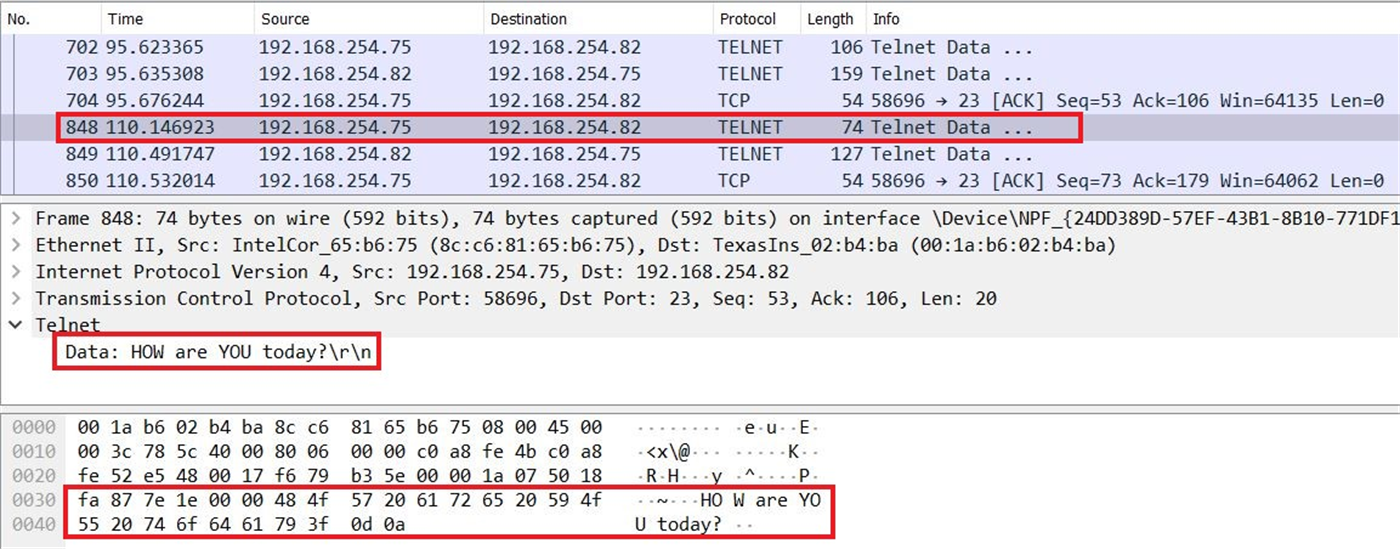 Figure 5-8 Client to Server Wireshark Capture
for Enet_tcpecho_server_lwip
 Figure 5-9 shows the corresponding message from the client (IP address 192.168.254.75) to the server (IP address 192.168.254.82).
When the server sends the message, it waits for the acknowledgment from the client confirming the data was received successfully. In the callback function called by tcp_sent(), the server simply prints the number of bytes that was acknowledged by the client on the terminal window as shown in Figure 5-9.
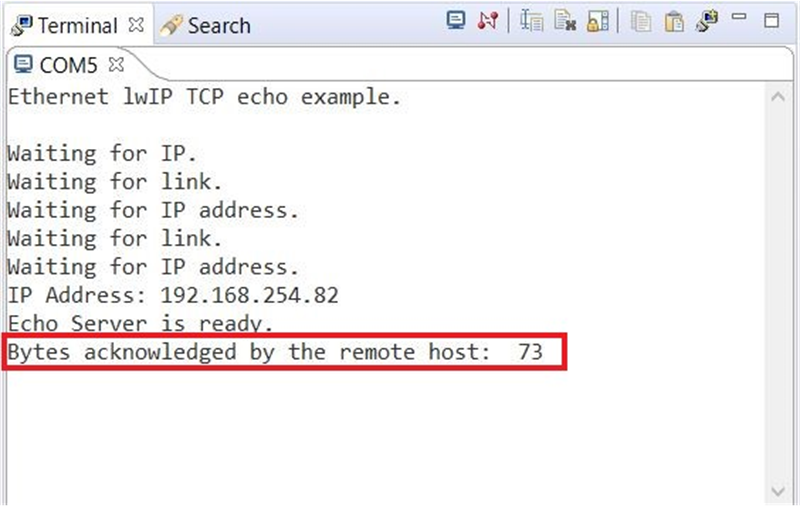 Figure 5-9 Client Confirmation of Data
Received for Enet_tcpecho_server_lwip
 Also, examine the Wireshark capture for the server’s response in Figure 5-10. The server (IP Address 192.168.254.82) sends the 73 characters message to the client (192.168.254.75) and it was acknowledged by the client for the reception of the data.
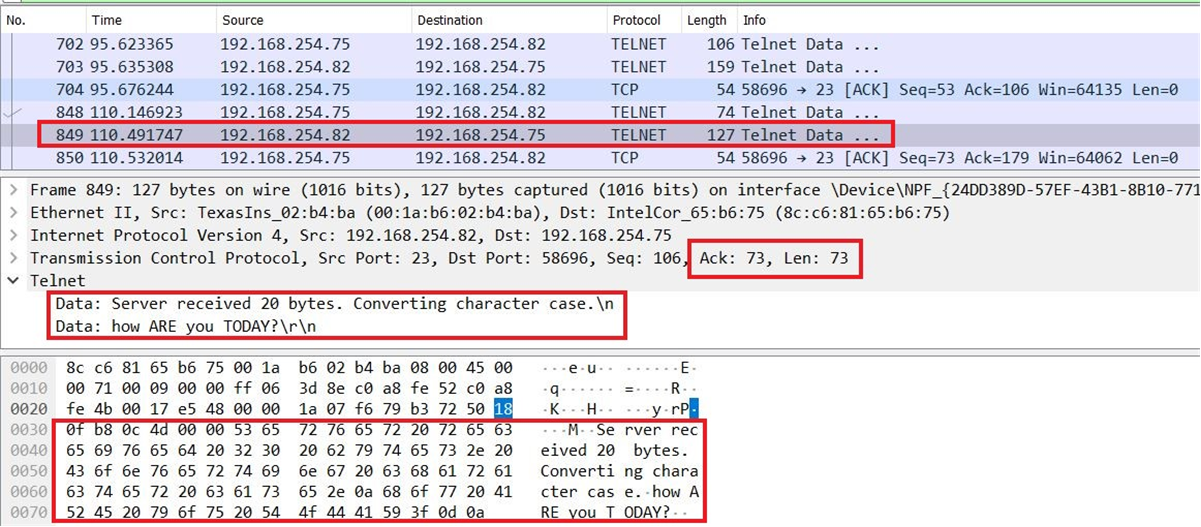 Figure 5-10 Server to Client Wireshark Capture
for Enet_tcpecho_server_lwip
 Suppose you let the connection idle, the server application utilizes the tcp_poll() to periodically trigger the callback function every 5 seconds to print out the elapse time the server is idle. In a real application, it is possible to program the idle internal before closing the connection to save power. Refer to the box 2 in Figure 5-6 where it reports 100 seconds as the time the server is idle since the last transaction.