SLVUBT0A June 2020 – January 2021
4.1 Changing the Communication Interface
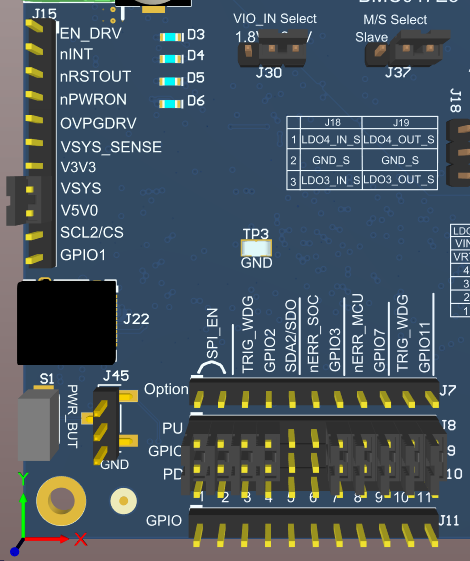
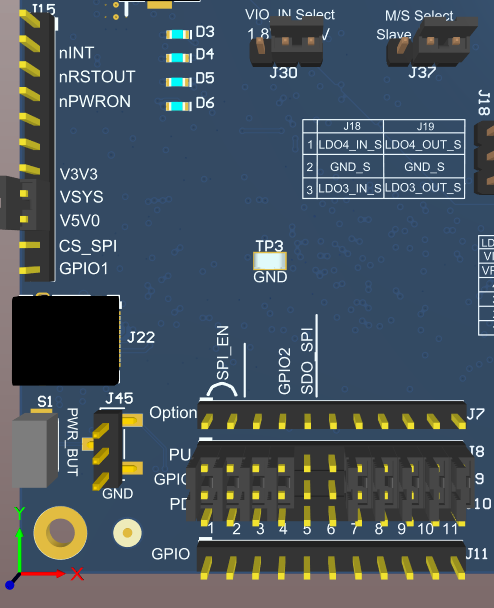
The default setting for communication with the PMIC is I2C. In some devices a second I2C channel is available on GPIO1 and GPIO2. In order to support the second I2C channel the GPIO1 and GPIO2 must be configured appropriately and pullups applied through J8 and J9, as shown in Figure 4-1 and Figure 4-2. Alternatively these GPIOs can be used to support SPI communication.
 Figure 4-1 TPS6594EVM Interface Settings
for Communication
 Figure 4-2 TPS6593EVM Interface Settings
for Communication
Figure 4-2 TPS6593EVM Interface Settings
for CommunicationChanging to SPI requires a minor change to the jumper settings. The first jumper to place is on the SPI_EN option on connector J7, as shown in Figure 4-1 and Figure 4-2. Placing this jumper will connect the micro controller to the SPI bus which is connected to all available PMICs through the EVM stack connection through J29. In a multiple EVM stackup, this jumper should only be placed on the EVM with the USB connection to the host computer. The SPI does not have a device ID and therefore the chip select is used to determine which PMIC will receive and respond to commands on the SPI bus. The signals SCL2/CS and GPIO1 on J15 should only be jumpered on the EVM which is intended to communicate with the GUI (through the micro controller). All other EVMs which are stacked should pull GPIO1 high, so that the PMIC does not respond or interfere with the SPI communication.