SPRADB0 may 2023 AM62A1-Q1 , AM62A3 , AM62A3-Q1 , AM62A7 , AM62A7-Q1 , AM67A , AM68A , AM69A
6 Using the Model
The next step is to use the model in practice.
The accuracy reported during training is helpful for determining the effectiveness of the model, but visualizing on realistic input is crucial to be confident the model is performing as expected.
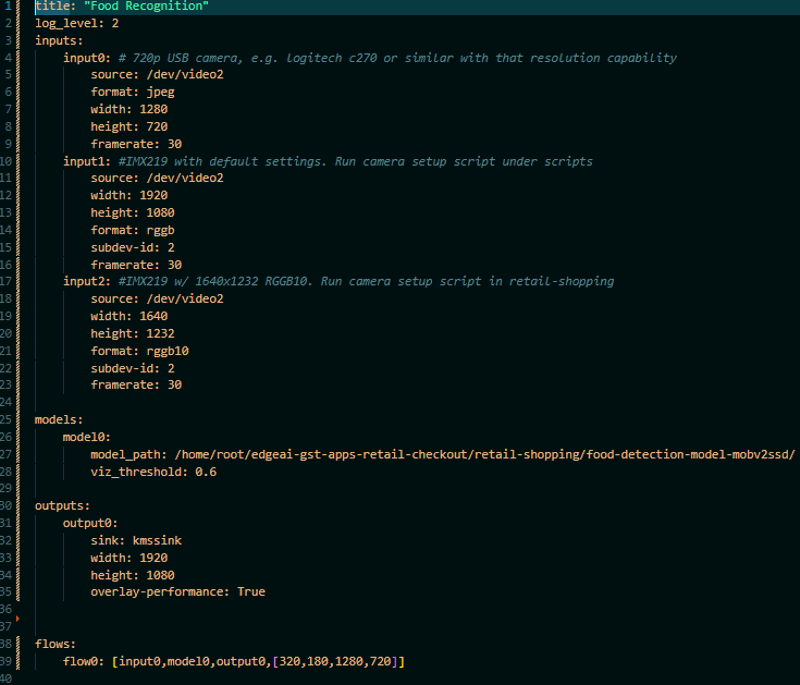
The fastest way to evaluate a model for new input on the target device is to use it within edgeai-gst-apps. This is a valuable proof-of-concept for evaluating more practical accuracy without writing new code. Copy the new directory within “compiled-artifacts” onto the target device and modify a config file like object_detection.yaml (shown in Figure 6-1) to point to this model directory. Ensure that the model is used in the flow at the bottom of the config file. The input can either be a live input like USB camera or a premade video/directory of image files.
 Figure 6-1 Example of edgeai-gst-apps
config File
Figure 6-1 Example of edgeai-gst-apps
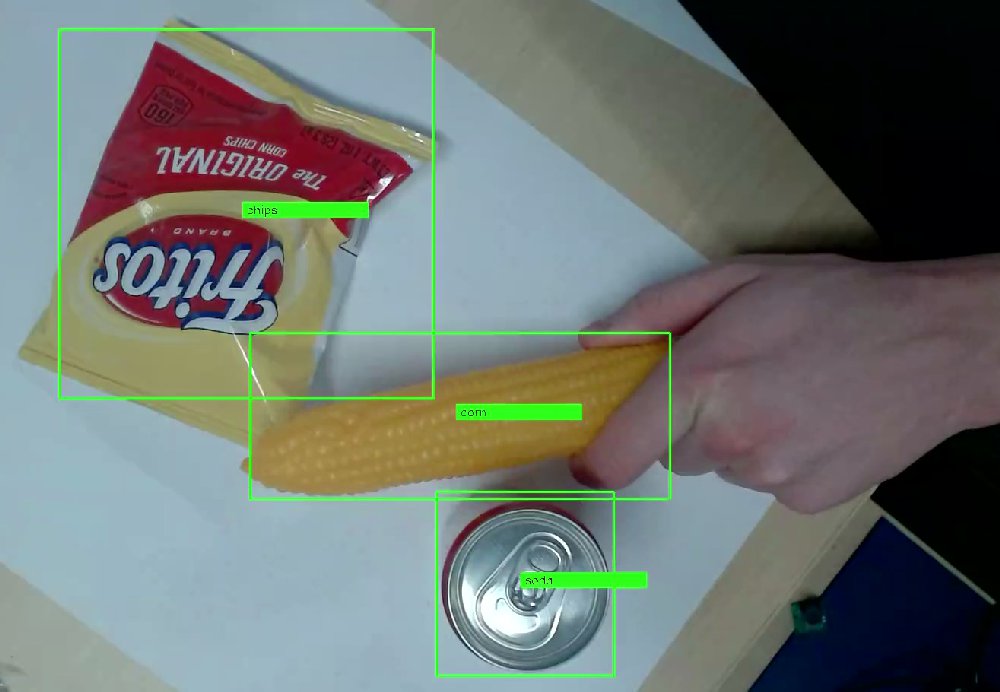
config FileA connected display/saved video file looks like Figure 6-2 (or may have performance information overlaid depending on how the output is configured):
 Figure 6-2 Gstreamer Display When Using
edgeai-gst-apps for Newly Trained Model
Figure 6-2 Gstreamer Display When Using
edgeai-gst-apps for Newly Trained ModelAn additional benefit of running the model in this way is that a holistic gstreamer string is printed to the terminal, which is a useful starting point for application development.