SLVAF59 April 2021 TPS2372 , TPS2373 , TPS23730 , TPS23731 , TPS23734 , TPS2375 , TPS2375-1 , TPS23750 , TPS23751 , TPS23752 , TPS23753A , TPS23754 , TPS23754-1 , TPS23755 , TPS23756 , TPS23757 , TPS23758 , TPS2376 , TPS2376-H , TPS2377 , TPS2377-1 , TPS23770 , TPS2378 , TPS2379
2.1 PoE Input
Find the RJ45 input jack. This should connect the twisted pairs with both the data and the power to the Ethernet PHY transformer. This transformer separates the data from the power. Ensure that the pairsets are correct for PoE. The pairsets are 1 and 2, 3 and 6, 4 and 5, 7 and 8. Note that two pairsets do not have to connect to the transformer the two pairs can connect to the diode bridge directly. Ensure that the power side and the data side of the transformer are correct. Sometimes the inductor is not included on the data side. Also note that two pairs does not have to connect to the data transformer, they can connect to the diode bridge directly. Also check they have the power side and the data side of the transformer correct. Backwards will not support the current, some will not have the inductors on the data side. Review the data sheet of the Ethernet PHY.
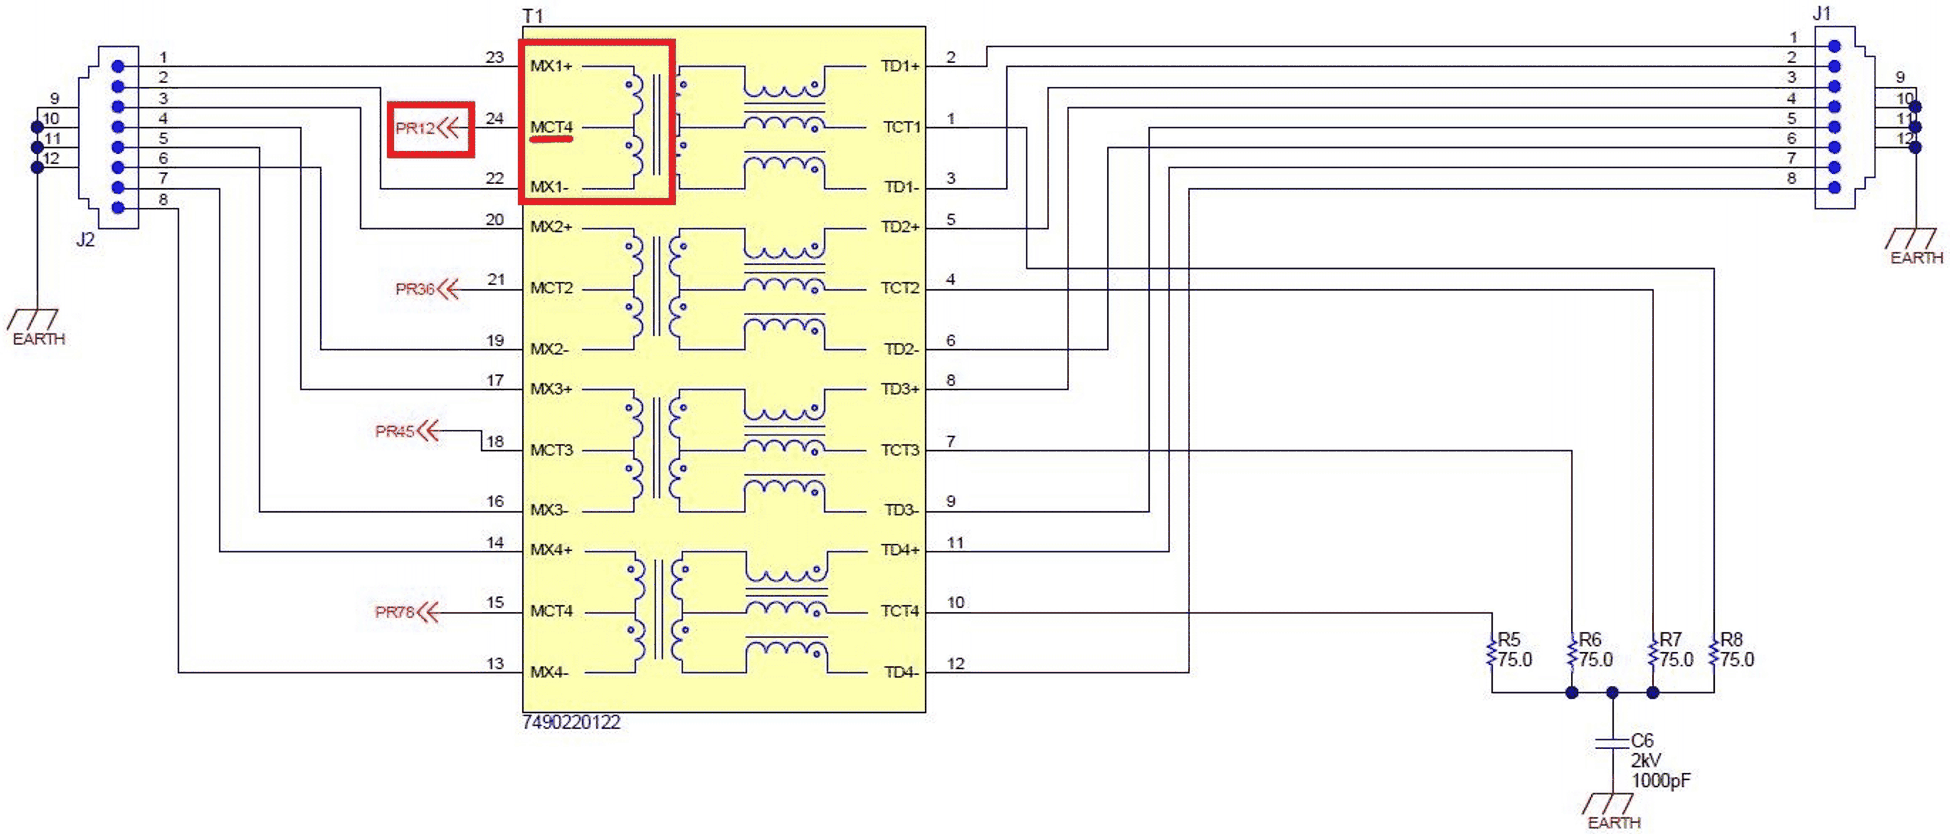 Figure 2-1 Input Transformer
Terminate the pairsets with Bob-Smith terminations. Without them, the PoE will probably not work with detection. Connect the Bob-Smith (BS) plane to Earth ground; if Earth ground is not available, then connect it to secondary ground. If it is connected to secondary ground, there should be a provision for a common mode choke on the input. If it is connected to secondary ground, there should be a provision for a common mode choke on the input.
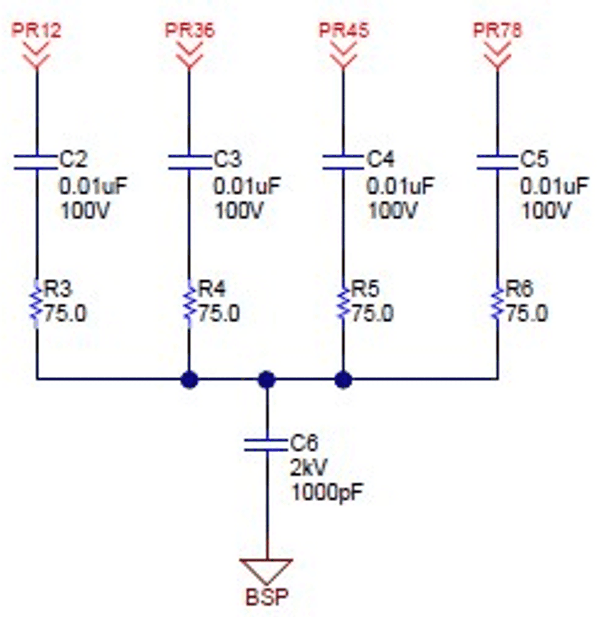 Figure 2-2 Bob-Smith Terminations
Ensure the data lines are properly terminated. This guide is focused on the power portion of the cable. How these are terminated should be in the PHY transformer data sheet, but it will normally be pulled up to a 3.3-V rail; this information is in the data sheet.
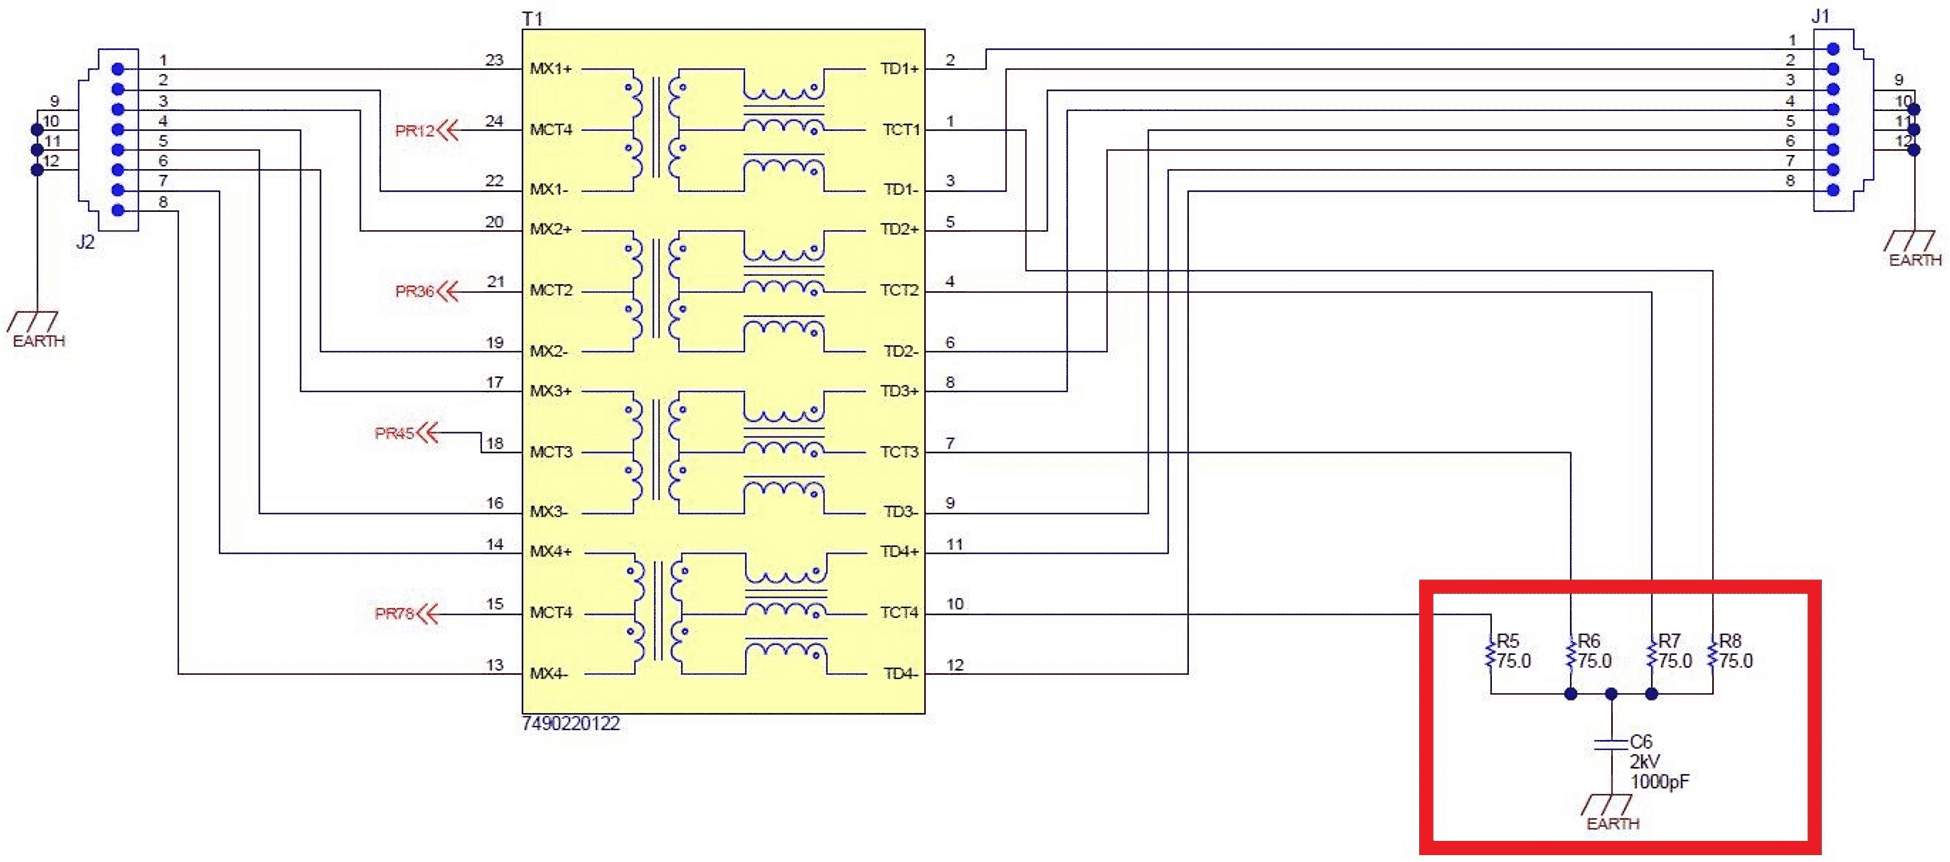 Figure 2-3 Input Transformer Data Lines Terminations
Follow the input pairsets to their respective rectifier. This can be discrete diodes as shown in Figure 2-4, it can be an integrated FET bridge, integrated diode bridge, discrete FET/diode combination (called a hybrid). For 13-W designs, typically a discrete diode bridge is best since it is lowest cost. Since this is the lowest power design, there is low losses in the diodes since there is low current. As we move to 25-W, 51-W, and 71-W of power, the losses in the diodes increase since the input current increases (from around 250mA to 1.5A). At 25-W, it can be decided if the diodes are acceptable, or to use FETs or an integrated solution. Usually this is costly for 25-W solution but it can be done. At 51-W and above, FETs are almost required. A hybrid bridge is used in the 51W TPS23730EVM-093. At 71-W, an integrated solution is optimal. With this much power, it also affects thermals with so much current going through these diodes. In any design, ensure the diodes or FETs can handle maximum current (lowest input voltage, maximum power). Remember that 25-W can be sent through two pairsets instead of four. The max current would be 676mA – and we double it for the rating – 1.2A or 2A diodes. The DEN resistor will need to change with the input bridge type. Please see the detection resistor in the PoE Settings Section.
 Figure 2-4 Input Rectifying Bridge: Discrete Diode Bridge
There should be some EMI filtering if we are following the power after it is rectified. It is suggested to leave space for an EMI choke. These help with conducted emissions. It is also suggested to have space for ferrite beads that are in series with the EMI choke. These help with radiated emissions. For part selection, ensure they are properly rated for the power. Please also connect the ferrite beads and EMI choke in series to add their properties. If they are in parallel, one can be bypassed so their effects do not add.
 Figure 2-5 Input EMI Filter Components
There should also be some input capacitors. These are required for filtering and for detection. The IEEE 802.3 detection is an impedance not just a resistance. So, the maximum input capacitance is 120nF. Please note that the detection will not work if this is violated.
 Figure 2-6 Input Detection Capacitance
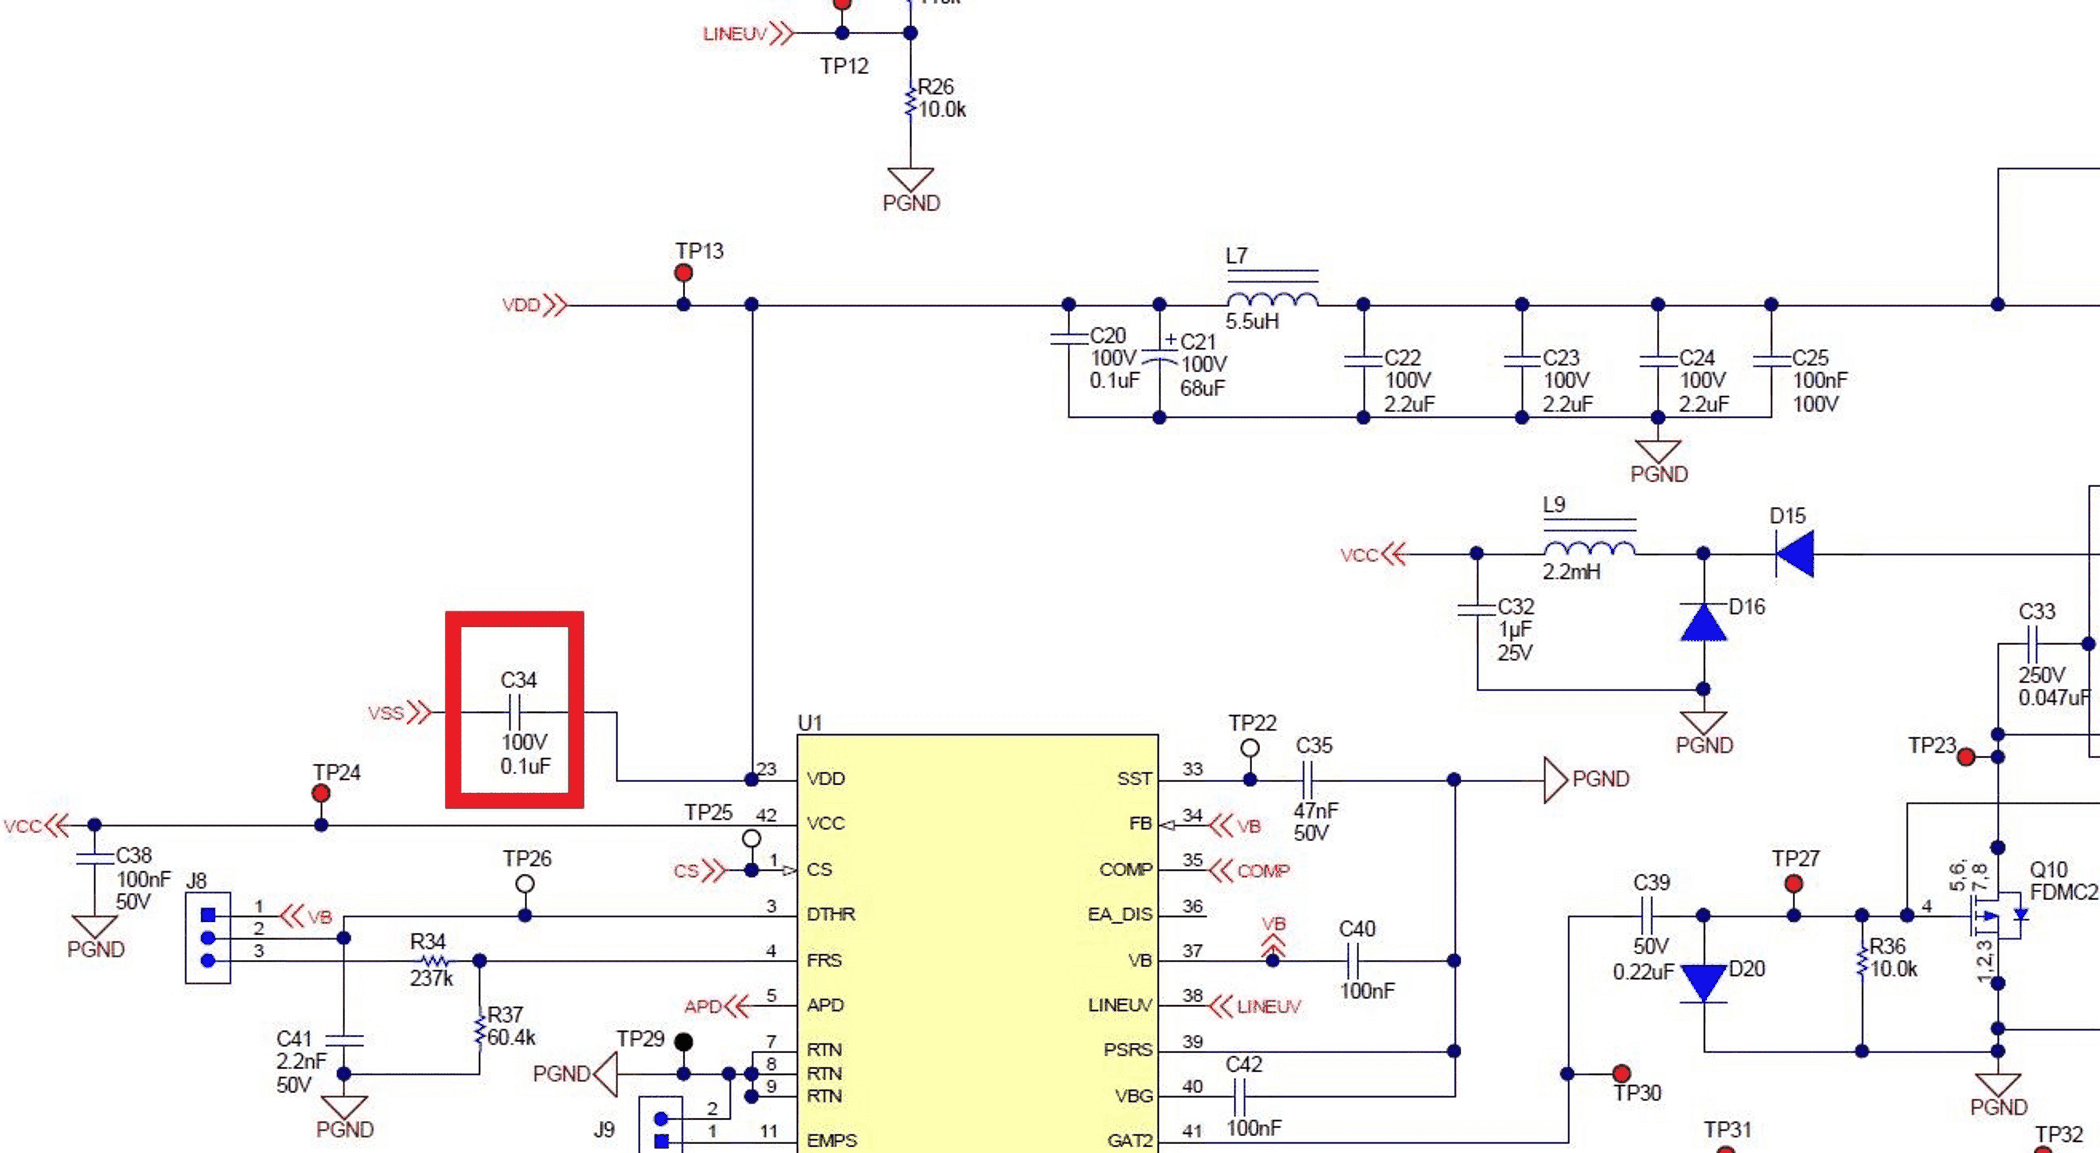 Figure 2-7 Input Detection Capacitance Continued
Next check for a TVS diode on the input lines (VDD-VSS). This diode is critical since it protects the IC from overvoltage events like ESD or surge. This diode should be a SMAJ 58. A bigger package is needed for outdoor applications. The 58 is critical. This sets the clamping voltage, and this is around 92-V. The next size up is 98-V, but the IC VDD_VSS abs max is 100V – so a 98-V clamp is too close. Damage has been observed in the field with this rating. Please give some margin with the 58 part.
 Figure 2-8 TVS Diode: VDD_VSS
VDD-VSS always requires a small bypass capacitor, usually 0.1uF. This should always be here, and contributes to the 120nF max between VDD and VSS for detection.
 Figure 2-9 VDD_VSS Bypass Capacitor
TVS between VSS_RTN. This TVS helps protect the internal pass FET during surge and ESD events. It is recommended for outdoor applications, but makes a design more reliable in all applications. Surge is a system level issue, so system level solutions are required. So it is good practice to have space for a TVS between VSS_RTN just in case three months into the design, it fails surge.
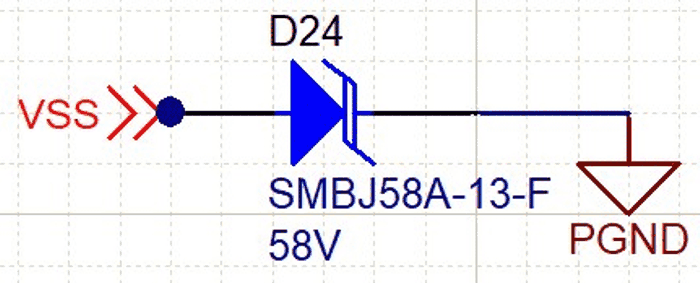 Figure 2-10 TVS Diode: VSS_RTN