SBAU394A April 2022 – September 2022
- ADS1285 Evaluation Module
- Trademarks
- 1 EVM Overview
- 2 ADS1285EVM-PDK Quick-Start Guide
- 3 EVM Analog Interface
- 4 Digital Interface
- 5 Power Supplies
- 6 Digital-to-Analog Converter
- 7 ADS1285EVM-PDK Initial Setup
- 8 ADS1285EVM-PDK Software Reference
- 9 ADS1285EVM-PDK Bill of Materials, PCB Layout, and Schematics
- 10References
- 11Revision History
2 ADS1285EVM-PDK Quick-Start Guide
The following instructions are a step-by-step guide to connecting the ADS1285EVM-PDK to the computer and evaluating the performance of the ADS1285:
- Review the default jumper settings in Section 7 and GUI software installation in Section 7.2.
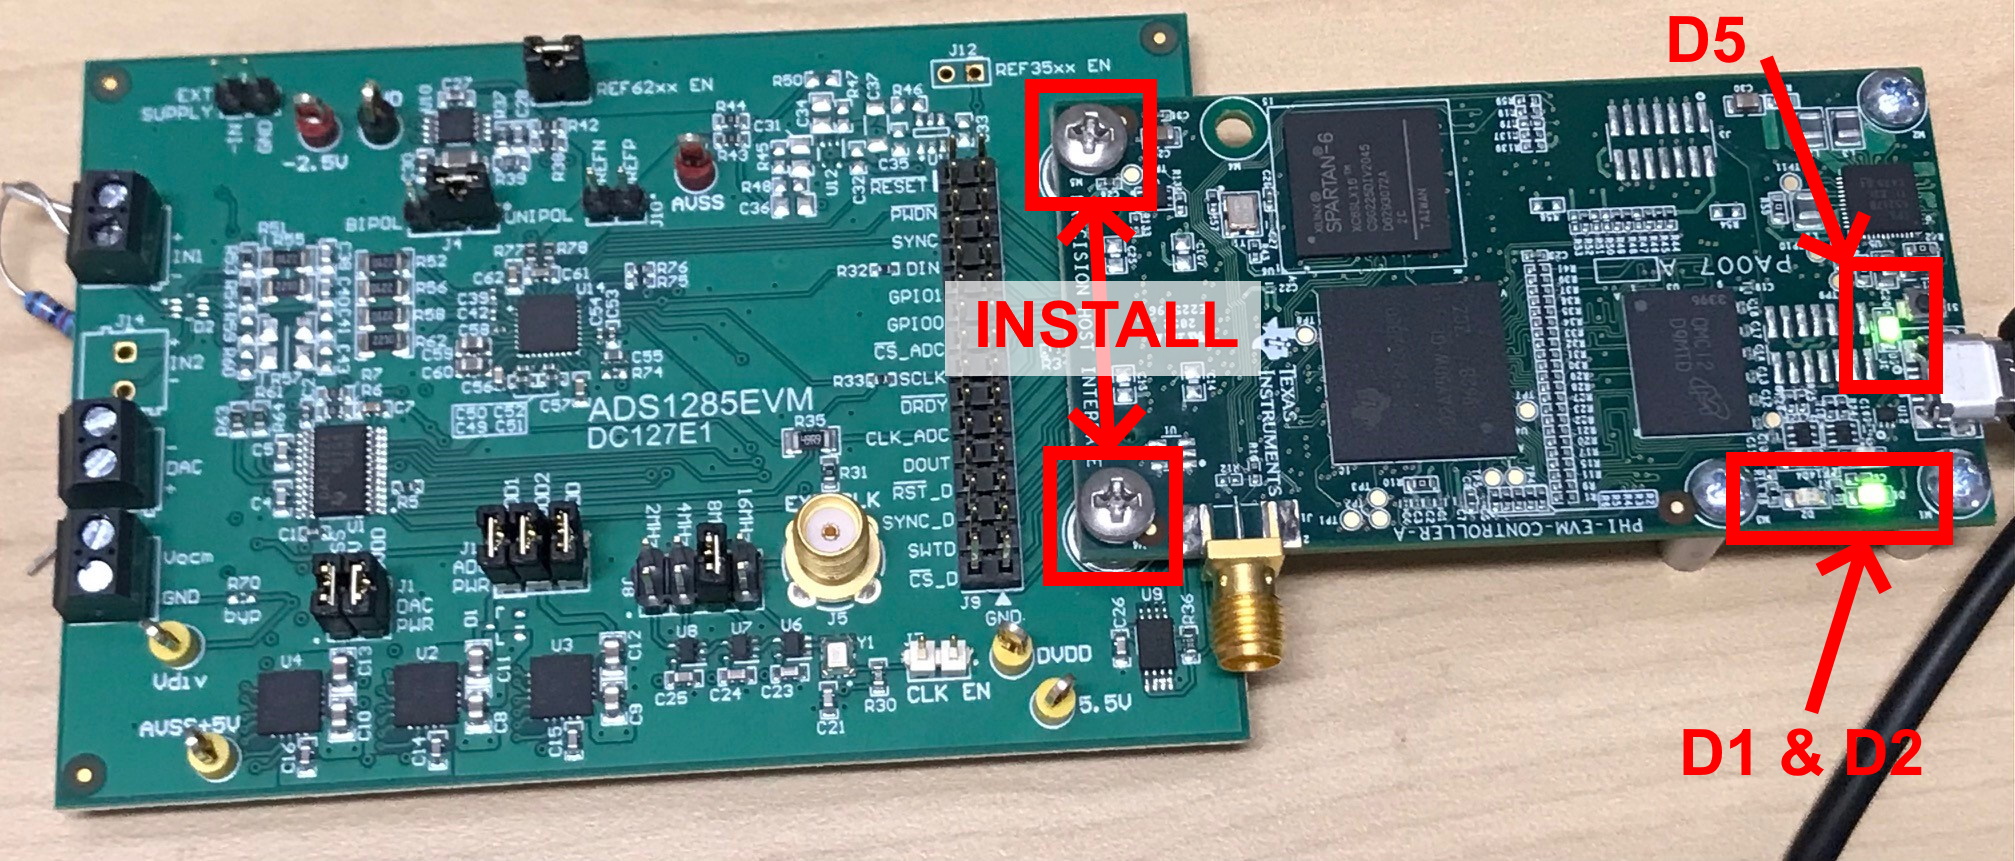
- Connect the ADS1285EVM-PDK to the PHI. Install the two screws as indicated in Figure 2-1.
- Attach the micro USB to the PHI board and your PC. Three LEDs illuminate on the PHI board to indicate connectivity to the PC.
- LED D5 on the PHI lights up, indicating that the PHI is powered up.
- LEDs D1 and D2 on the PHI start blinking to indicate that the PHI is booted up and communicating with the PC. Figure 2-1 shows the resulting LED indicators.
 Figure 2-1 ADS1285EVM-PDK Hardware Setup and LED Indicators
- Launch the ADS1285EVM-PDK GUI software and power will be supplied to the EVM.
- The default installation path is C:\Program Files (x86)\Texas Instruments\ADS1285 EVM.
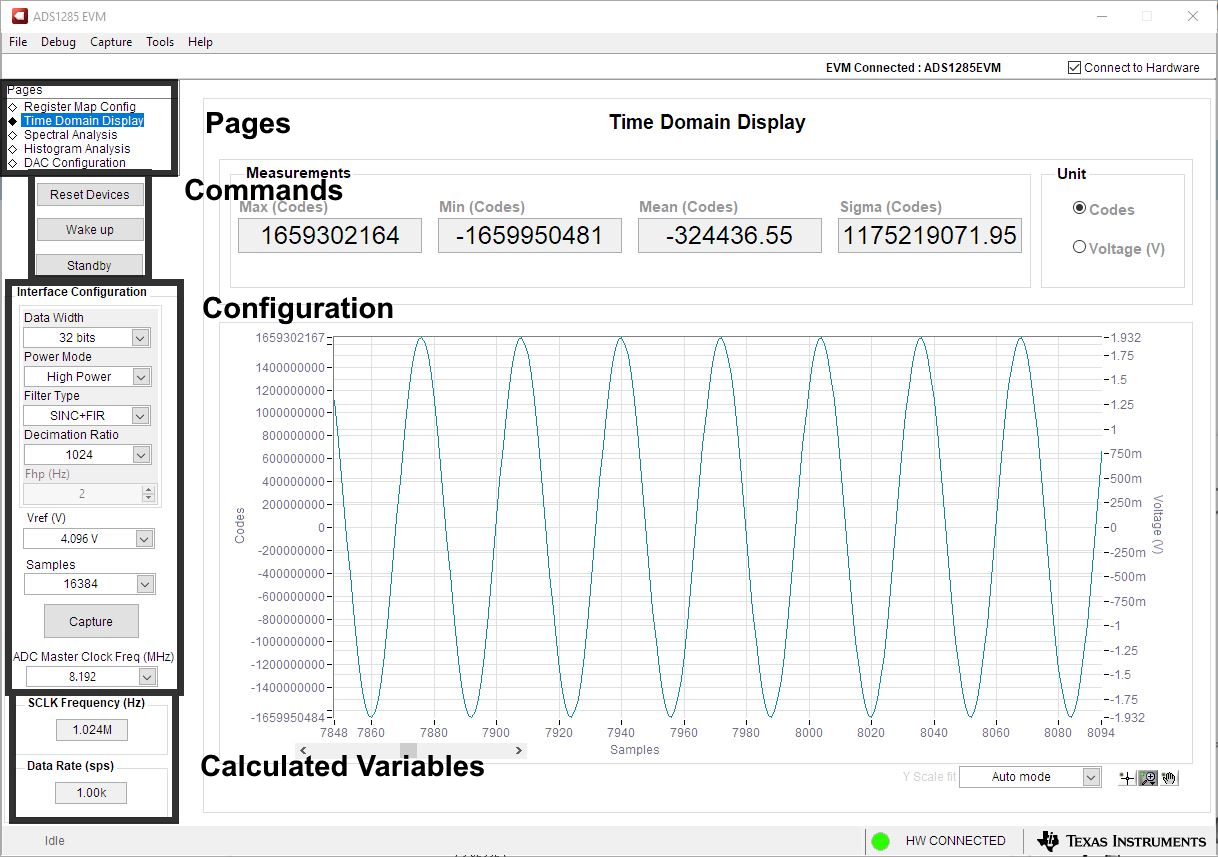
- As shown in Figure 2-2, use the Configuration section of the GUI for a specific clock input, desired data rate, and number of samples. Then, use the Capture button to collect data. Section 8.1 details the EVM GUI global input parameters and the various pages within the GUI.
 Figure 2-2 EVM GUI Global Input Parameters