SLOU558B August 2022 – January 2023 DRV8452 , DRV8462 , DRV8962
- Abstract
- Trademarks
- 1 Introduction
- 2 Jumpers Table and Setup
- 3 Software Setup
- 4 Hardware Setup
- 5 Launching the DRV84xx_DRV82x2_DRV89x2-EVM GUI Application
- 6 GUI Operations DRV8461EVM, DRV8462EVM, and DRV8462VEVM
- 7 GUI Operations DRV8962EVM and DRV8962VEVM
- 8 GUI Operations DRV8262EVM and DRV8262VEVM
- 9 Updating Firmware
- 10Evaluation Hardware Overview
- A Appendix A
A Appendix A
The jumpers J16-18 and J20 in the board are populated differently depending on which version of the board was ordered.
Make sure to use jumper shunts to completely populate J4 and J8. J10 must be populated for there to be communication with the EZFET. Use the following figure to populate the following jumpers for all variants:
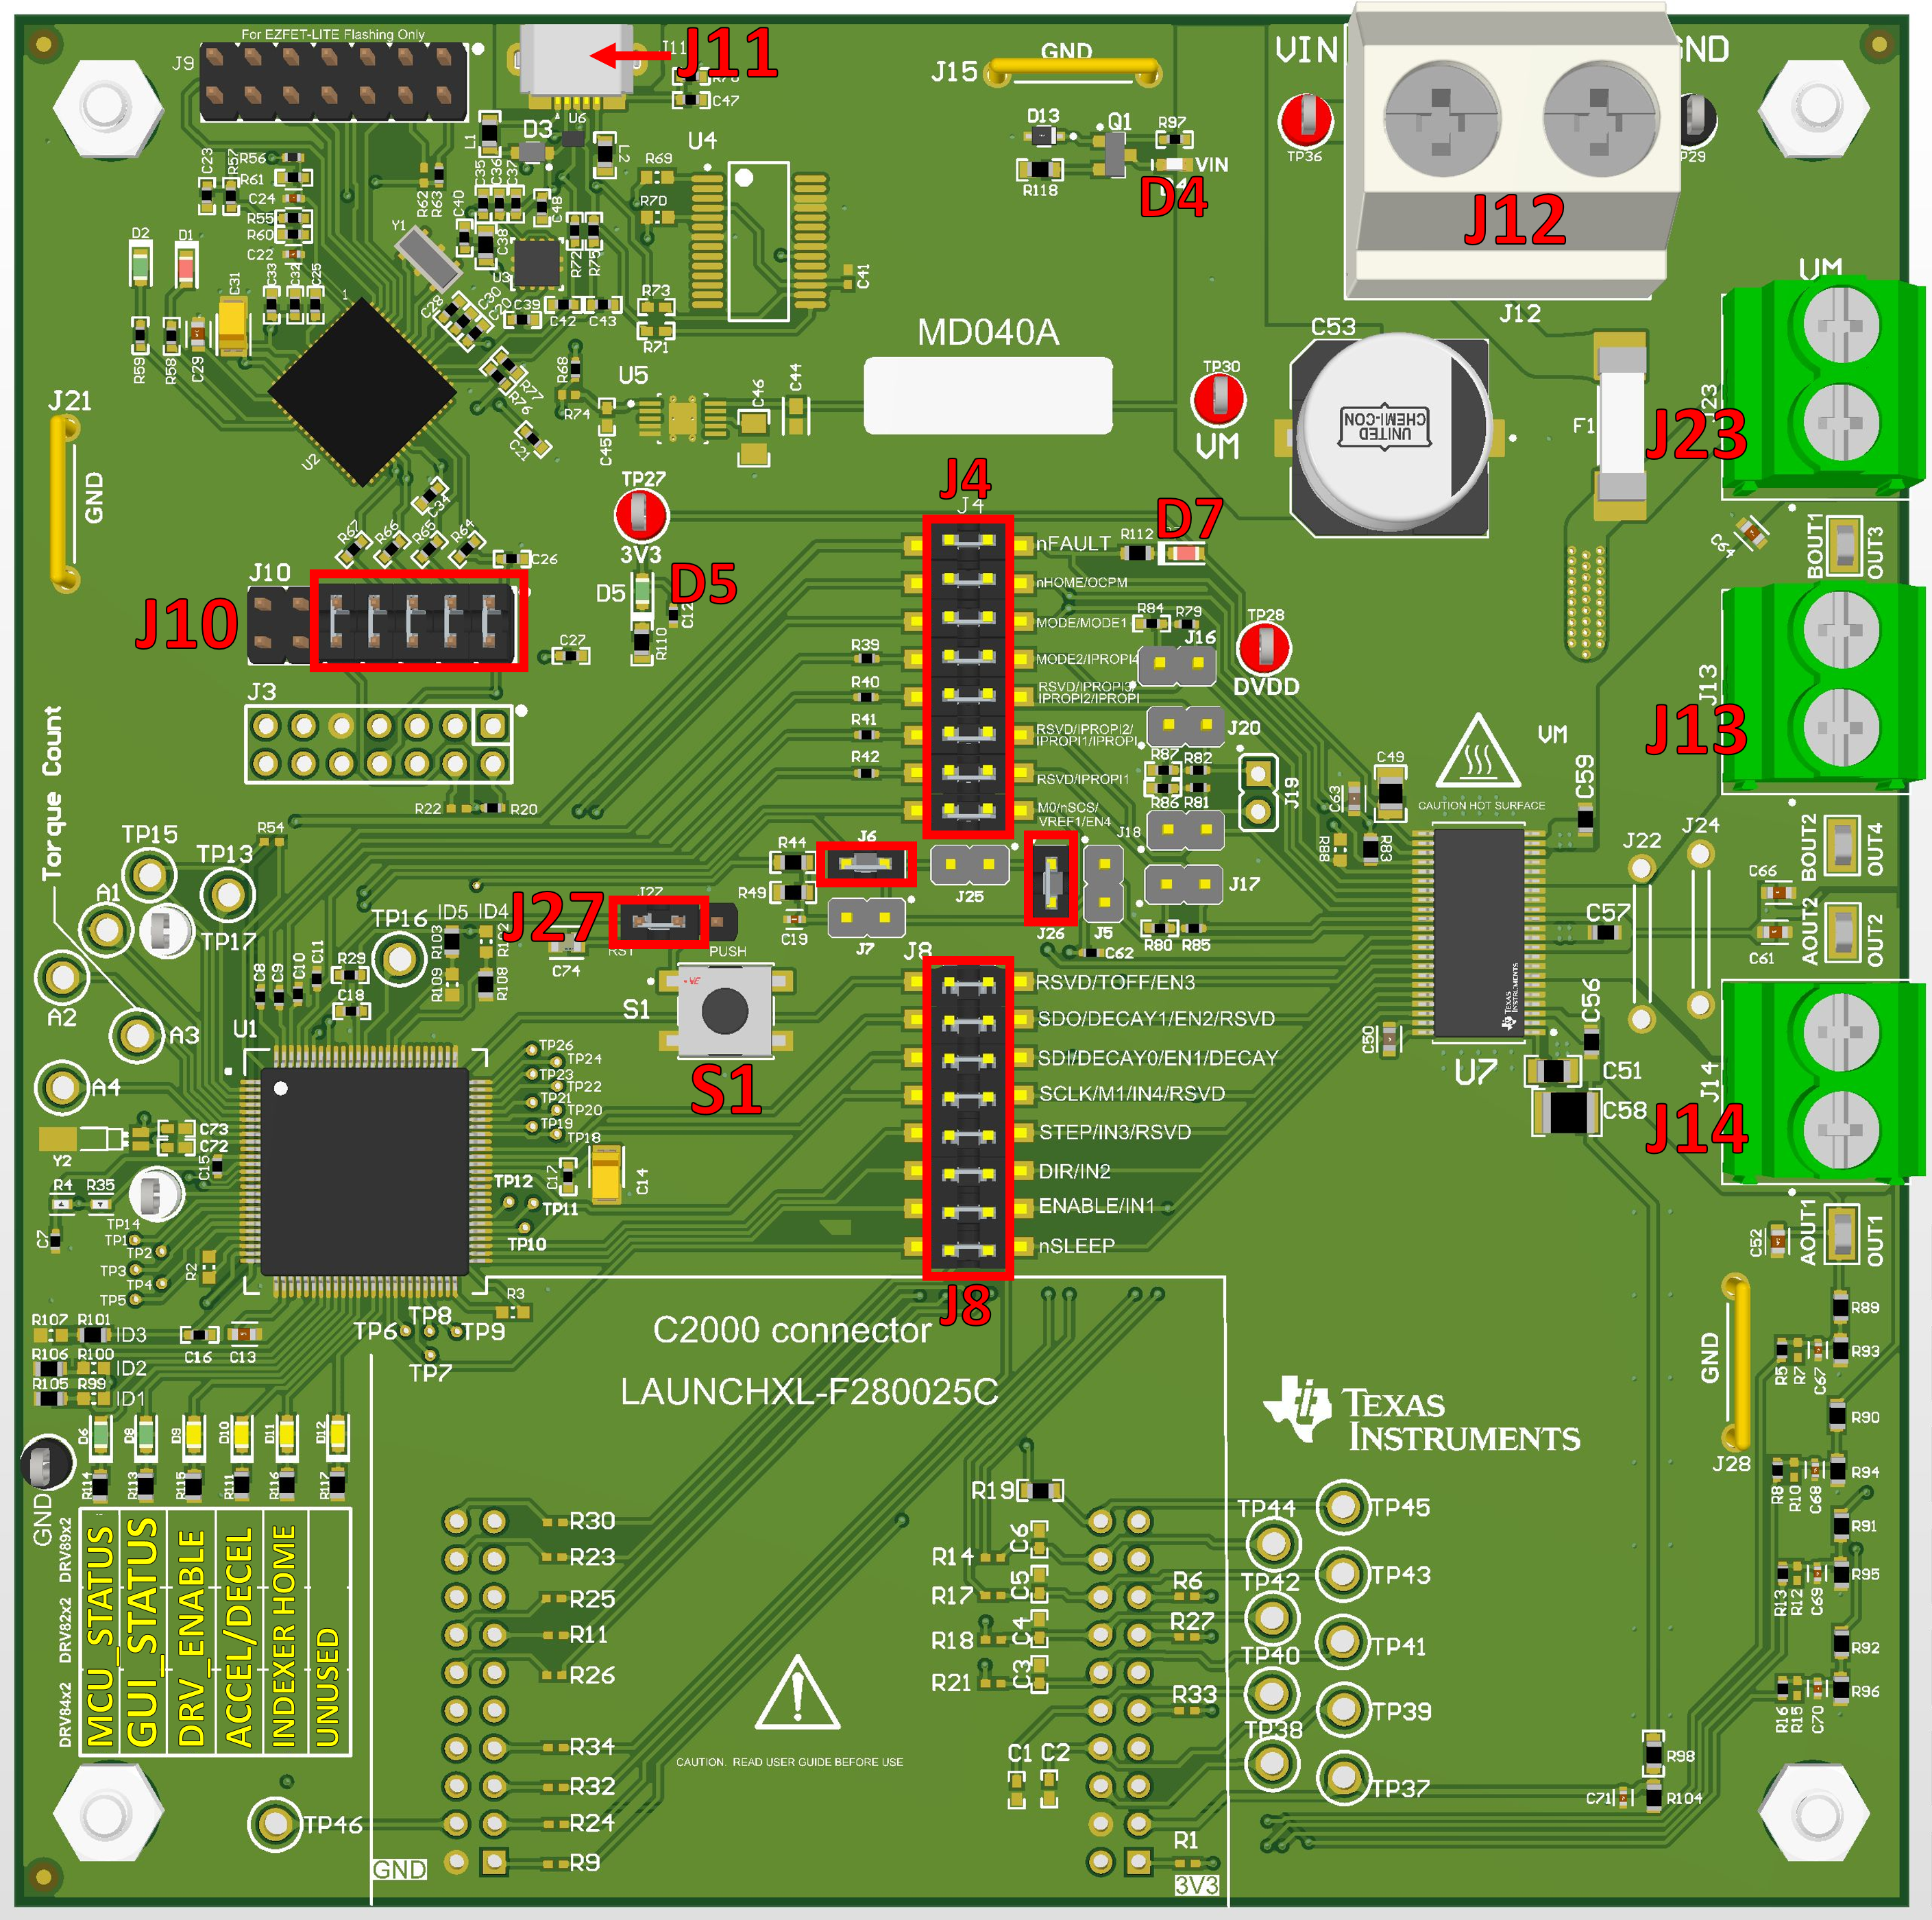 Figure A-1 Jumper Population Guide
Description of jumper function and action if populated for different variants.
| Jumpers | DRV84xx | DRV89x2 | DRV82x2 |
|---|---|---|---|
J6 | VREF with MSP430 | VREF with MSP430 | VREF with MSP430 |
J7 | VREF manually | VREF manually | VREF manually |
J4/J8 | MCU Communication Jumpers | MCU Communication Jumpers | MCU Communication Jumpers |
J10 | EZFET Communication Jumper | EZFET Communication Jumper | EZFET Communication Jumper |
J11 | Micro USB Connection | Micro USB Connection | Micro USB Connection |
J13 | BOUT1/BOUT2 | OUT3/OUT4 | OUT3/OUT4 |
J14 | AOUT1/AOUT2 | OUT1/OUT2 | OUT1/OUT2 |
J25 | DNP | DNP | Disconnect for dual H-Bridge Mode. Connect for single H-Bridge mode, connects VREFs (Pin 33 and Pin 34 together. |
J26 | DNP | DNP | Disconnect for single H-Bridge Mode, Disconnects VREF2 from MSP430 in single H-Bridge mode. Leave connected for dual H-Bridge mode. |
For more detailed information download the hardware files and schematics. Once you have verified that all shunts and jumpers are in the correct location you can move on to hardware setup.
DRV8461EVM:
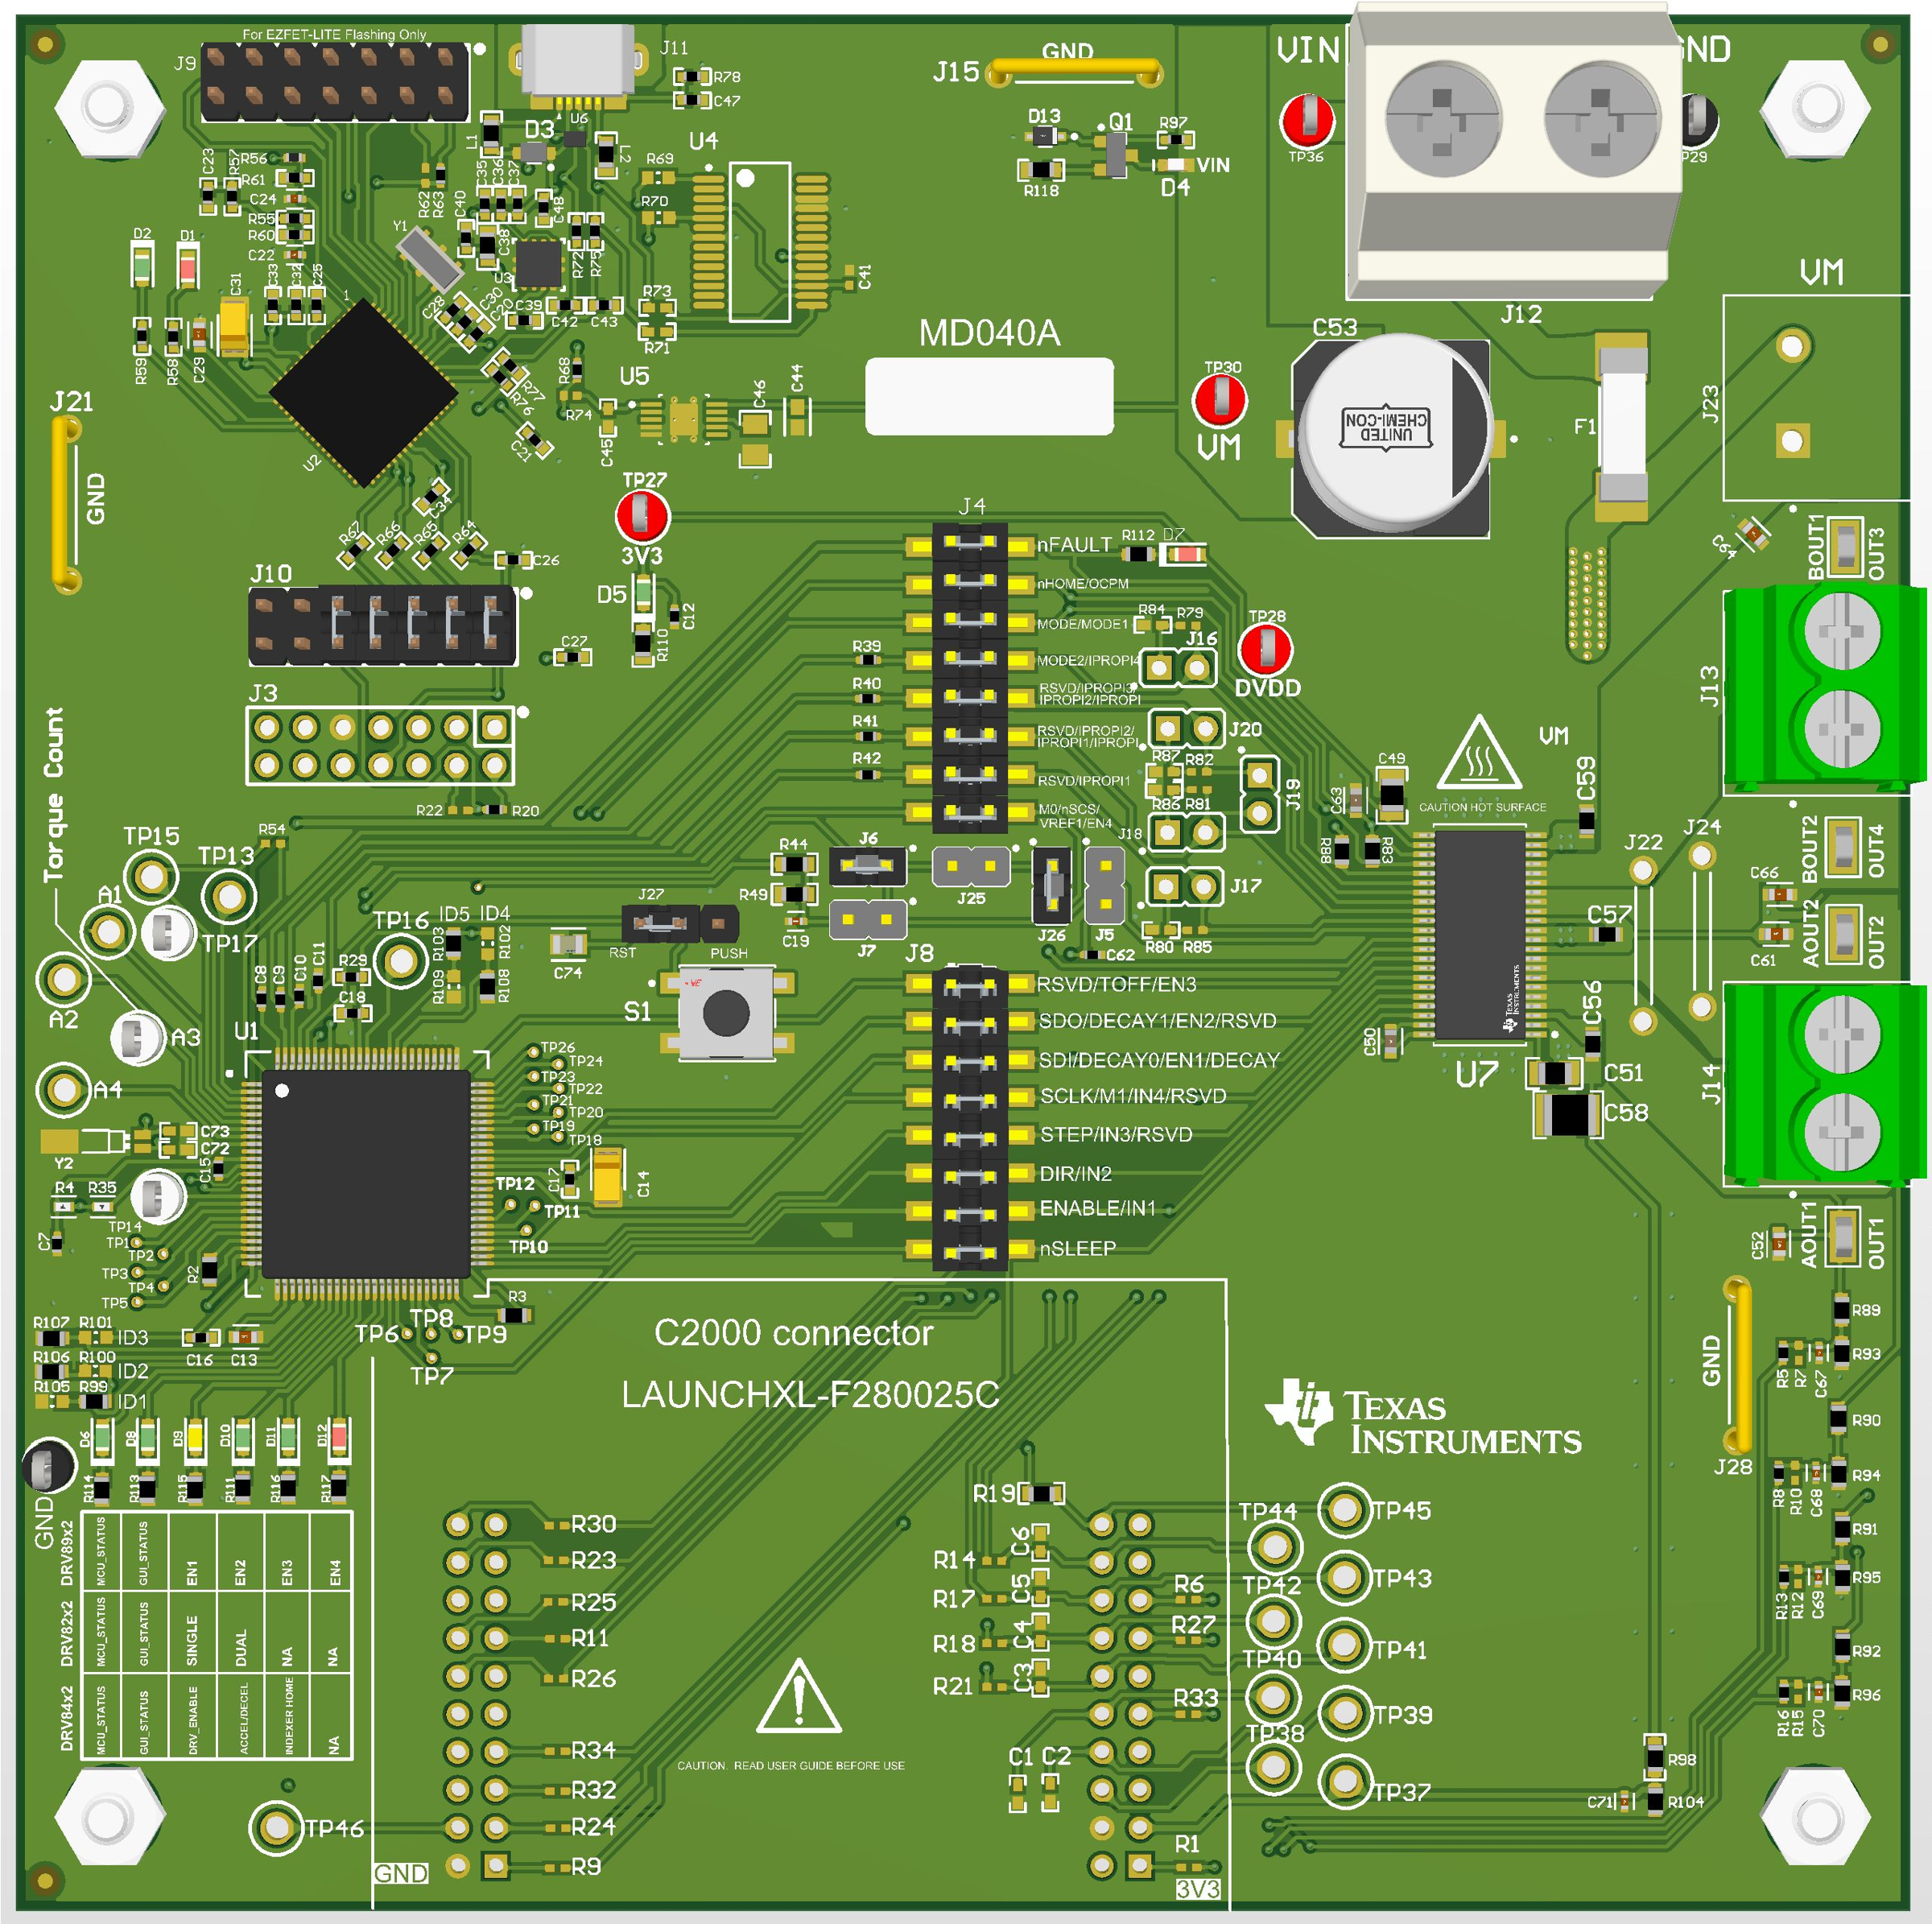 Figure A-2 DRV8461EVM Jumper Population Guide.
 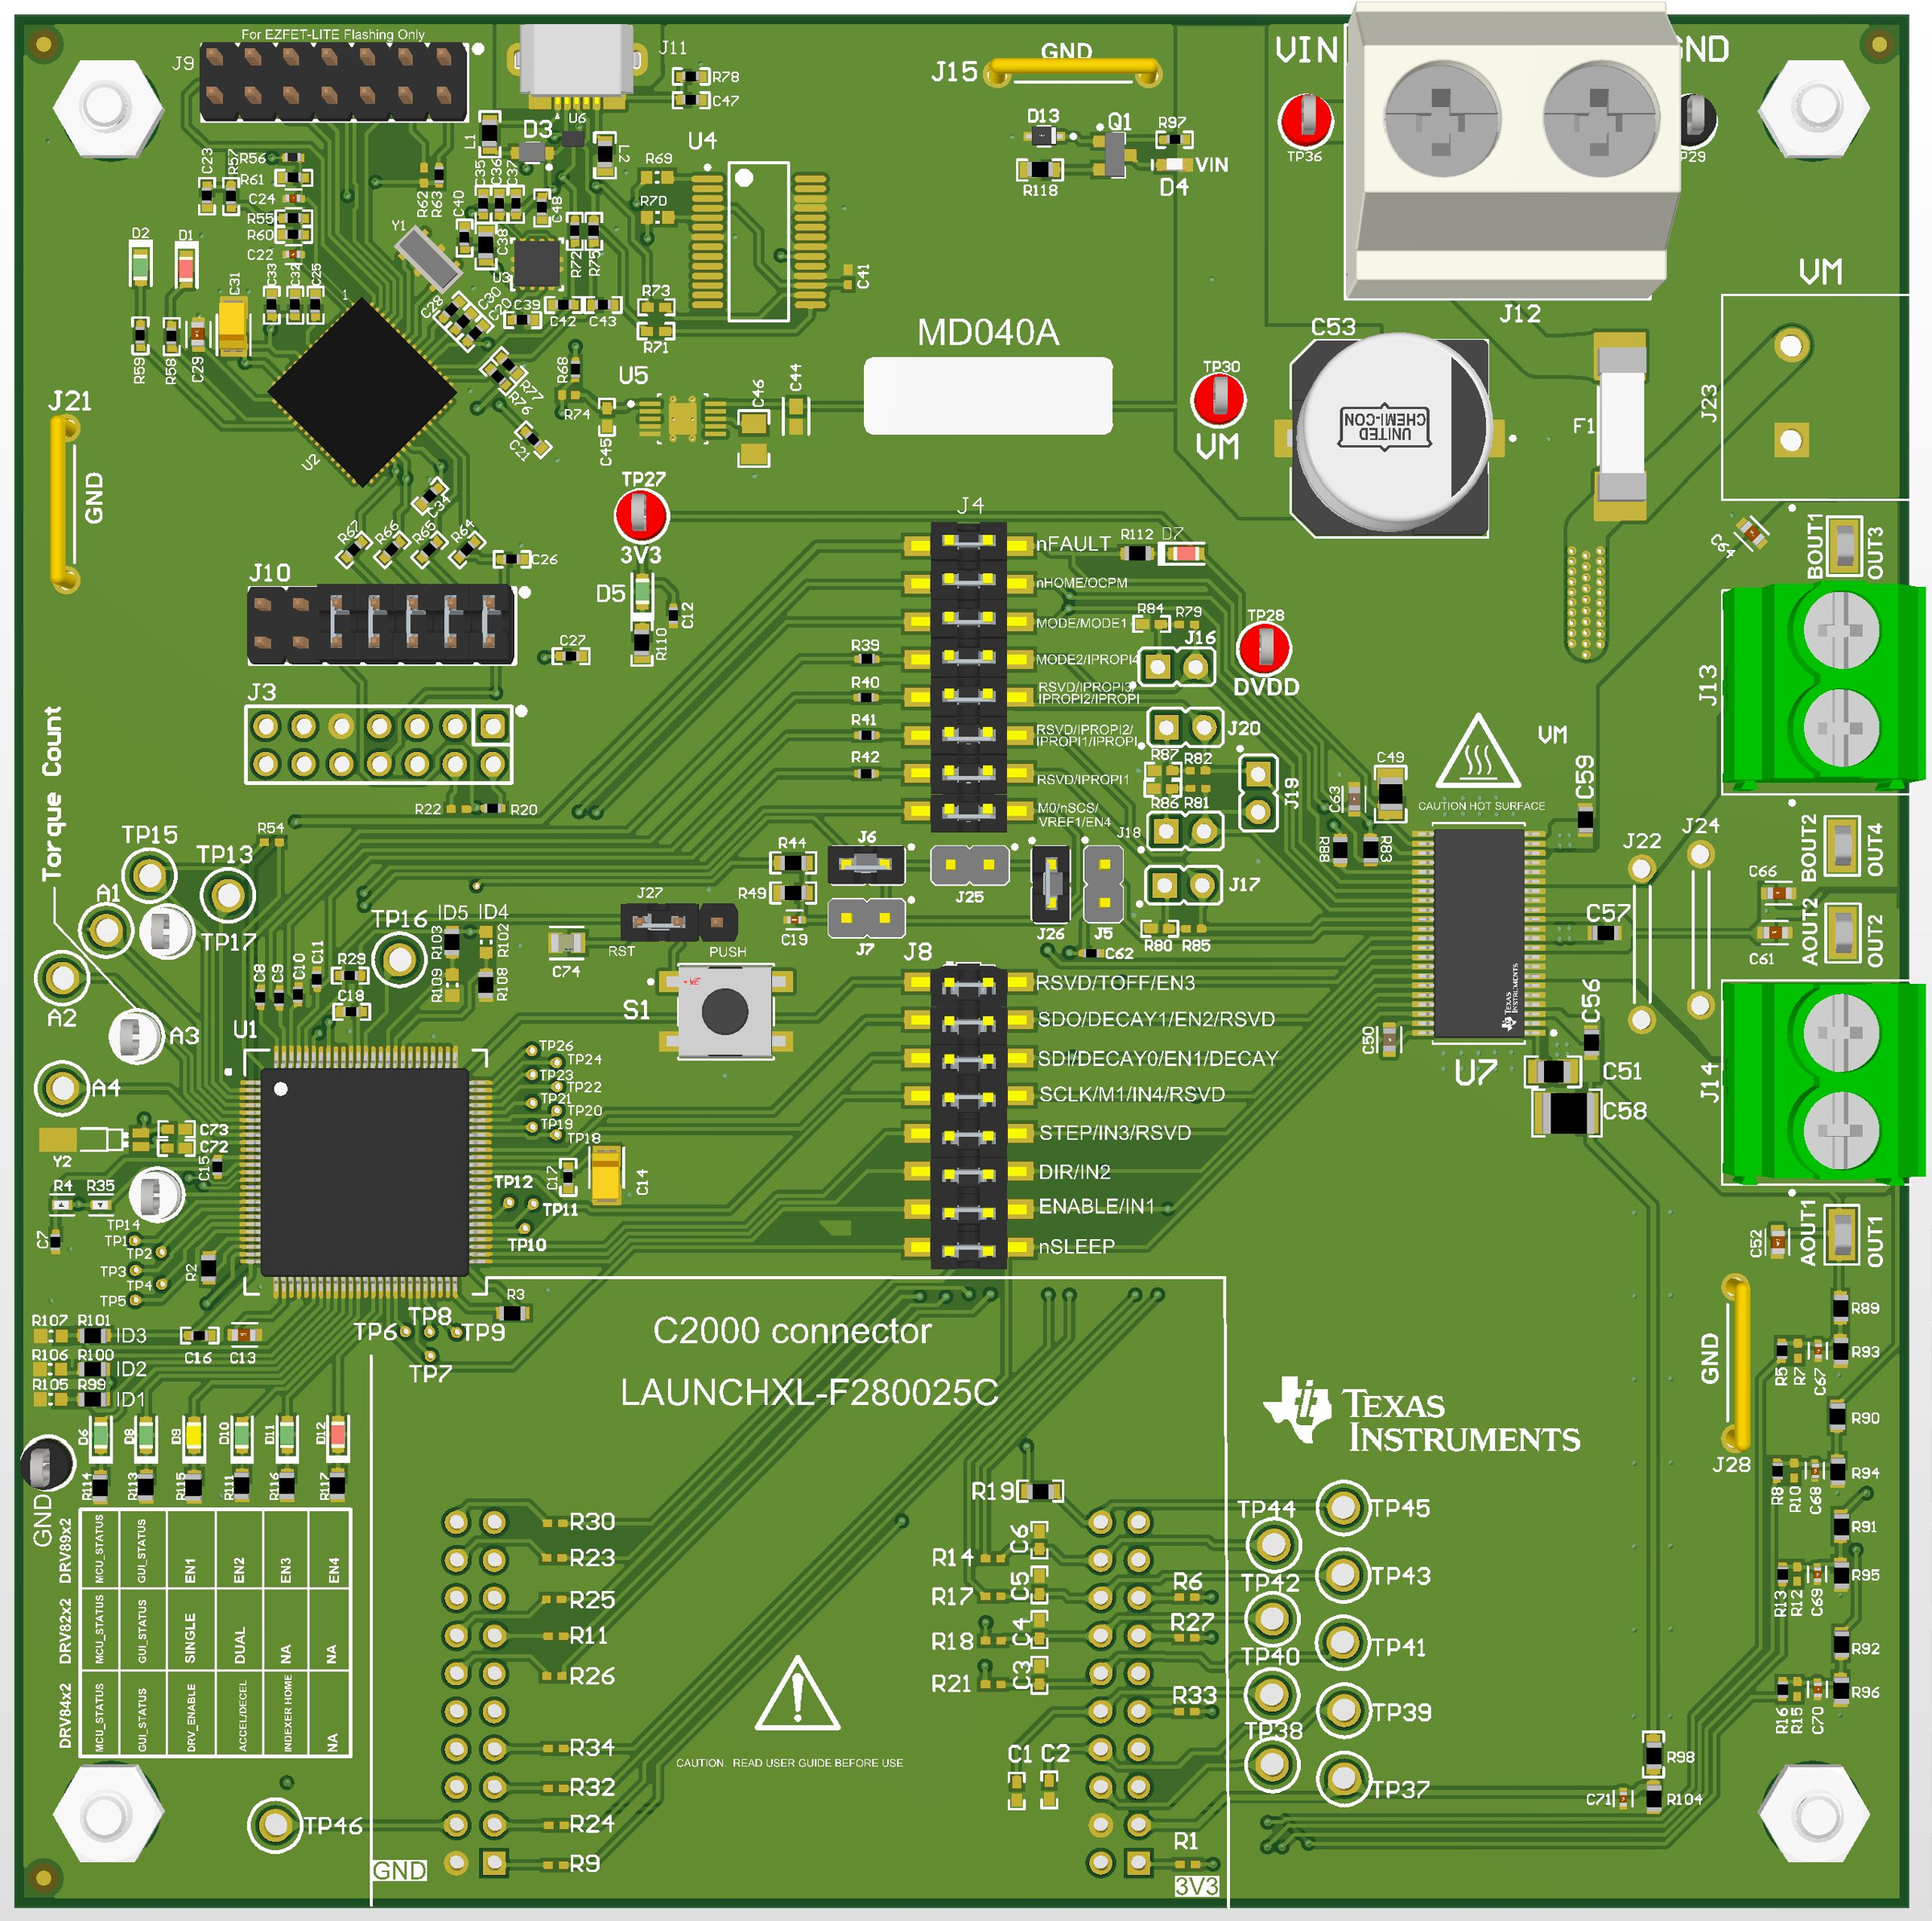 Figure A-3 DRV8462EVM Jumper Population Guide.
 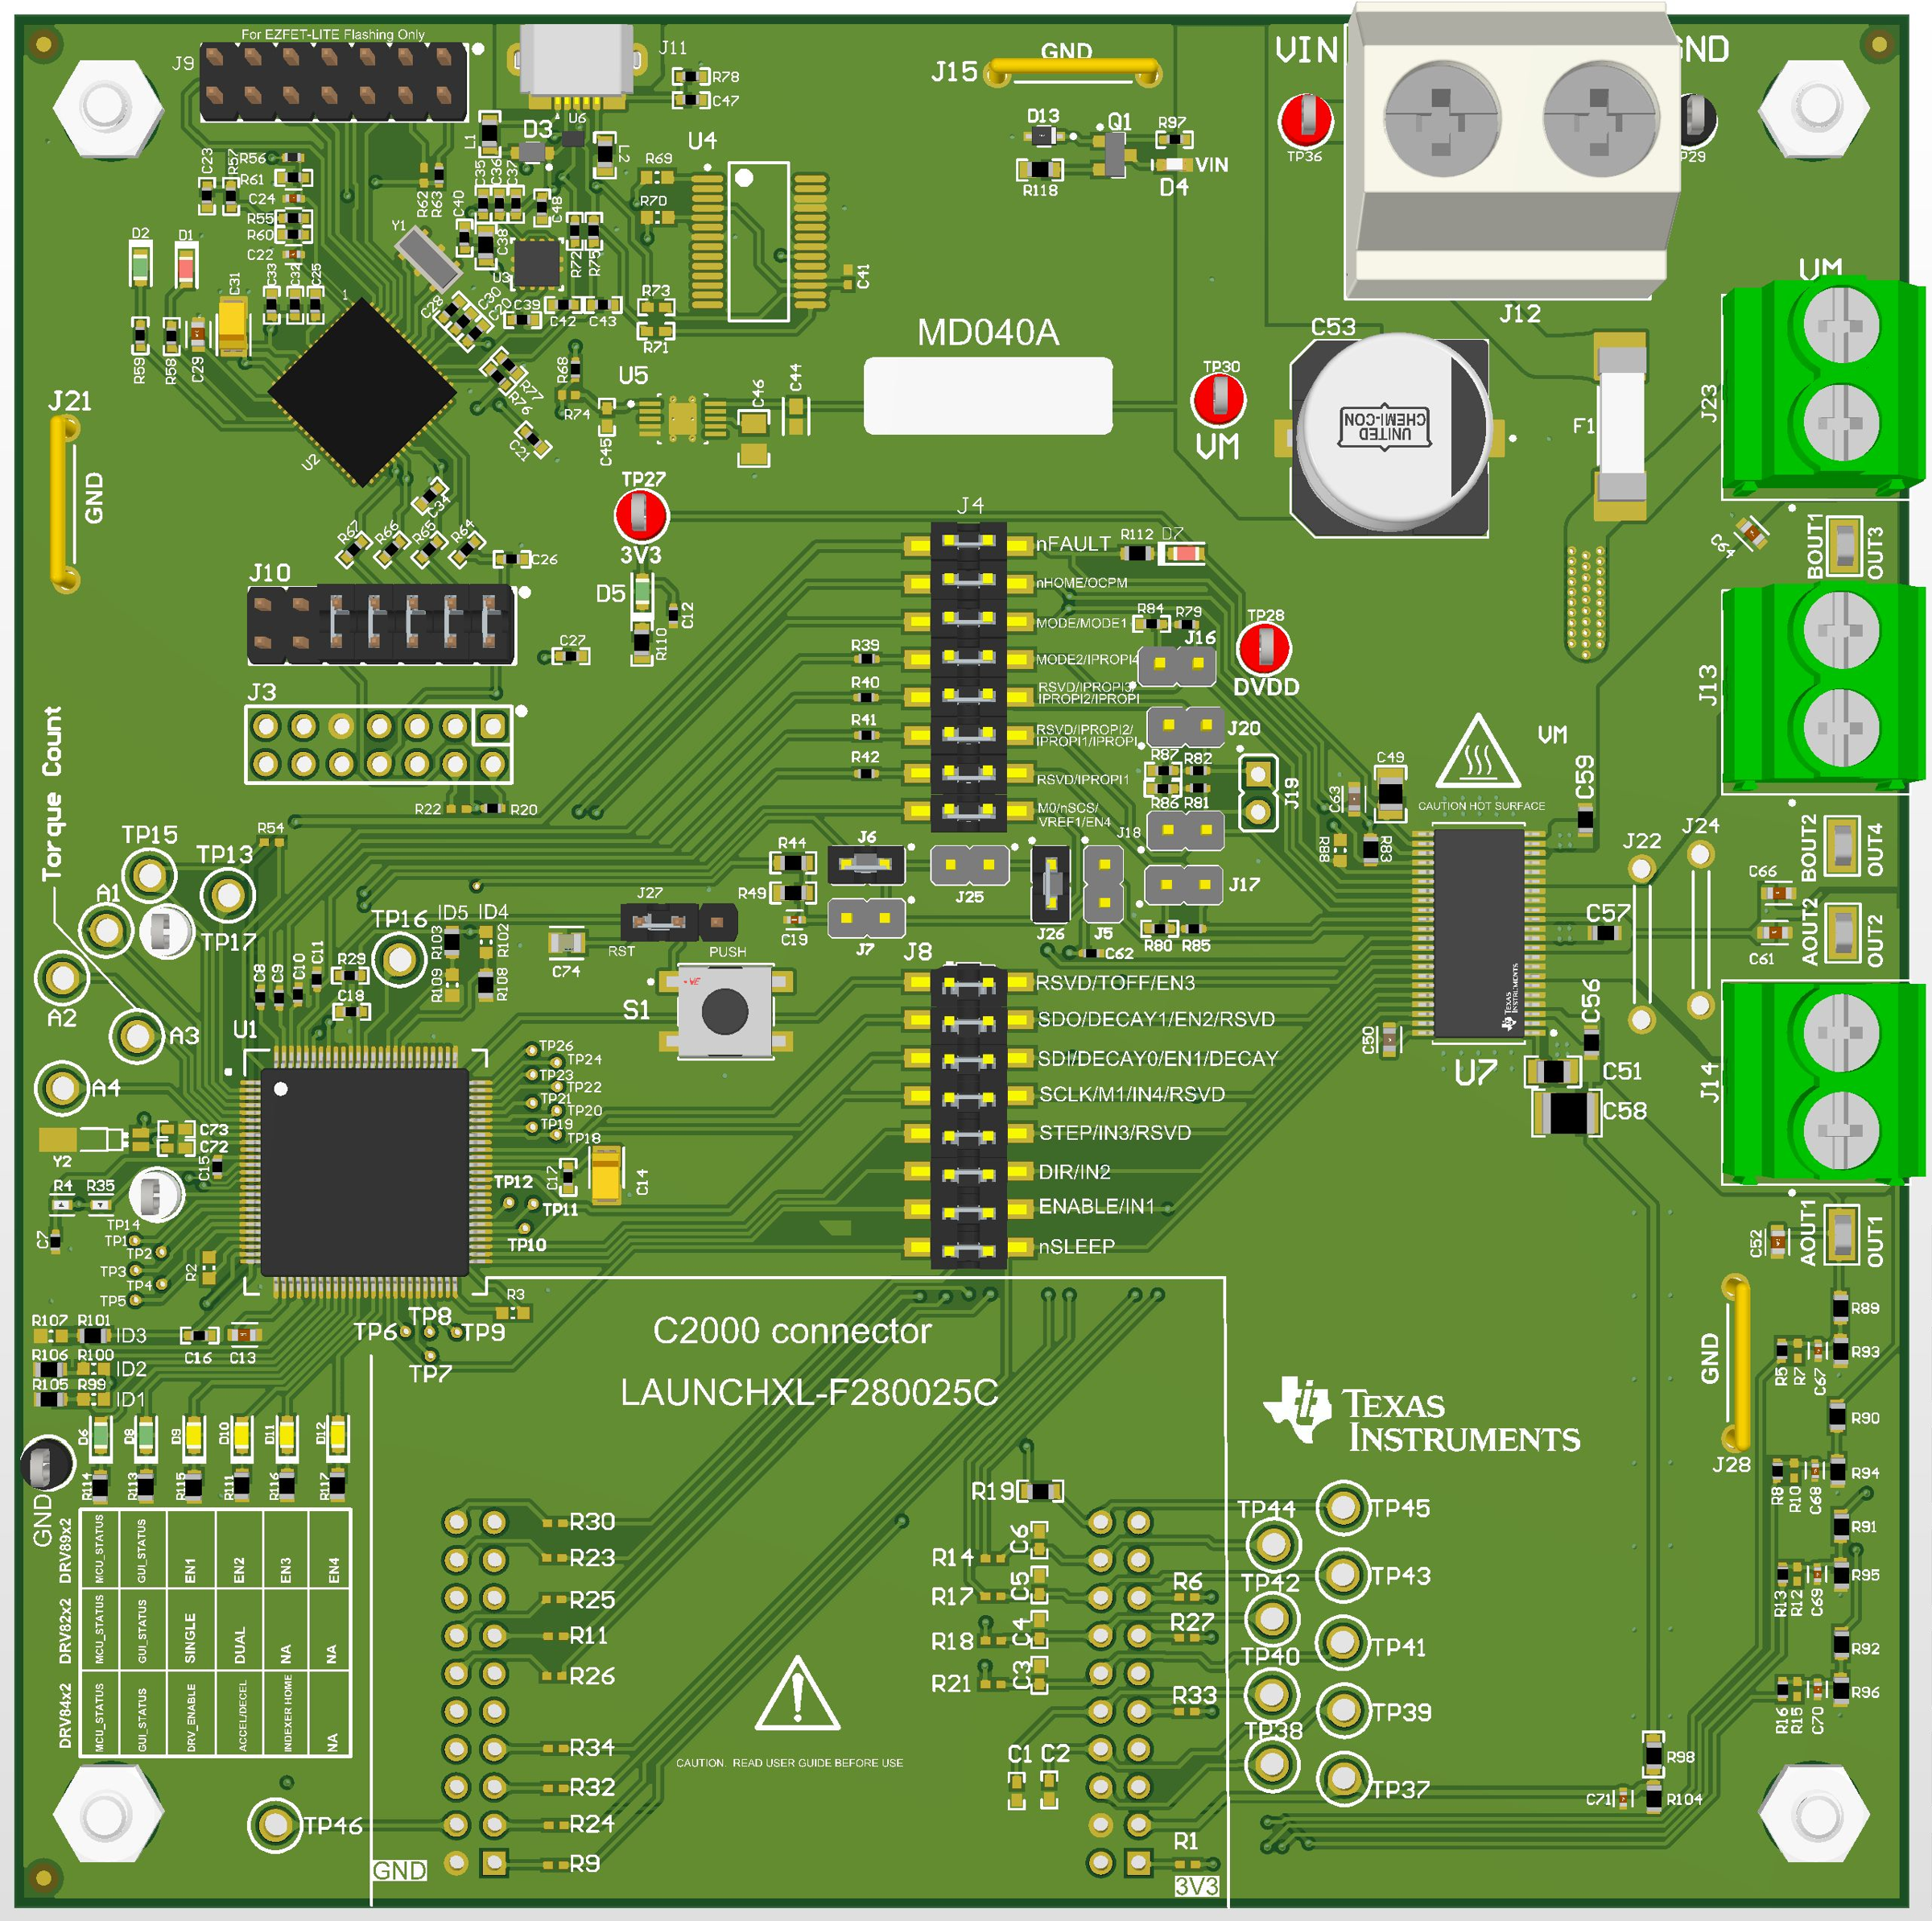 Figure A-4 DRV8962EVM Jumper Population Guide.
 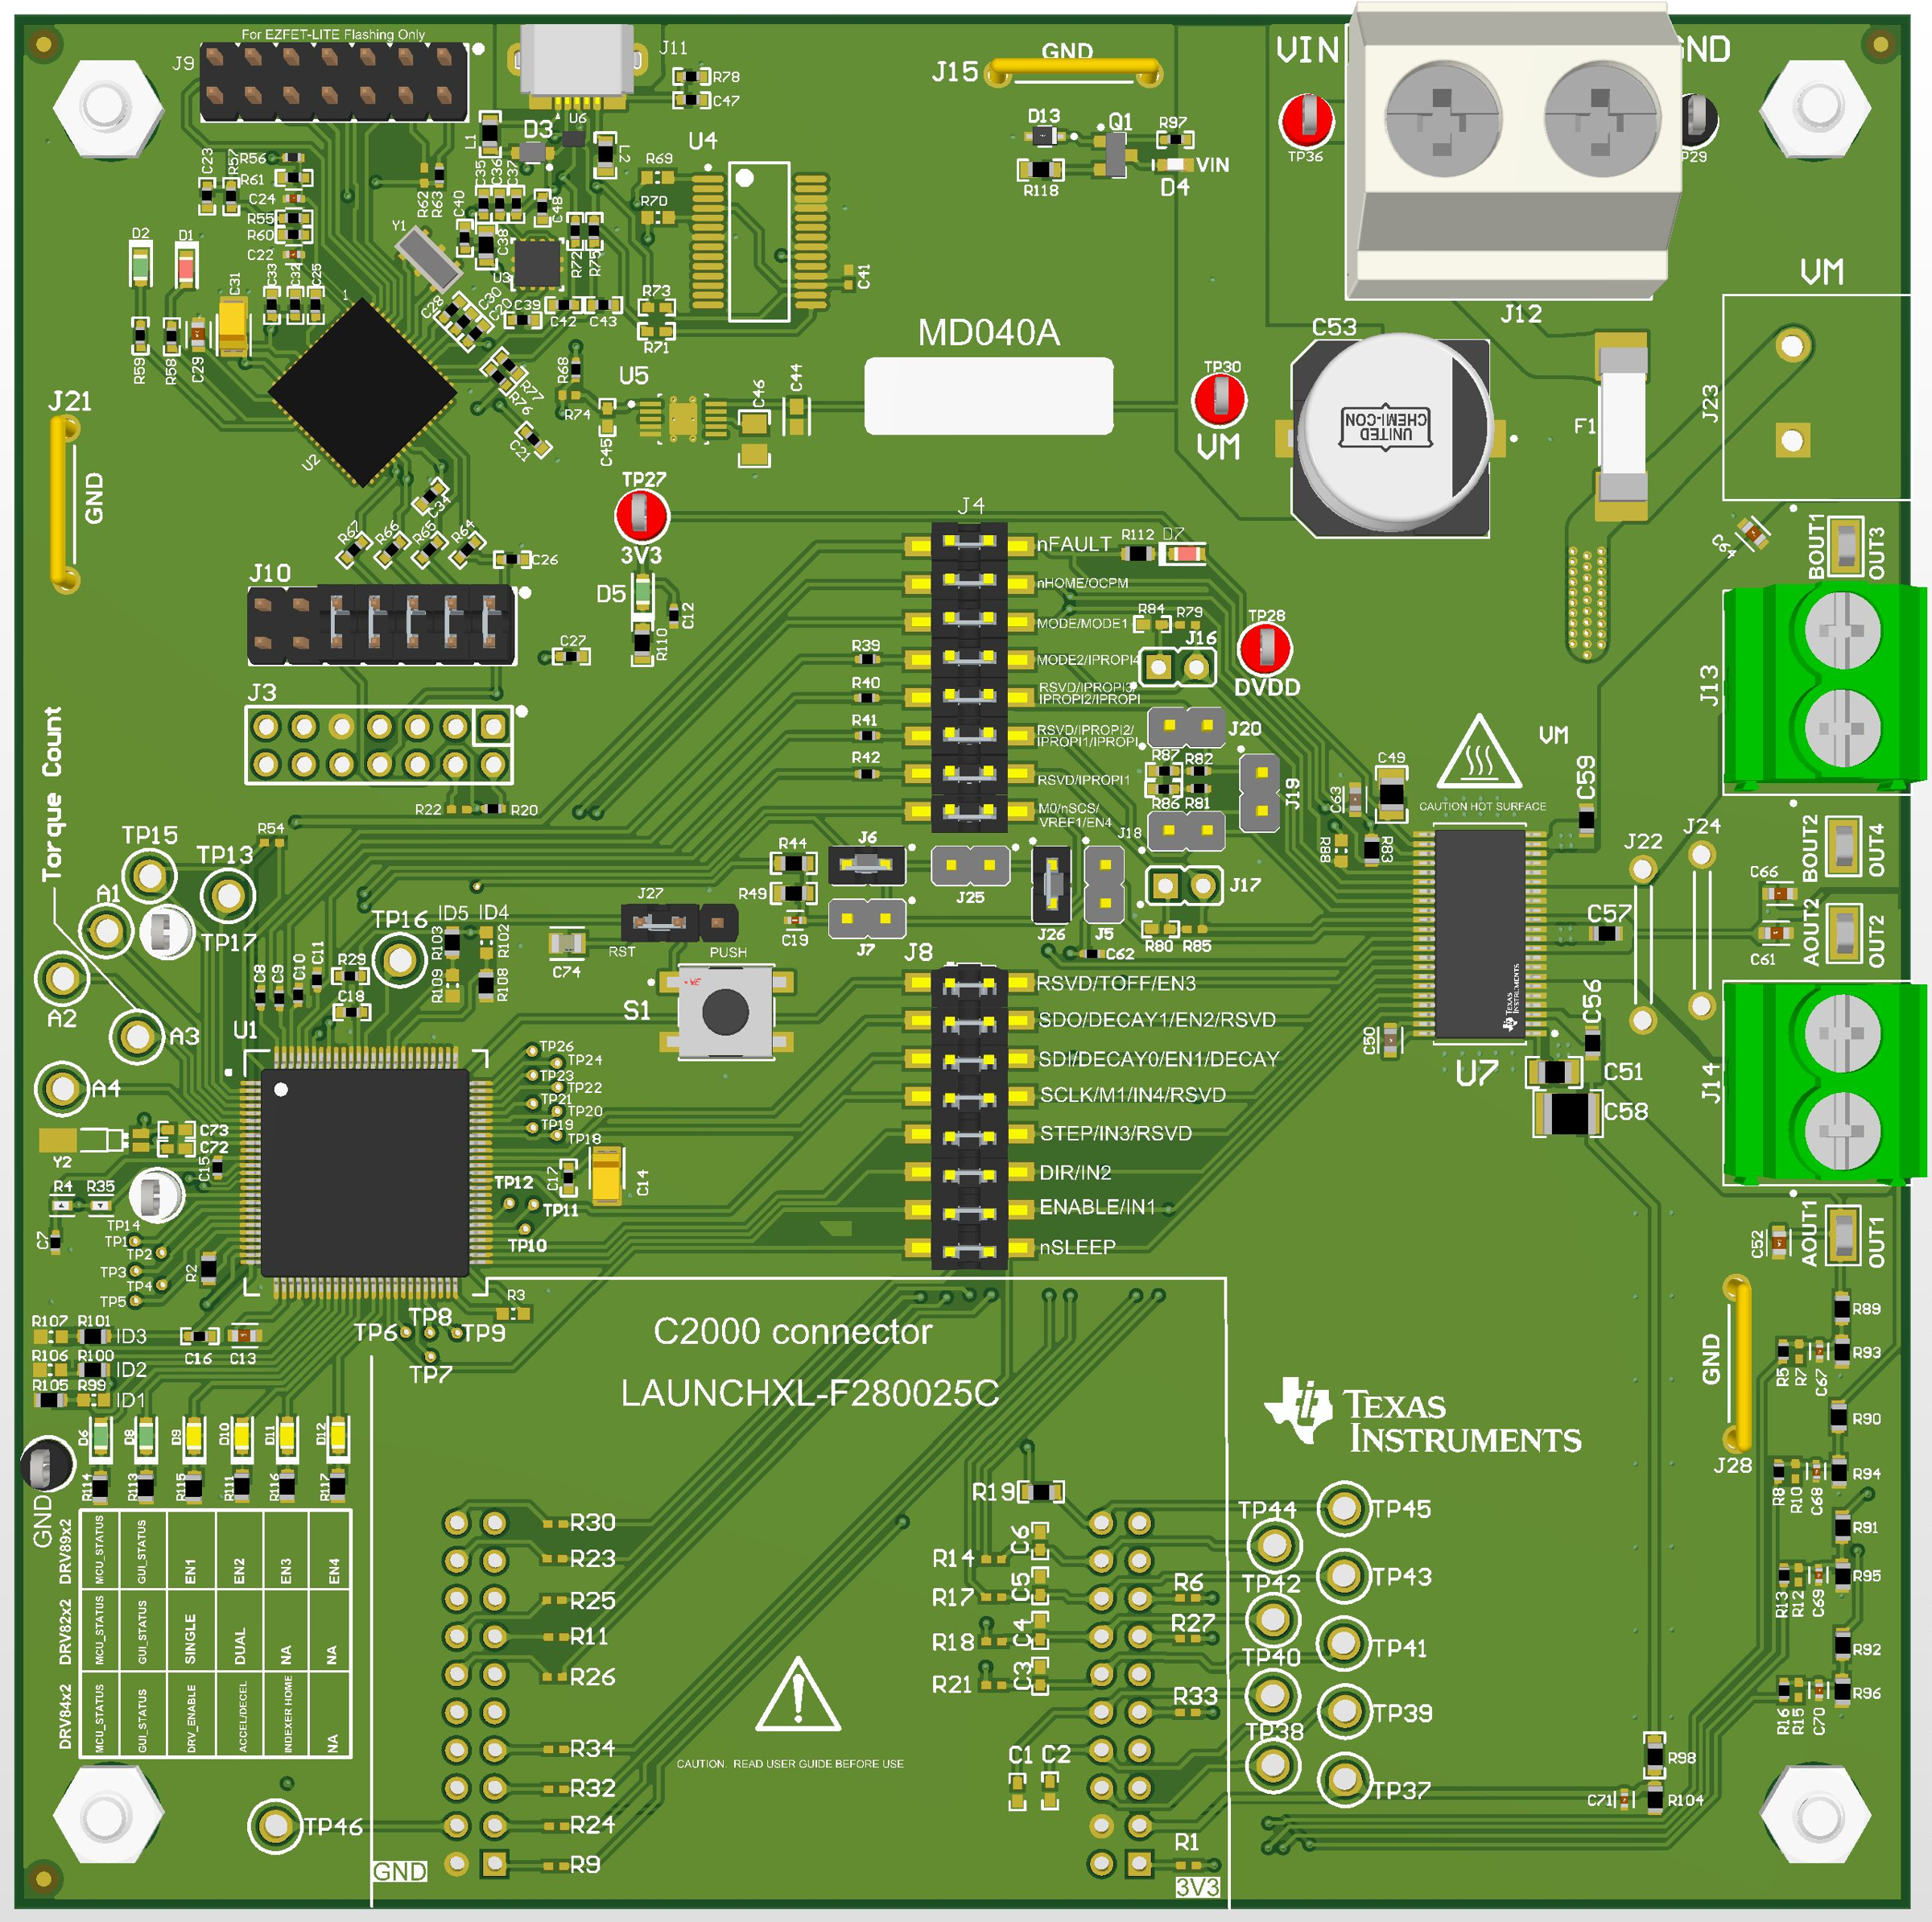 Figure A-5 DRV8262EVM Jumper Population Guide.
 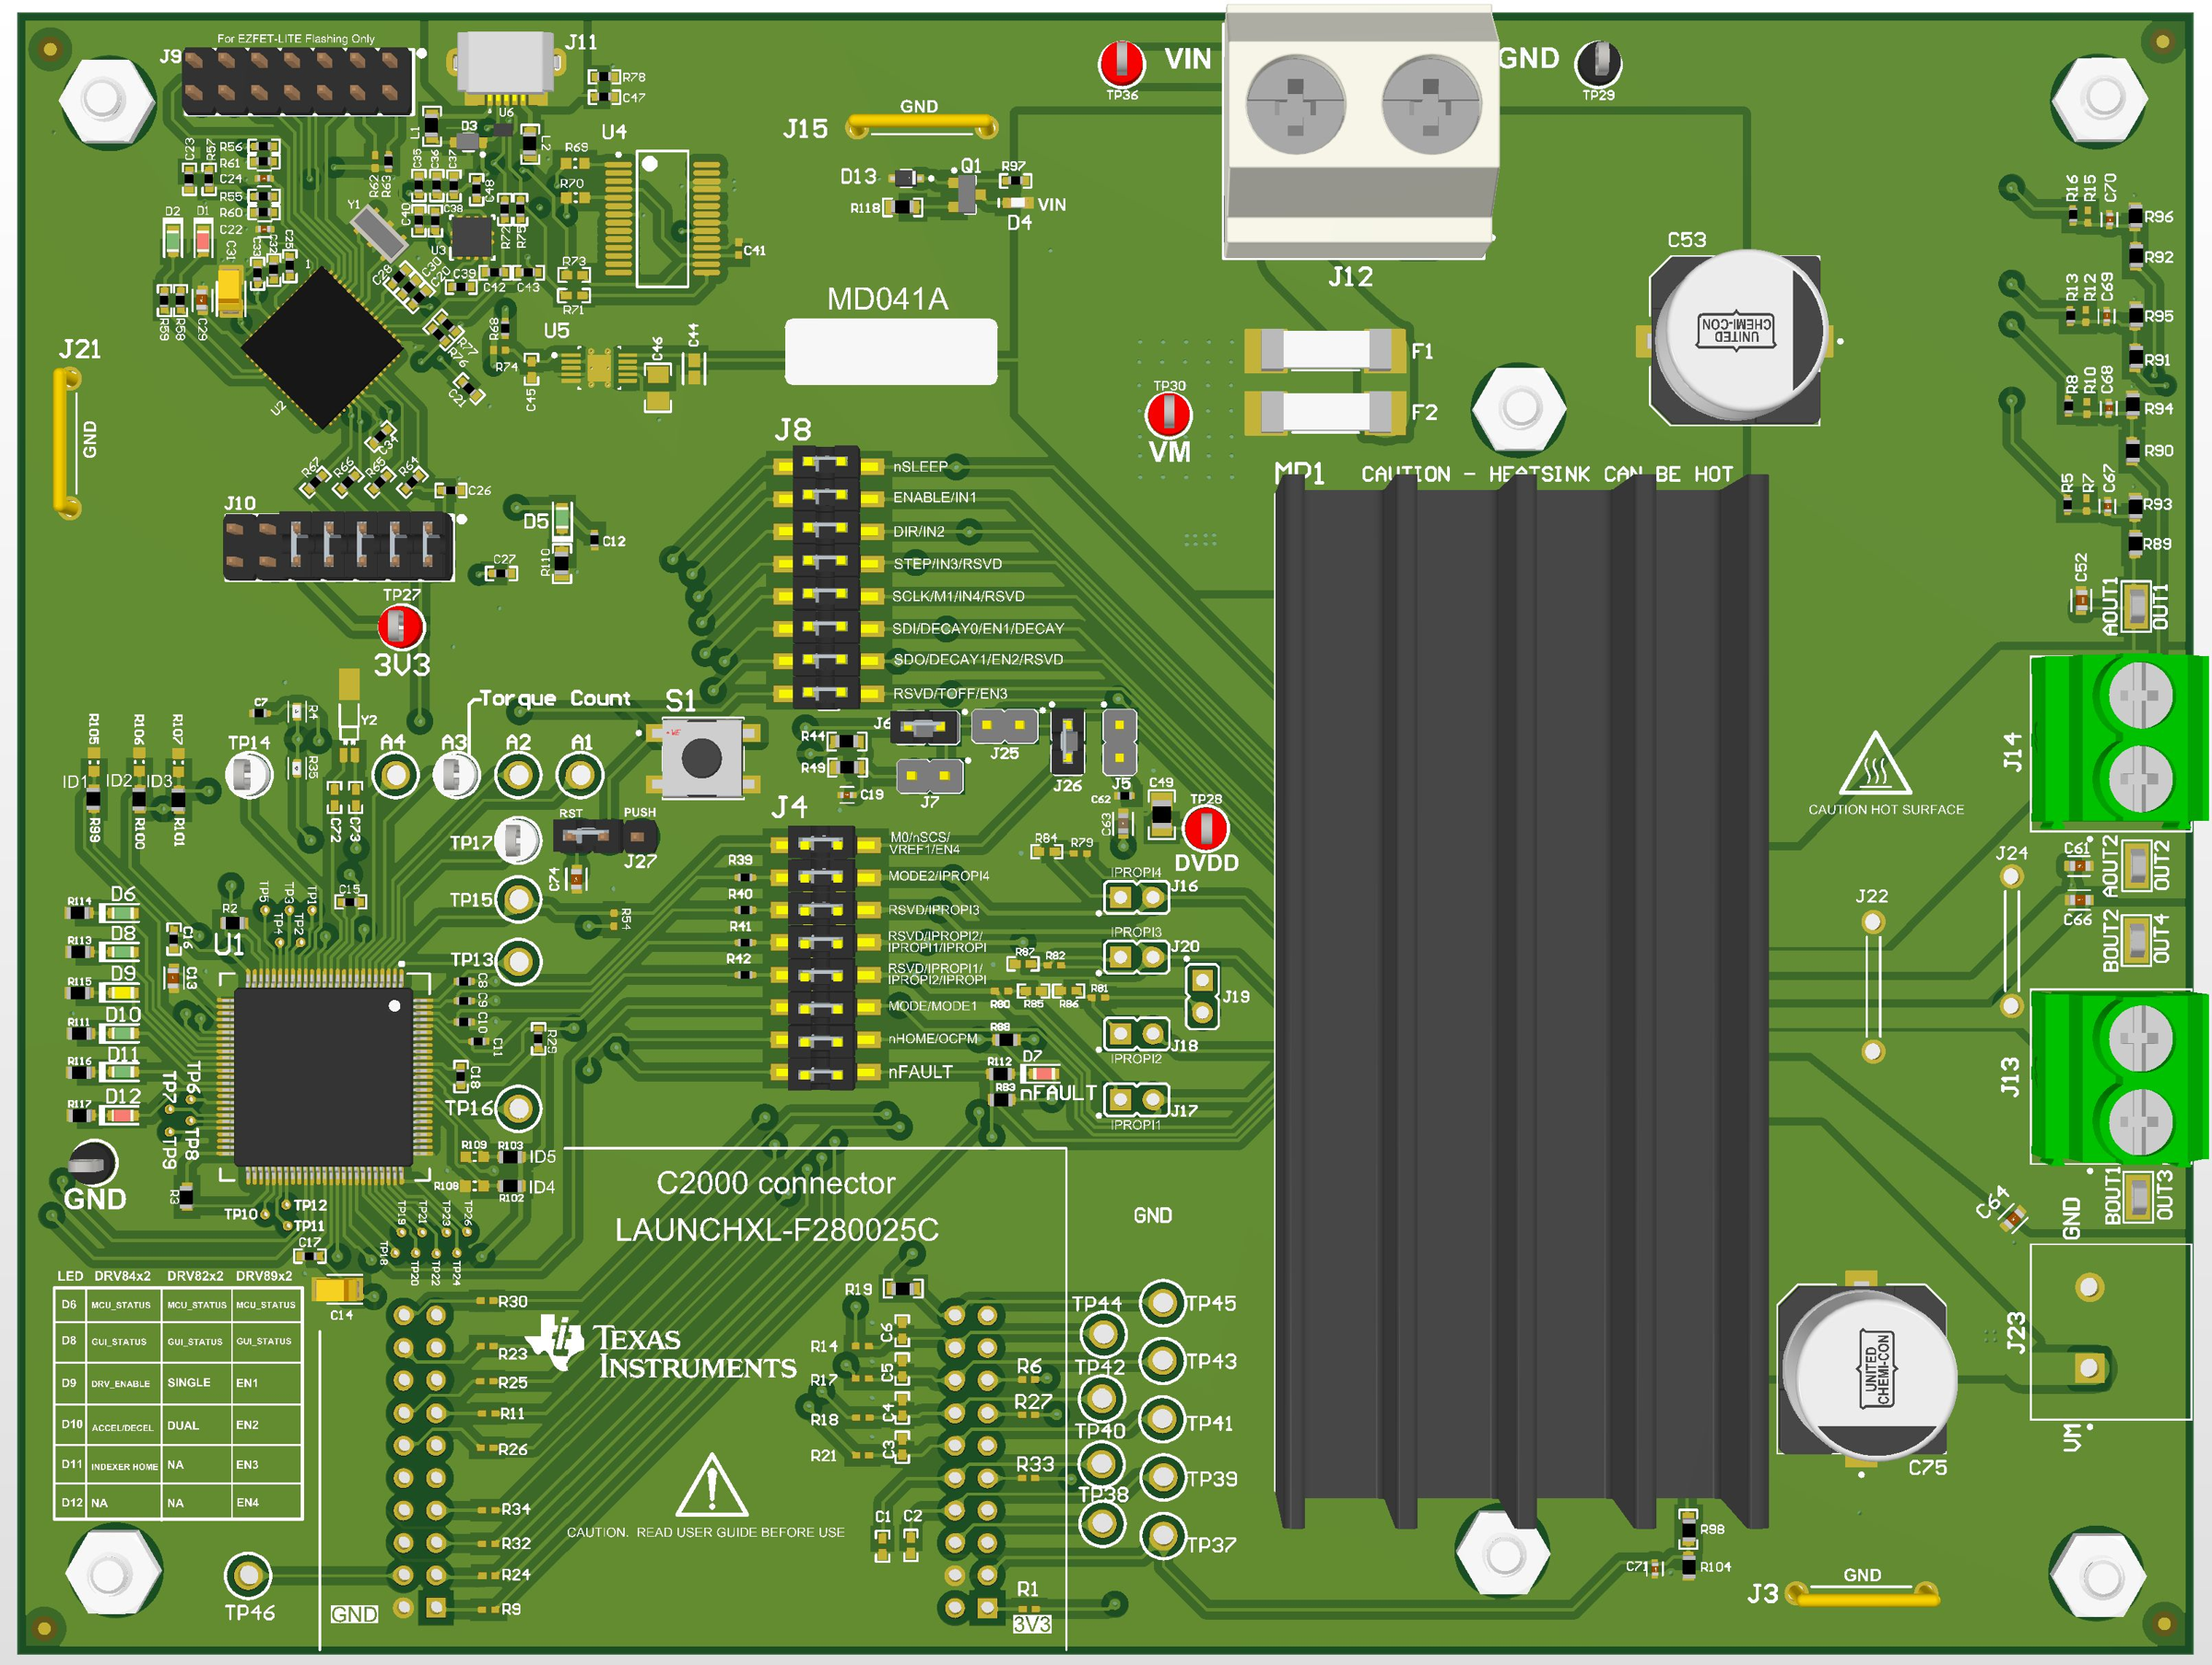 Figure A-6 DRV8462VEVM Jumper Population Guide.
 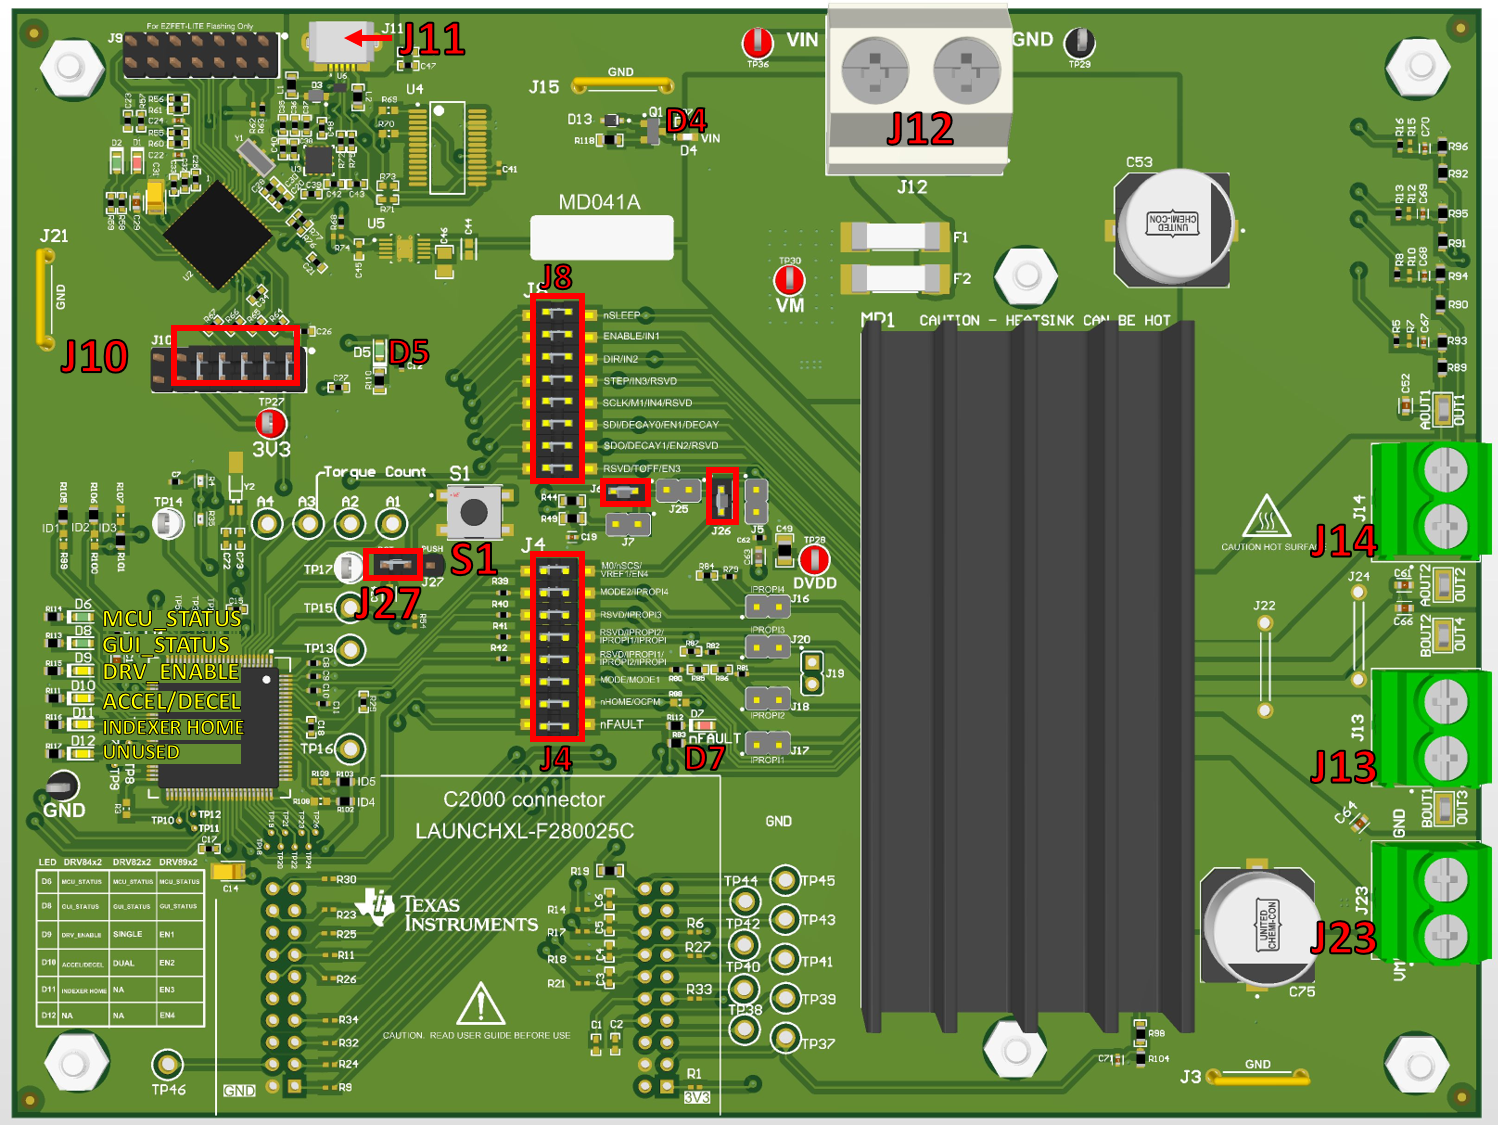 Figure A-7 DRV8962VEVM Jumper Population Guide.
 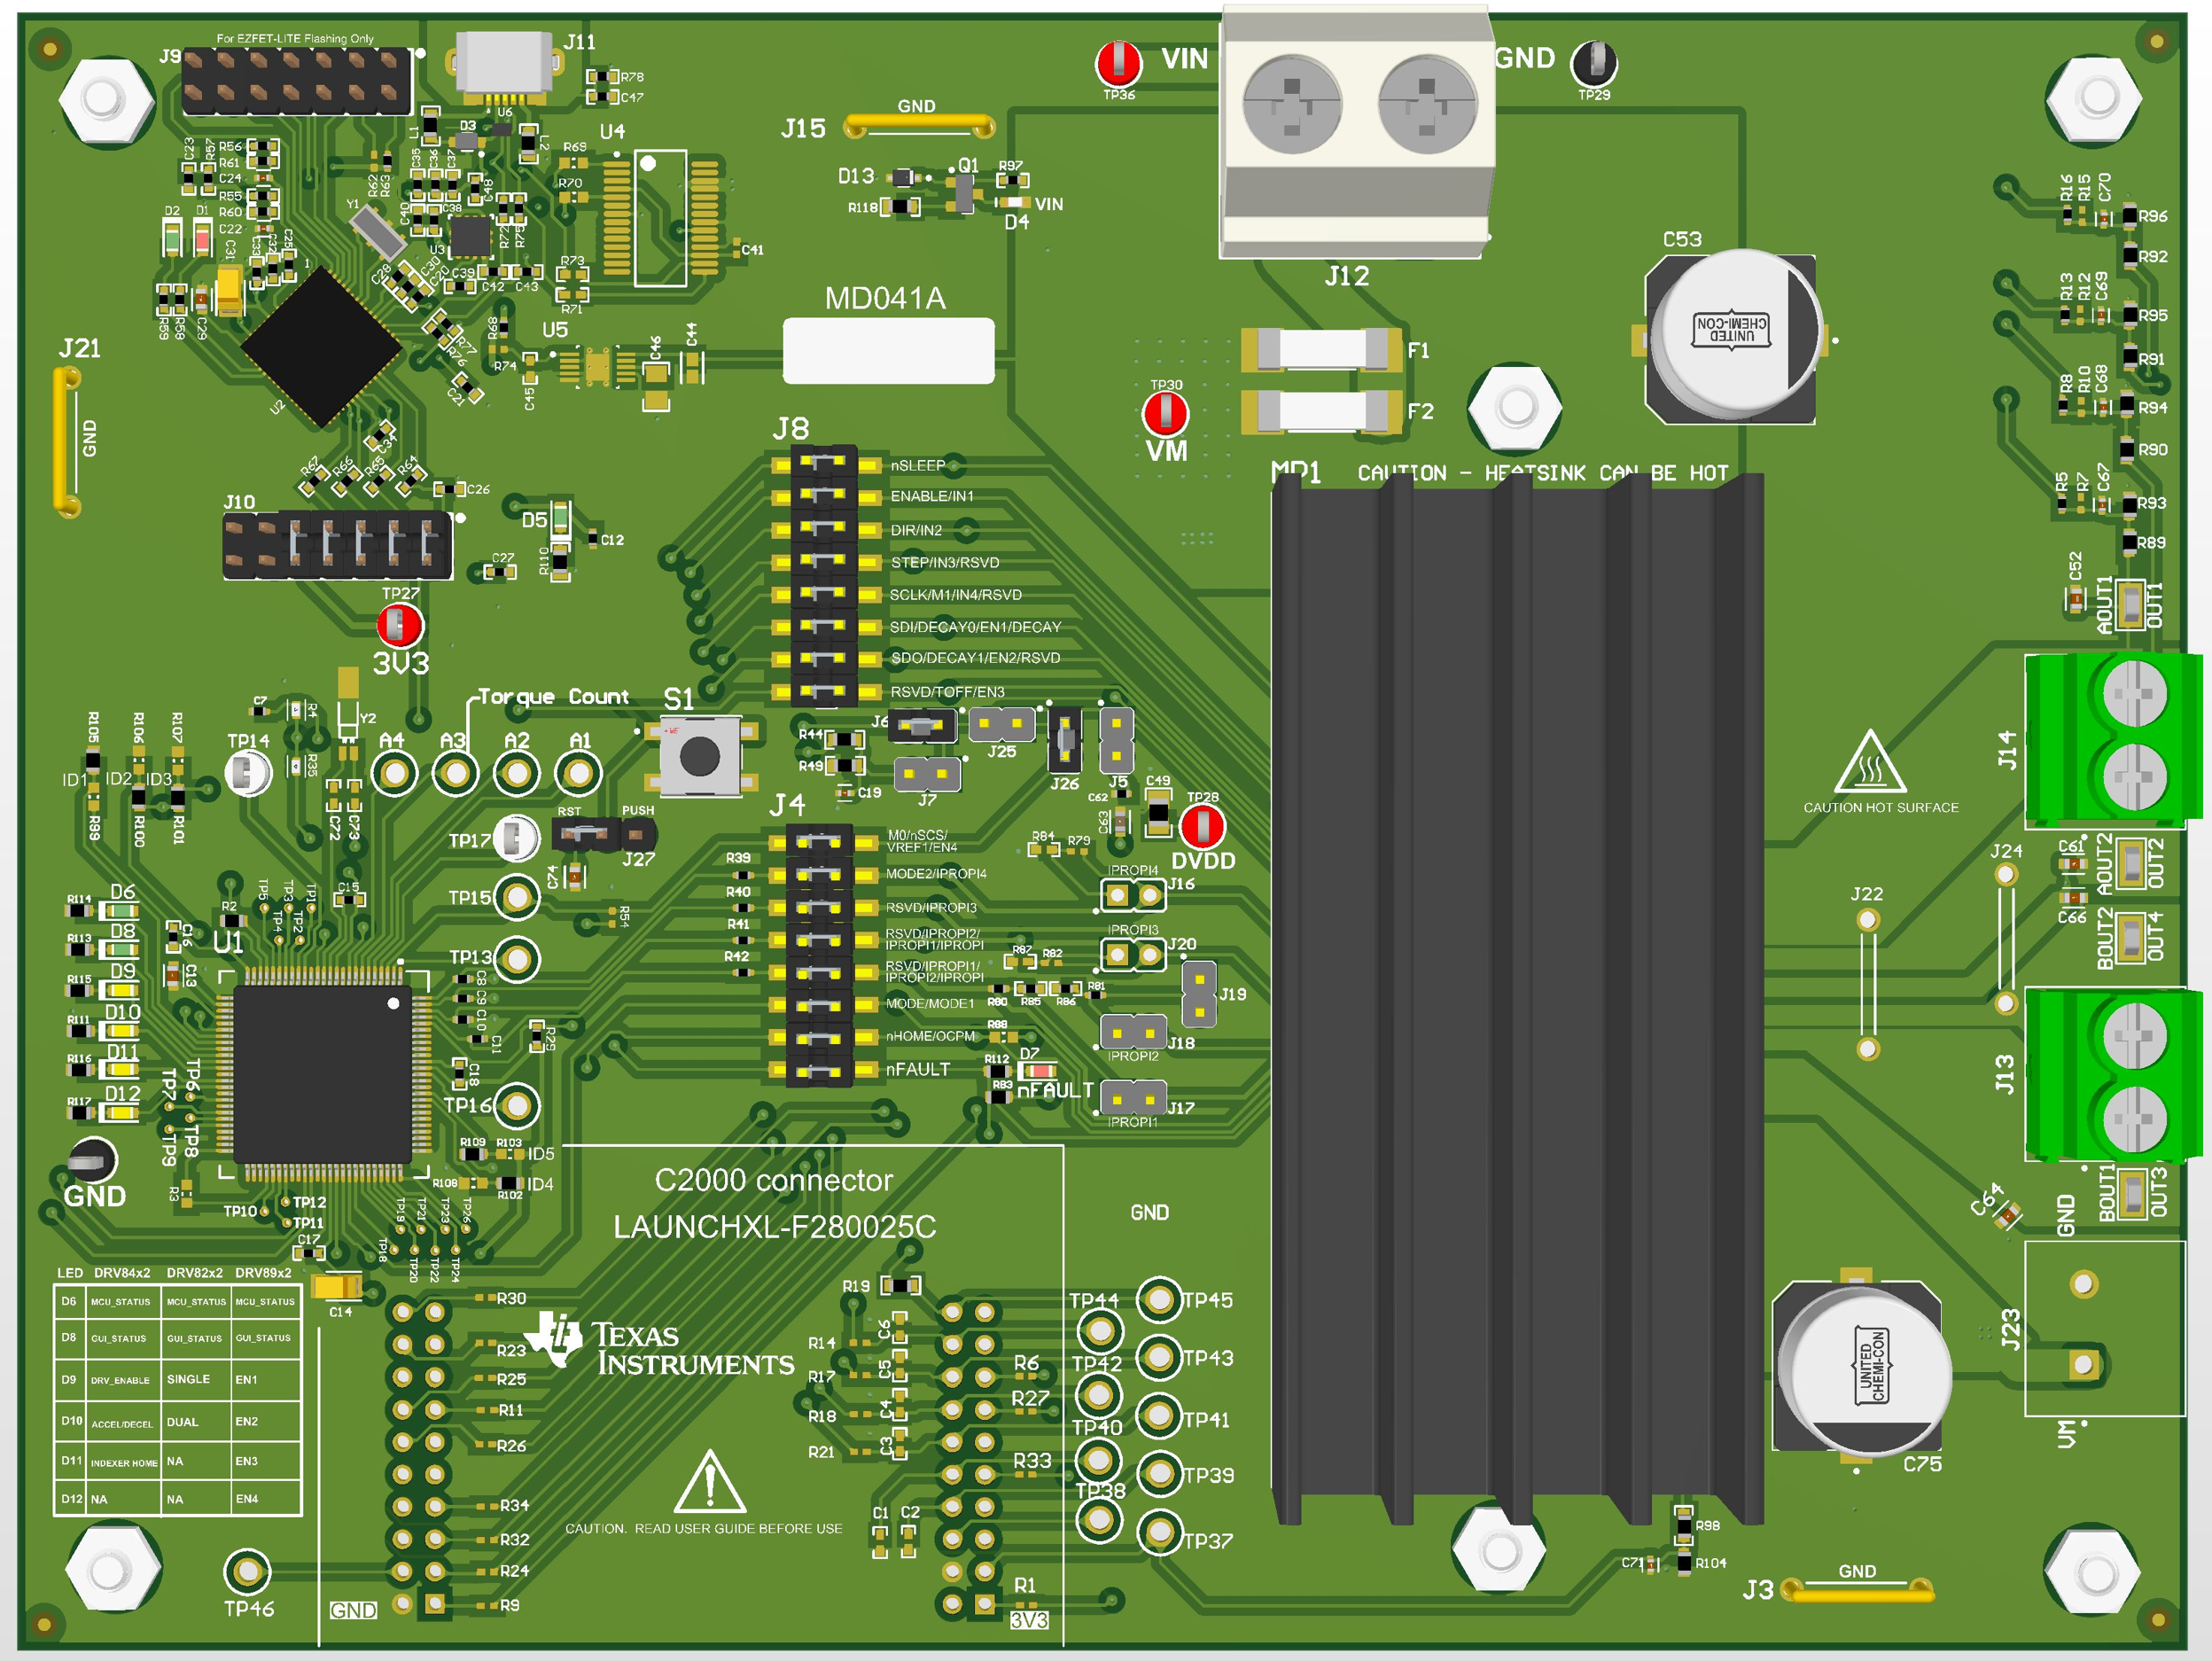 Figure A-8 DRV8262VEVM Jumper Population Guide.