SLOU558B August 2022 – January 2023 DRV8452 , DRV8462 , DRV8962
- Abstract
- Trademarks
- 1 Introduction
- 2 Jumpers Table and Setup
- 3 Software Setup
- 4 Hardware Setup
- 5 Launching the DRV84xx_DRV82x2_DRV89x2-EVM GUI Application
- 6 GUI Operations DRV8461EVM, DRV8462EVM, and DRV8462VEVM
- 7 GUI Operations DRV8962EVM and DRV8962VEVM
- 8 GUI Operations DRV8262EVM and DRV8262VEVM
- 9 Updating Firmware
- 10Evaluation Hardware Overview
- A Appendix A
5 Launching the DRV84xx_DRV82x2_DRV89x2-EVM GUI Application
Whether using the desktop or web version of the GUI, the user experience and steps covered below will be the same. It is assumed the hardware setup steps in the previous section have already been completed.
- Launch the GUI application using Chrome web browser or from your local desktop installation. Note you’ll have to log-in to the TI Dev Gallery using your myTI log-in credentials prior to launching the app while running from a web browser.
- Hyperlink for running app in Chrome: Web GUI
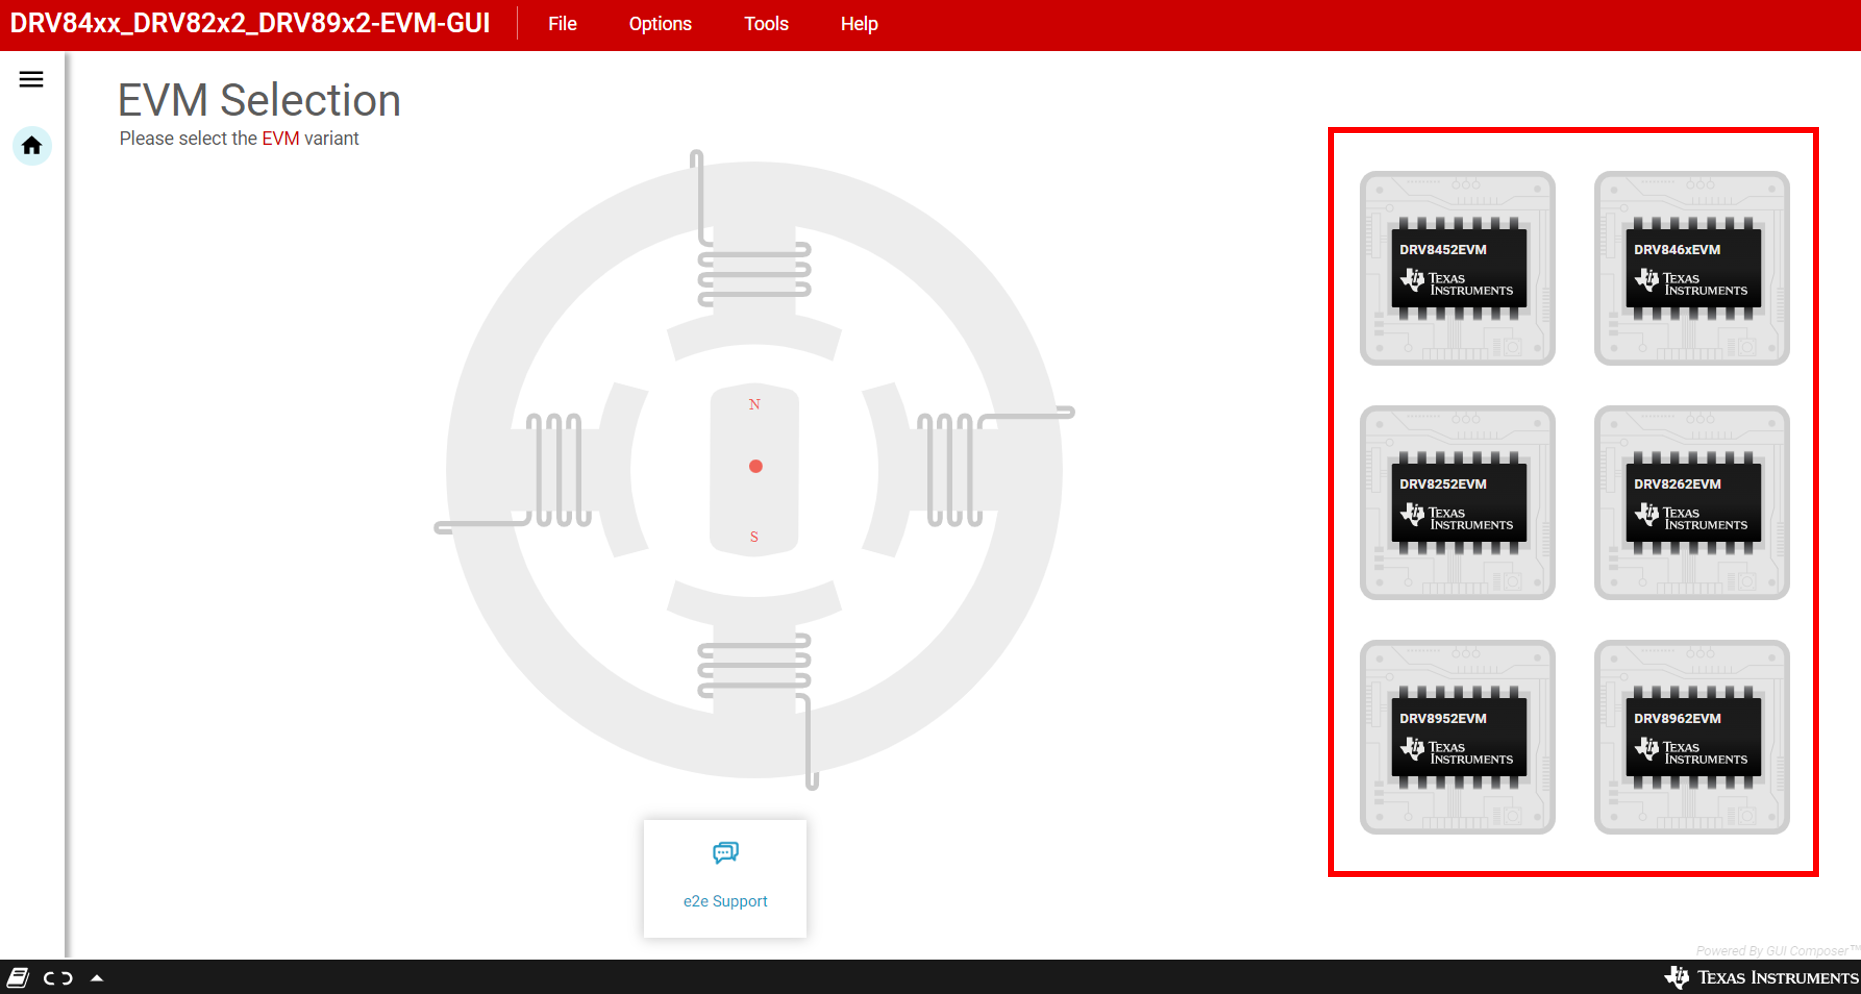
- Select the desired EVM type from the screen referenced in #GUID-65B2F62B-1D40-473D-A4A5-6EB3DEAF4340
 Figure 5-1 DRV84xx_DRV82x2_DRV89x2-EVM GUI Home Screen.
 Device selection screen within GUI.
For DRV8461EVM, DRV8462EVM, and DRV8462VEVM click on "DRV846xEVM"
For DRV8962EVM and DRV8962VEVM click "DRV8962EVM"
For DRV8262EVM and DRV8262VEVM click "DRV8262EVM"
Note:There is not an EVM for the DRV8452, DRV8952, or DRV8252 devices. You can make one by swapping out the DRV8x62 chip with the matching DRV8x52 chip on its EVM, change ID3 resistor to the LOW (GND) position, and change the ID4 resistor to the HIGH (3.3V) position.
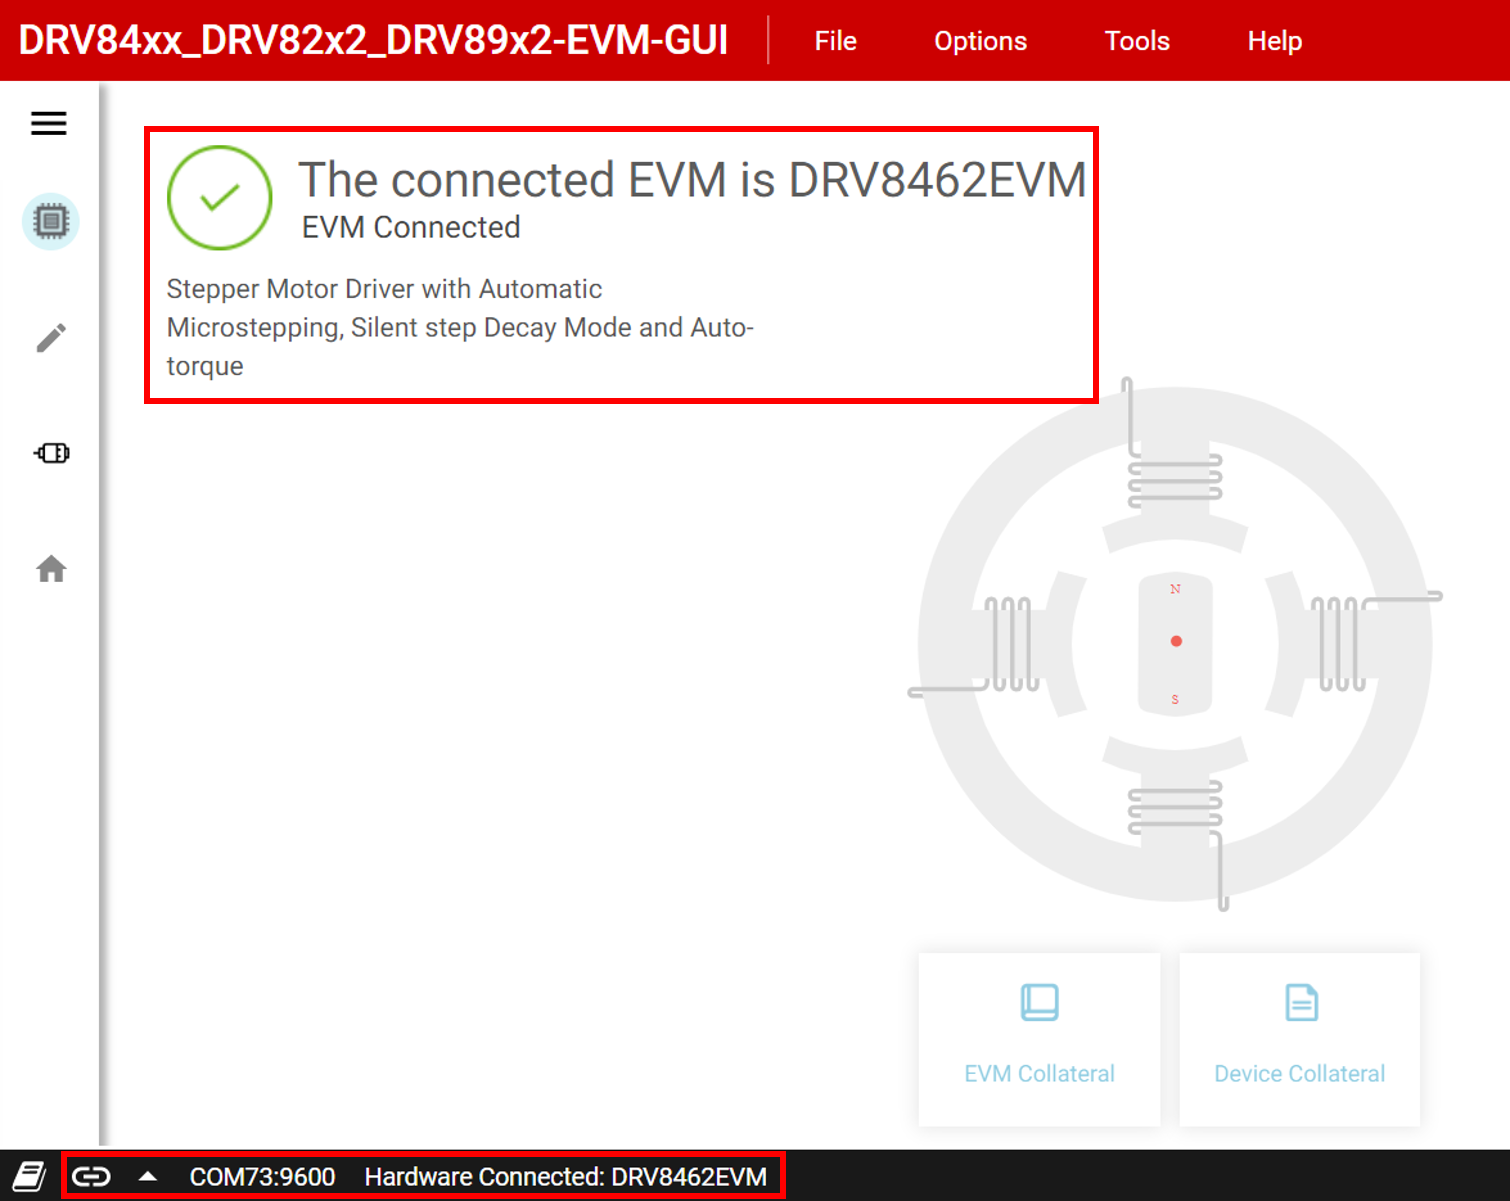
- After clicking the correct EVM type, the GUI application will initiate communications with the EVM. Connection confirmation will be displayed as shown below in #GUID-455A0E1E-0BF8-4B41-957D-78B4E4F96597:
 Figure 5-2 Successful EVM Connection
 - If the GUI app connection with the EVM is repeatedly not successful, follow the below listed steps to debug the issue.
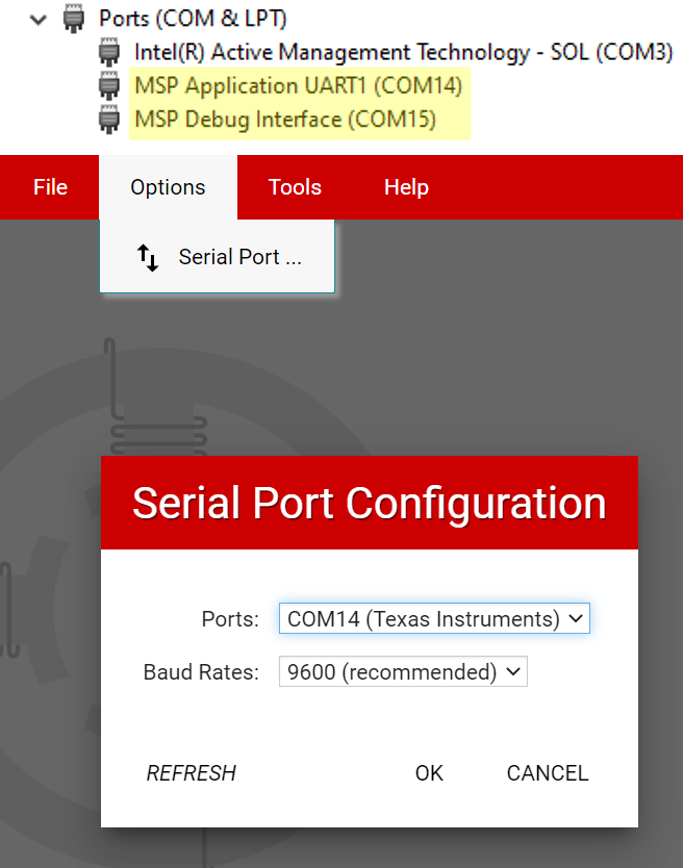
- Check if the serial communications parameters were properly configured. In the GUI, click on the “Options” menu, and select “Serial Port”. Verify if the port selected matches the MSP Application UART1 enumerated in the Device Manager, Windows system Control Panel. The baud rate must be set to 9600 (recommended). If no MSP COMxx ports were enumerated and displayed in the Windows Device Manager, ensure proper power sequencing was followed. If necessary do a power off and on cycle. If the following Windows Device Manager information is still not visible after the power cycle it points to a hardware connection issue.
 Figure 5-3 Serial Port Configuration
 - It is possible that the EVM has a much older version of the firmware. Perform a firmware update using the procedure described in Updating Firmware
- Check if the MCU_STATUS LED D6 is blinking at approximately 1 Hz. If the STATUS LED is not blinking, perform a firmware reset using the push button S1 with jumper J23 in 1-2 RST position. Attempt to connect the GUI app with the EVM again.
- Check if the serial communications parameters were properly configured. In the GUI, click on the “Options” menu, and select “Serial Port”. Verify if the port selected matches the MSP Application UART1 enumerated in the Device Manager, Windows system Control Panel. The baud rate must be set to 9600 (recommended). If no MSP COMxx ports were enumerated and displayed in the Windows Device Manager, ensure proper power sequencing was followed. If necessary do a power off and on cycle. If the following Windows Device Manager information is still not visible after the power cycle it points to a hardware connection issue.
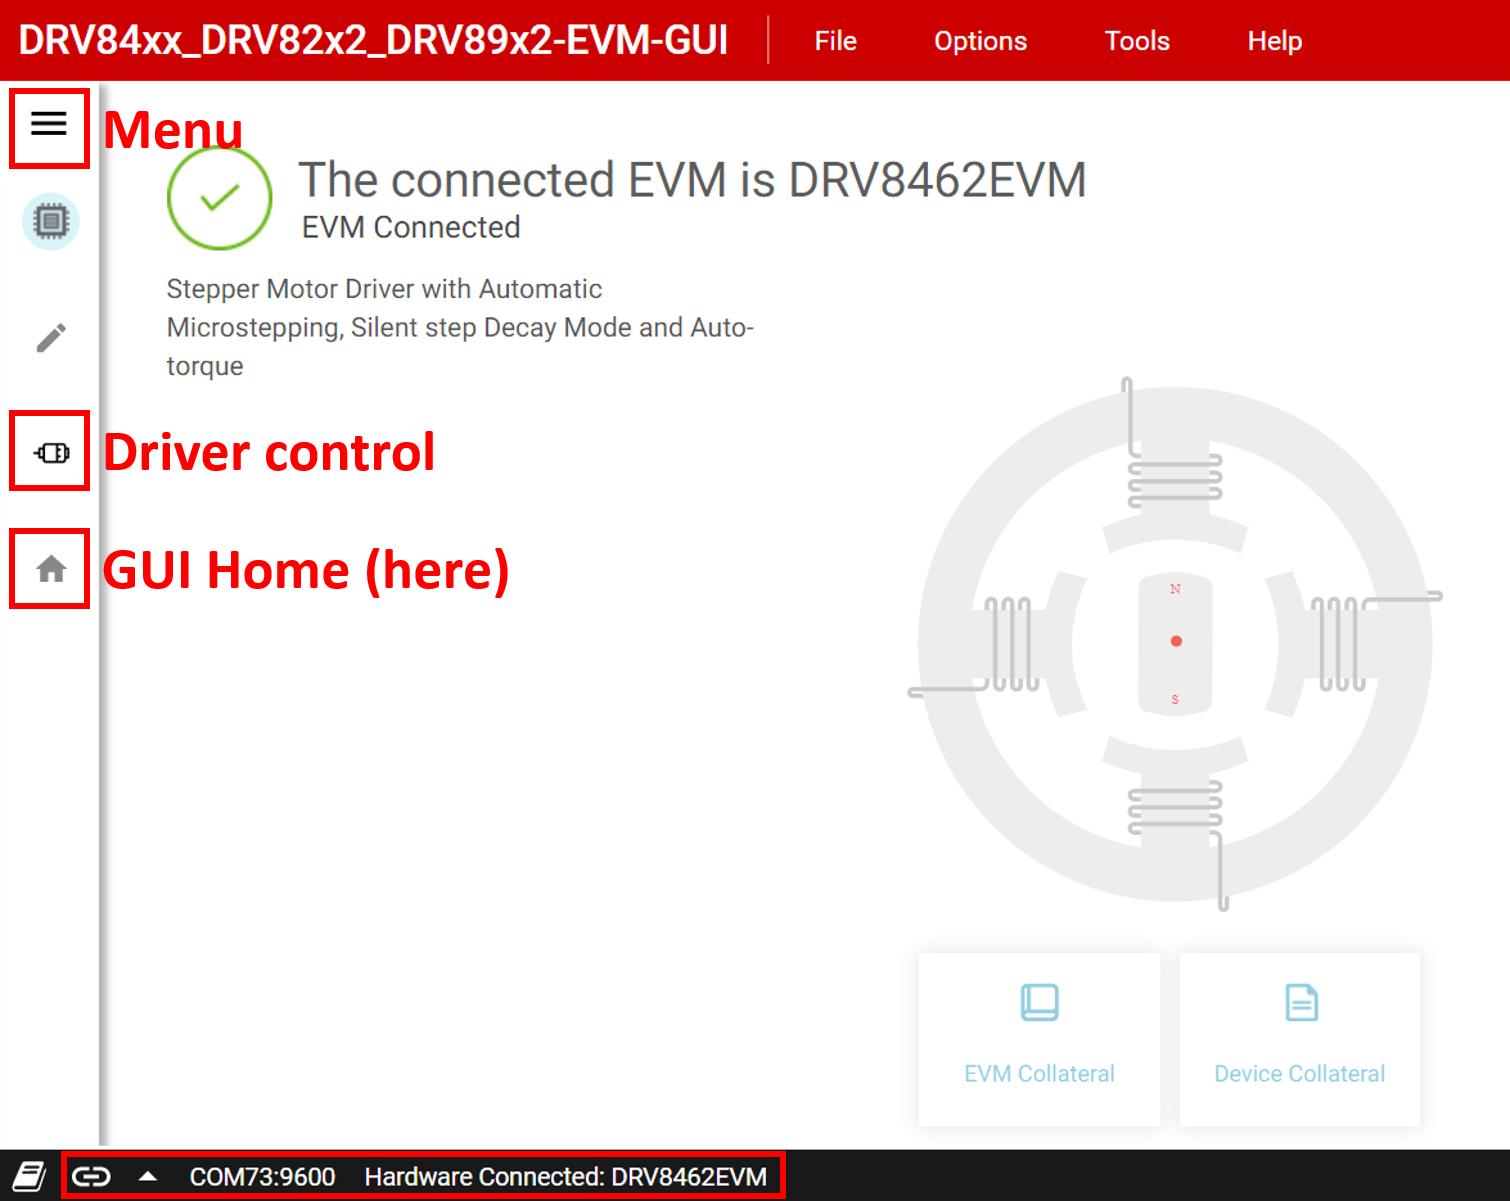
- At this point, the user may set-up the EVM for device evaluation:
- Driver Control page with configuration and diagnostic options.
- GUI Home page to re-select the EVM if necessary.
 Figure 5-4 DRV84xx_DRV82x2_DRV89x2-EVM GUI Navigation
 - The "Driver Control" tab will display the firmware version in the top right corner. When you click on "Help > About" it should display the GUI version, Device Rev ID, and the EVM firmware version.