SNOU173A October 2020 – December 2020 LM7310
5.2 ORing of Two Power Supplies Test
Use the following instructions to perform Simple ORing test:
- Use Channel 1 and Channel 2 to test ORing capability of LM73100.
- Populate R24 with 0Ω resistor to connect VOUT1 and VOUT2.
- Change the UVLO threshold setting for each channel as per the voltage intended to be applied.
- Apply voltage on Channel 1 and Channel 2. Different voltages can be applied on Channel 1 and Channel 2.
Test various conditions
Ramp up voltage on the low voltage rail to a value greater than the other rail to see output always follow the highest voltage rail
Ramp down voltage on the highest voltage rail to a value lower than the other rail to see output always follow the highest voltage rail
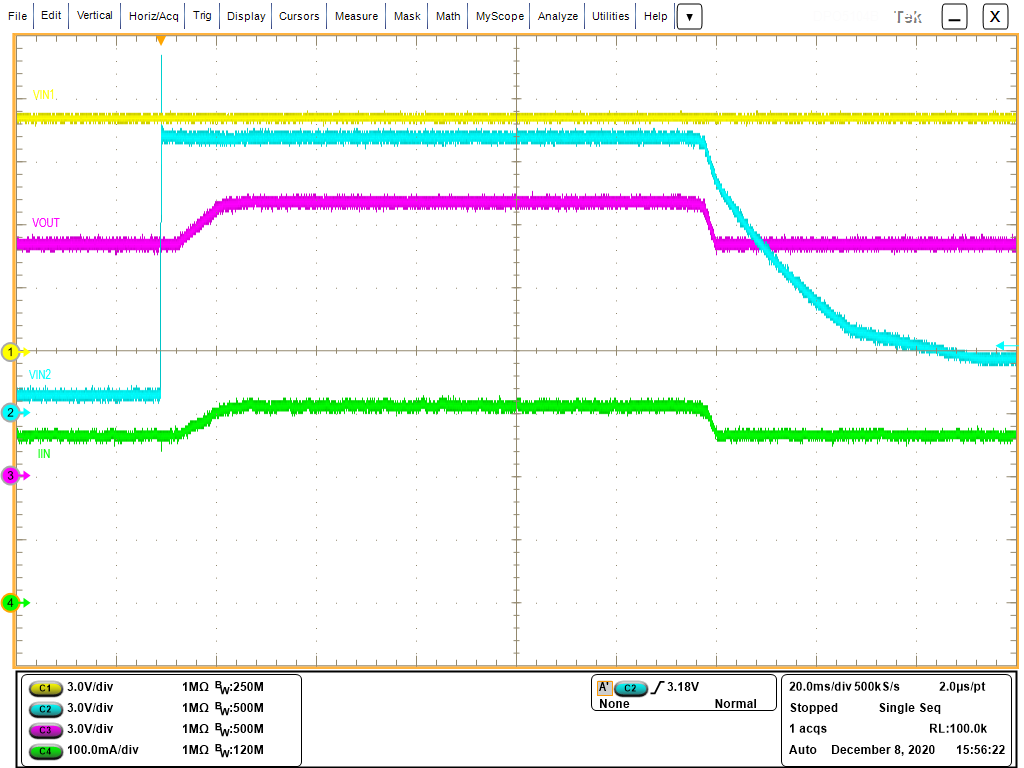
Figure 5-3 shows an example of simple ORing on the LM73100EVM Ideal Diode Evaluation Board.
 Figure 5-3 ORing Control of LM73100 (VIN1 = 11 V, VIN2 = 13 V)