SPRUIT8D February 2020 – February 2021 AWR2243
- Trademarks
- 1Getting Started
- 2Hardware
- 3Design Files and Software Tools
- 4Design Revision History
- 5Mechanical Mounting of PCB
- 6PCB Storage and Handling Recommendations
- 7Regulatory Information
- 8Revision History
2.2 Connecting BoosterPack™ to LaunchPad™ or MMWAVE-DEVPACK
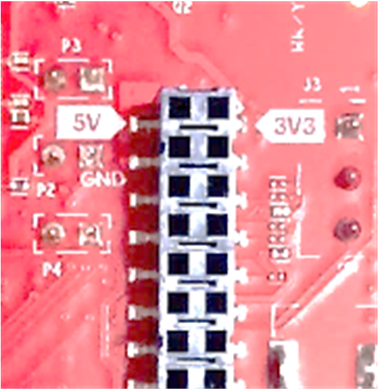
This BoosterPack can be stacked on top of the Launchpad, or the MMWAVE-DEVPACK, using the two 20-pin connectors. The connectors do not have a key to prevent the misalignment of the pins or reverse connection. Therefore, ensure reverse mounting does not take place. On the AWR2243 BoosterPack, we have provided 3V3 marking near pin 1 (see Figure 2-4). This same marking is provided on compatible LaunchPads which must aligned before powering up the boards.
 Figure 2-4 3V3 and 5-V Mark on the LaunchPad™ (White Triangle)