TIDUCL3 February   2017


  1. Overview
  2. Resources
  3. Features
  4. Applications
  5. Design Images
  6. System Overview
    1. 6.1 System Description
    2. 6.2 Key System Specifications
    3. 6.3 Block Diagram
    4. 6.4 Highlighted Products
      1. 6.4.1 LMT87-Q1
      2. 6.4.2 TLC555-Q1
      3. 6.4.3 OPA2377-Q1
      4. 6.4.4 TL431-Q1
      5. 6.4.5 TPS92691-Q1
  7. System Design Theory
    1. 7.1  PCB and Form Factor
    2. 7.2  Optimizing Board Performance Based on LED String Voltage and Current
    3. 7.3  Switching Frequency
    4. 7.4  Output Overvoltage Protection (OVP)
    5. 7.5  Current Monitoring (IMON)
    6. 7.6  Thermal Foldback
      1. 7.6.1 Changing Thermal Foldback Response
        1. 7.6.1.1 Changing Starting Point for Thermal Foldback
        2. 7.6.1.2 Changing Slope of Thermal Foldback
        3. 7.6.1.3 Constant Current at High Temperatures
      2. 7.6.2 Thermal Foldback Without PWM Dimming
    7. 7.7  Clock Generation (PWM)
    8. 7.8  Onboard Supply and Setting Duty Cycle
    9. 7.9  Buffering, Averaging, and Filtering
    10. 7.10 Boost Converter
  8. Getting Started Hardware
    1. 8.1 Hardware
    2. 8.2 LED Selection
    3. 8.3 J3, LED+, LED– (Boost)
    4. 8.4 J1, POS(+), NEG(–)
    5. 8.5 J4, Temperature Sensor Connection
    6. 8.6 Duty Cycle Adjust
  9. Testing and Results
    1. 9.1 Duty Cycle Accuracy
    2. 9.2 Thermal Foldback Testing
    3. 9.3 EMI Testing
    4. 9.4 Accuracy Calculation
  10. 10Design Files
    1. 10.1 Schematics
    2. 10.2 Bill of Materials
    3. 10.3 PCB Layout Recommendations
      1. 10.3.1 Layout Prints
    4. 10.4 Altium Project
    5. 10.5 Gerber Files
    6. 10.6 Assembly Drawings
  11. 11Related Documentation
    1. 11.1 Trademarks
  12. 12About the Author

Hardware

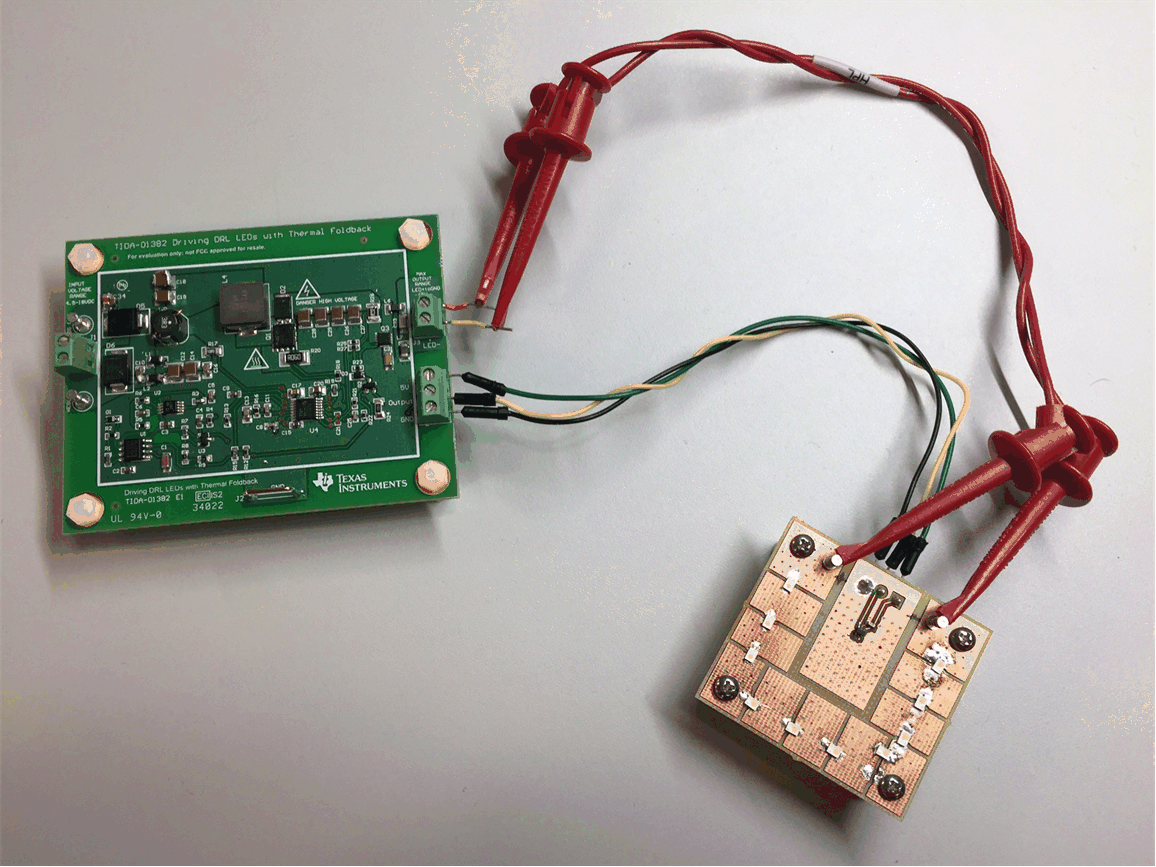
Connect the desired number of LEDs per string at the output screw terminals to get started with the
TIDA-01382 board. Figure 23 shows an image of the TIDA-01382 board.
TIDA-01382 tida-01382_full_design.gifFigure 23. TIDA-01382 With LED Daughter Board