SLVUBT8B November 2020 – June 2022 LP8764-Q1 , TPS6594-Q1
- Scalable PMIC's GUI User’s Guide
- Trademarks
- 1 Introduction
- 2 Supported Features
- 3 Revisions
- 4 Overview
- 5 Getting Started
- 6 Quick-start Page
- 7 Register Map Page
- 8 NVM Configuration Page
- 9 NVM Validation Page
- 10Watchdog Page
- 11Additional Resources
- 12Appendix A: Troubleshooting
- 13Appendix B: Advanced Topics
- 14Appendix C: Known Limitations
- 15Appendix D: Migration Topics
- 16Revision History
8.1.1 Static Configuration
The Static Configuration perspective provides a similar interface as to what is found in the Quick-start page. The recommended flow is to start with the System Info tab on the far left, updating each block within the System Info tab and then proceeding to the next configuration tab. In a multi-device system, simply select the device to be configured from the Select a device to configure drop-down menu at the top left of the page.
Within each block are a list of registers and fields which directly match the device register and field names. It is recommended to use the data sheet specification to understand and properly set the field values for a given application. Within the BUCK blocks there is an additional graphical selection tool, see Figure 8-4, to abstract the register settings into the use cases also described in the device data sheet. The graphical selection tool will appear in the far right column of the display, providing the Configuration Use case name as well as the recommended inductor value.
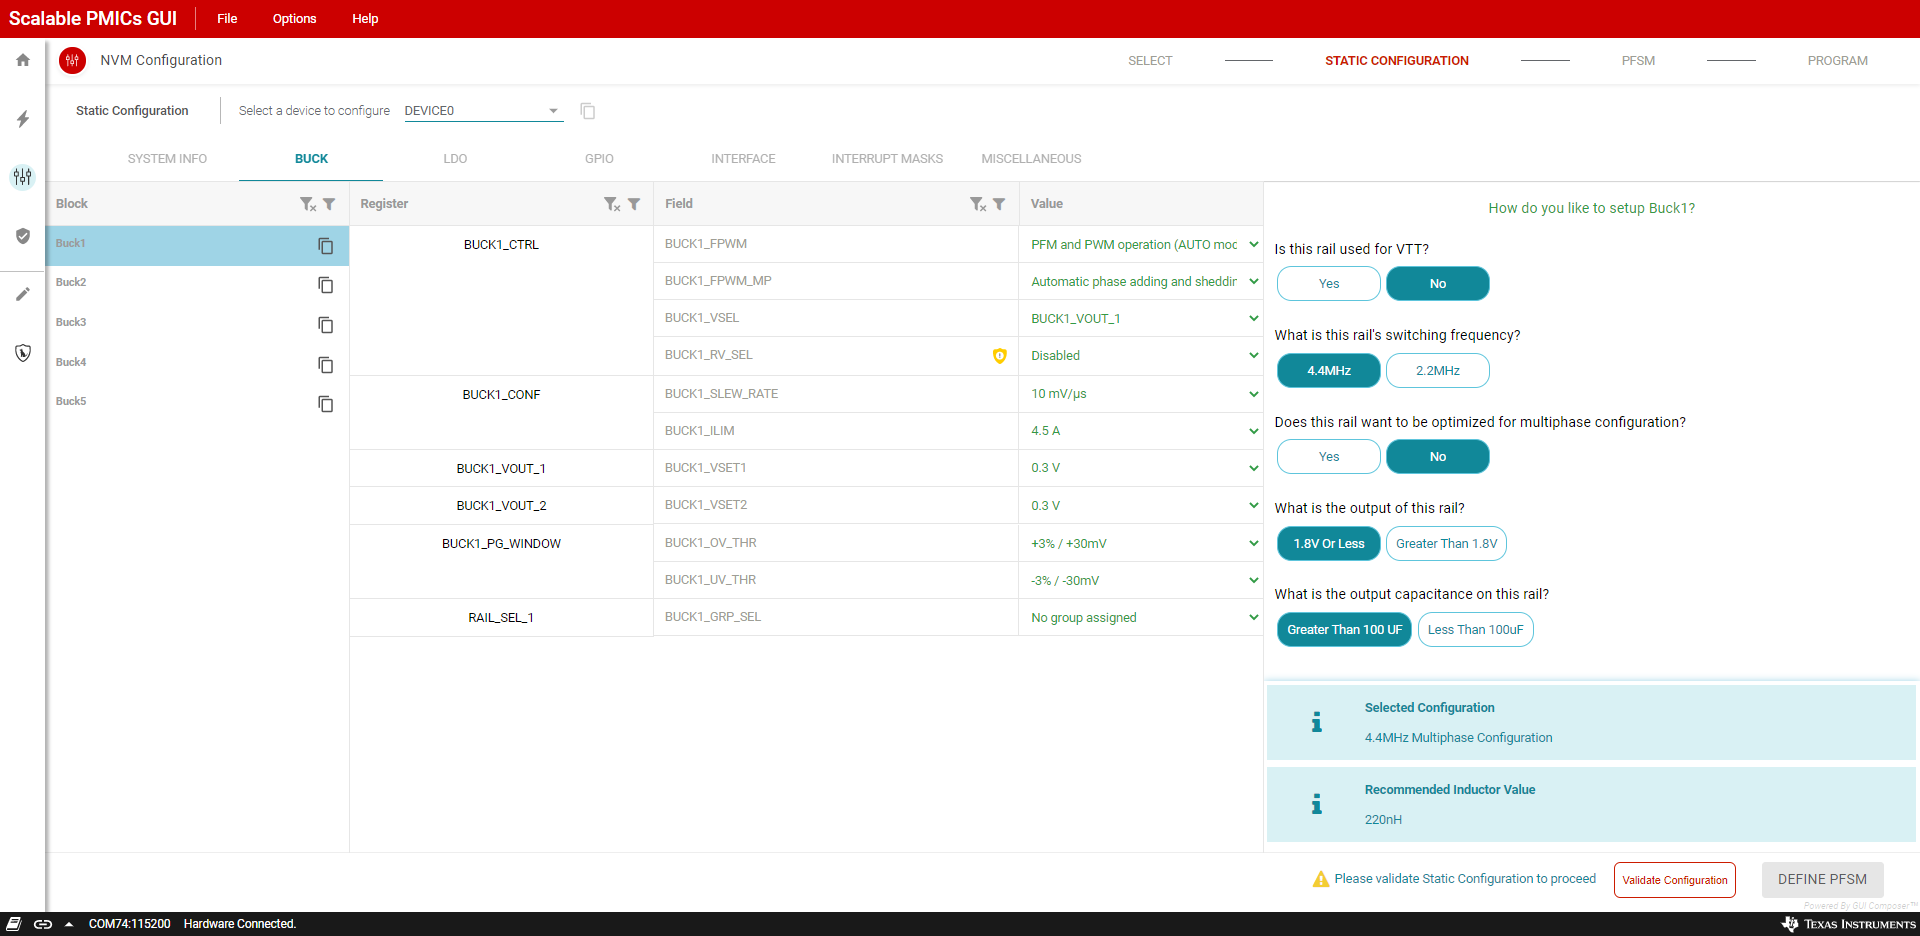 Figure 8-4 BUCK Static
Configuration
Figure 8-4 BUCK Static
ConfigurationWithin the Static Configuration perspective, the GUI is monitoring the validity of the configuration. Specifically, for multi-device solutions the GUI is making sure that both the power (VCCA and nPWRON) and interface selections match. By clicking on the Validation Failed text at the bottom of the perspective a pop-up window, as shown in Figure 8-5, will describe all of the issues which are invalid and preventing the next stage of the development.
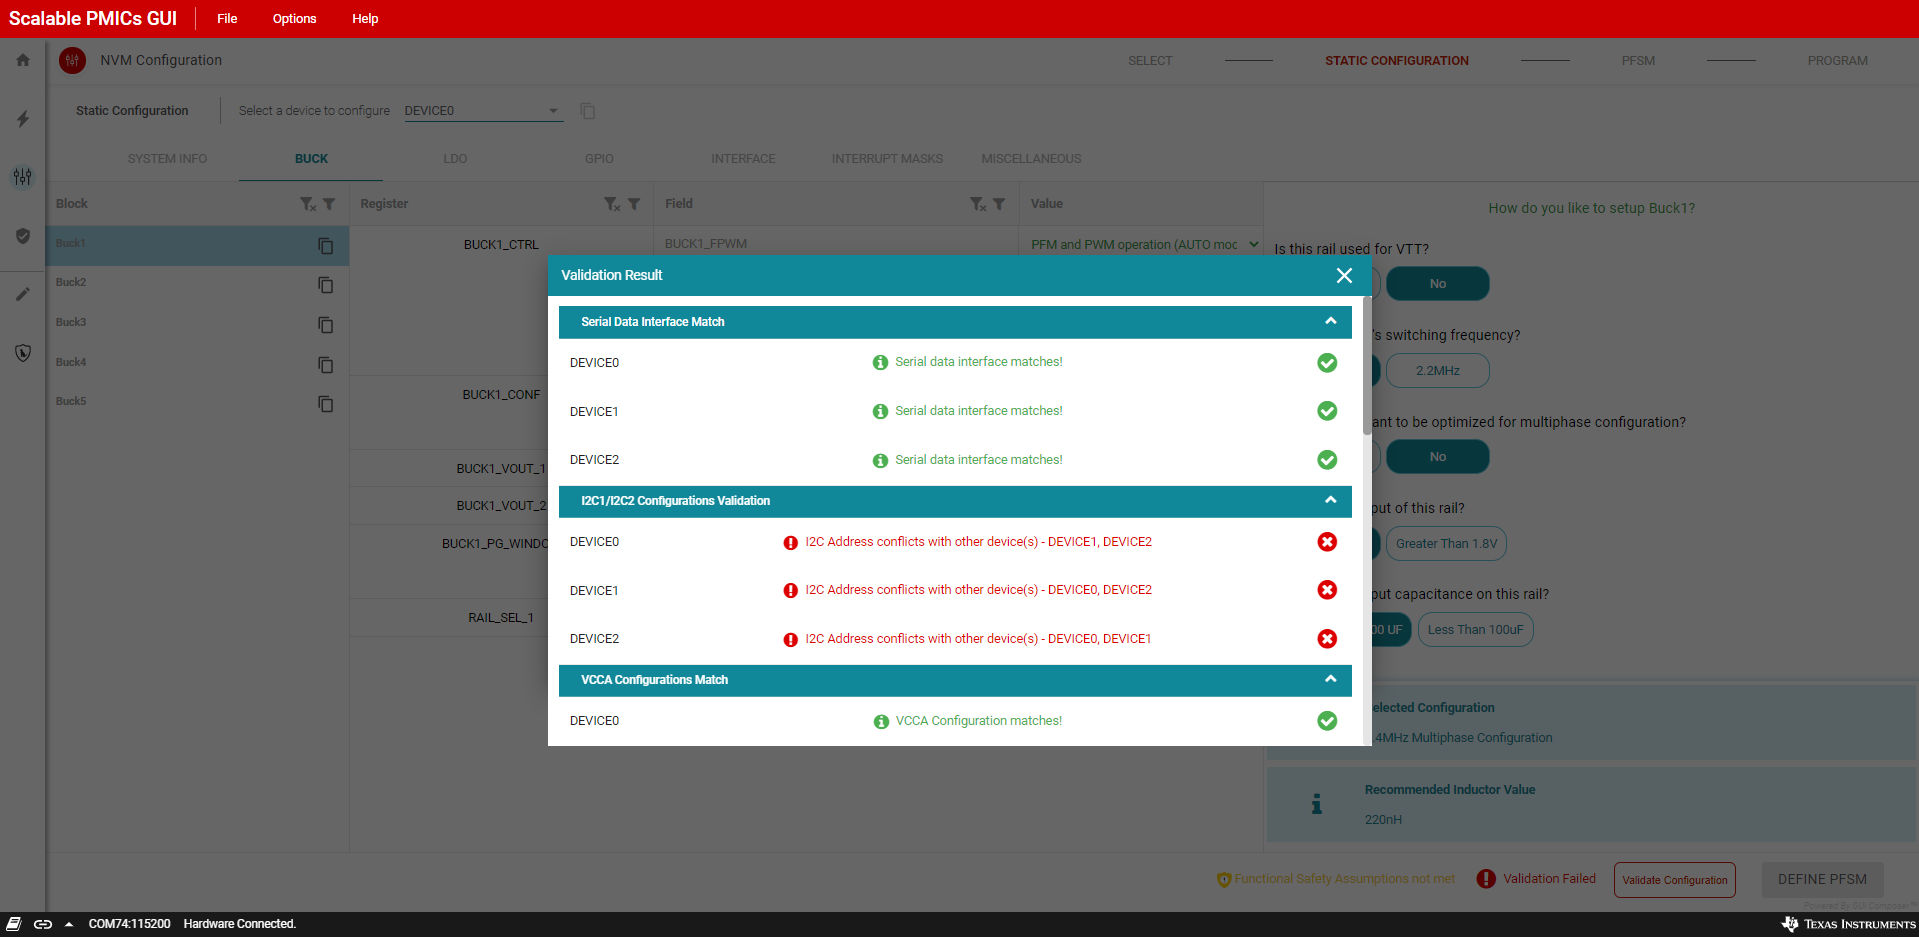 Figure 8-5 Static Configuration, Failed
Verification
Figure 8-5 Static Configuration, Failed
VerificationIn this example, all three devices have the same I2C address(es). After updating each device to a unique address, the GUI now shows Validation Success and the Define PFSM button is now active.
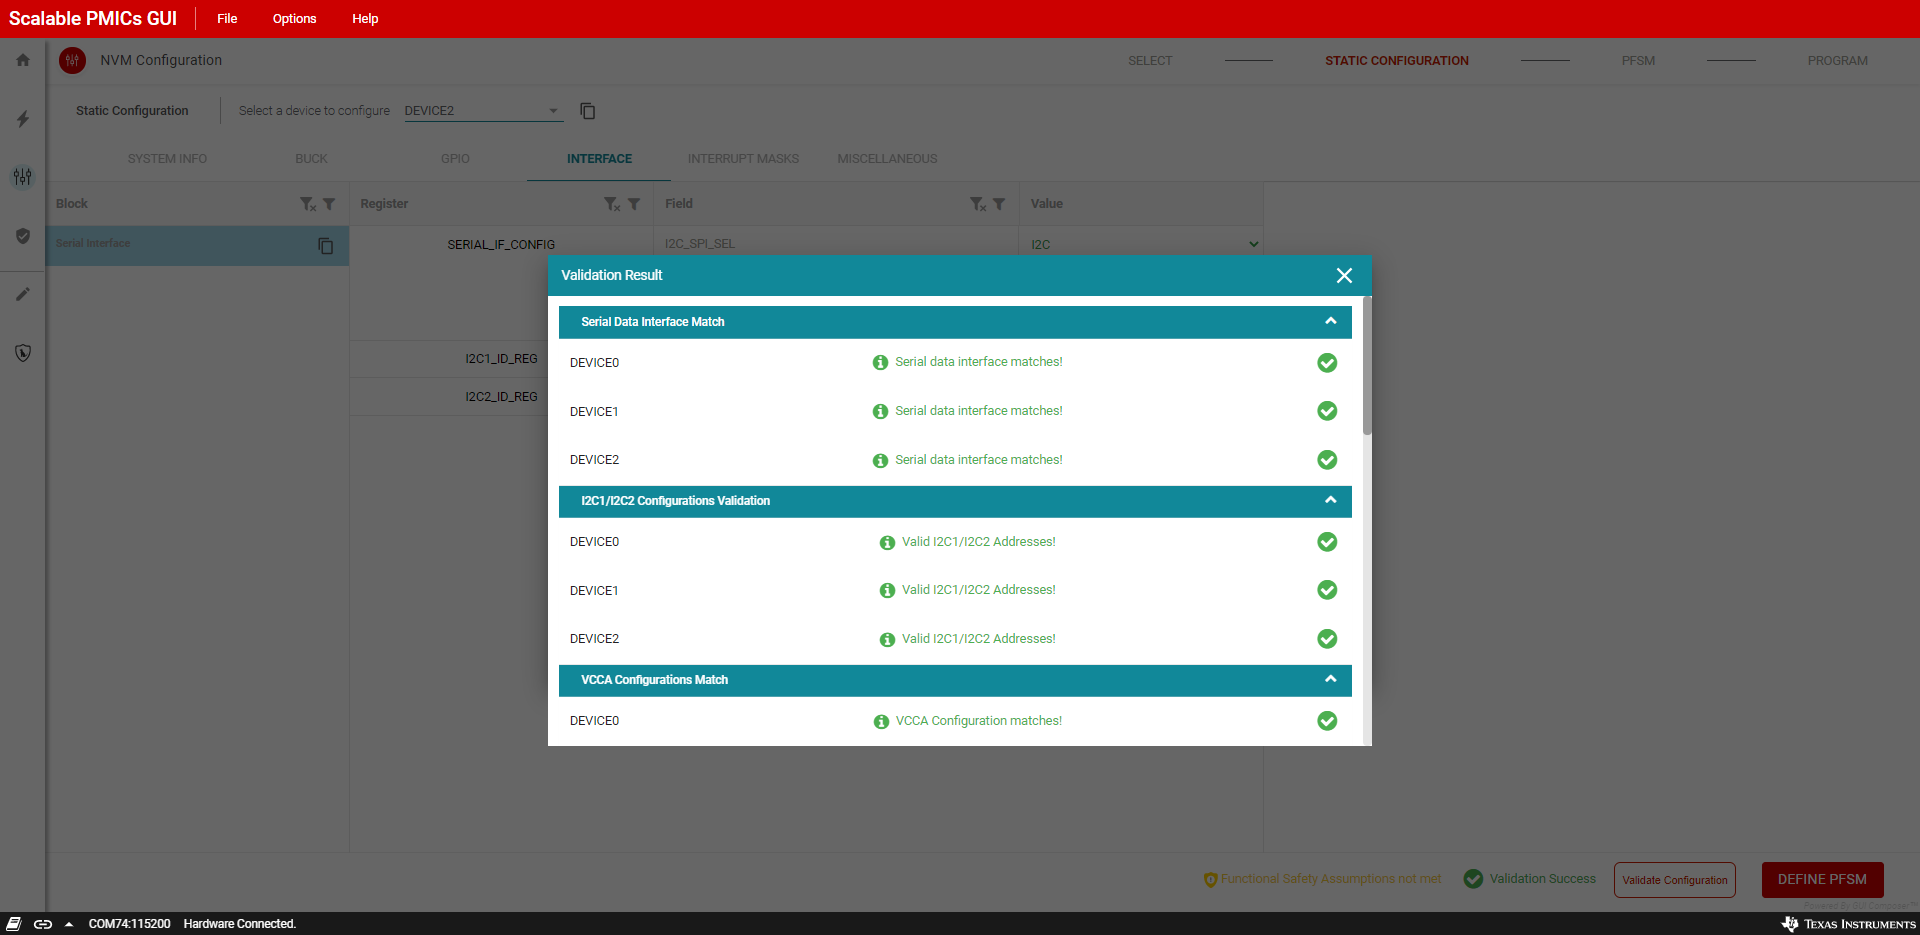 Figure 8-6 Static Configuration, Passing
Verification
Figure 8-6 Static Configuration, Passing
VerificationIn addition to the check of the static settings, in devices which support functional safety, there is an additional check of the safety related features. By clicking on the Functional Safety Assumptions not met text, a pop-up window, as shown in Figure 8-7, displays. The window lists the parameters related to the device’s functional safety assumptions. Refer to the device's functional safety manual and the application’s functional safety goals, to confirm that the selected settings meet their functional safety target.
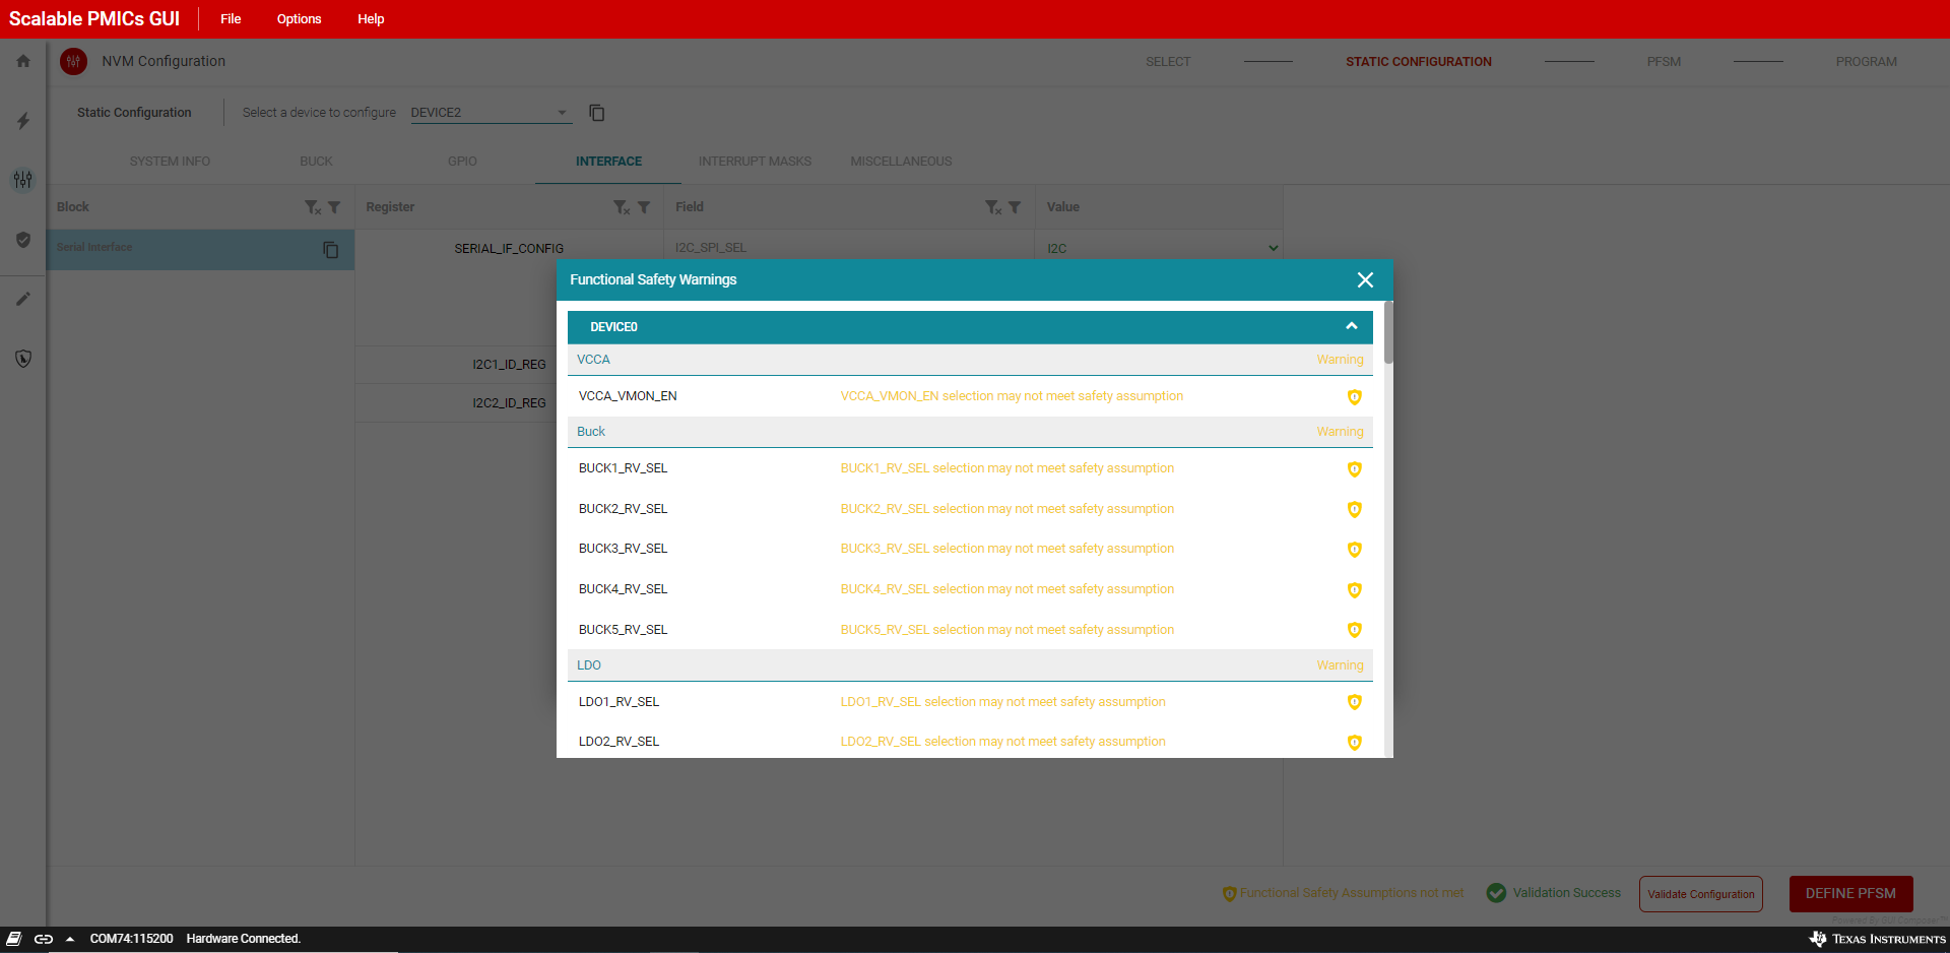 Figure 8-7 Function Safety Assumptions
Check
Figure 8-7 Function Safety Assumptions
CheckWhen transitioning to the PFSM perspective from the static settings if any values were not updated, then a warning message will appear. Values that are not updated will appear with a yellow highlight around the value. In this example, only the I2C addresses have been updated. Texas Instruments recommends reviewing and confirming all settings that are highlighted as unchanged.
 Figure 8-8 Example of non-updated Static
Configuration Values
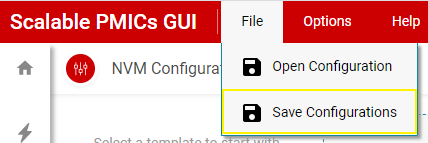 Figure 8-9 Save Often