TIDUEO1B April   2021  – June 2021


  1.   Description
  2.   Resources
  3.   Features
  4.   Applications
  5.   5
  6. 1General Texas Instruments High Voltage Evaluation (TI HV EVM) User Safety Guidelines
  7. 2System Description
    1. 2.1 Key System Specifications
  8. 3System Overview
    1. 3.1 Block Diagram
    2. 3.2 Design Considerations
      1. 3.2.1 Basic Operation
      2. 3.2.2 PCMC PSFB using C2000
    3. 3.3 System Design Theory
      1. 3.3.1 Peak Current Mode Control (PCMC) Implementation
      2. 3.3.2 Zero Voltage Switching (ZVS) or Low Voltage Switching (LVS)
      3. 3.3.3 Synchronous Rectification
      4. 3.3.4 Slope Compensation
    4. 3.4 Highlighted Products
      1. 3.4.1 C2000™ MCU F28004x
  9. 4Hardware, Software, Testing Requirements, and Test Results
    1. 4.1 Required Hardware and Software
      1. 4.1.1 Hardware
      2. 4.1.2 Software
        1. 4.1.2.1 Software Control Flow
        2. 4.1.2.2 Incremental Builds
        3. 4.1.2.3 Procedure for running the incremental builds - PCMC
          1. 4.1.2.3.1 Build 1: Peak Current Loop Check with Open Voltage Loop
            1. 4.1.2.3.1.1 Objective
            2. 4.1.2.3.1.2 Overview
            3. 4.1.2.3.1.3 Procedure
              1. 4.1.2.3.1.3.1 Start CCS and Open a Project
              2. 4.1.2.3.1.3.2 Build and Load the Project
              3. 4.1.2.3.1.3.3 Debug Environment Windows
              4. 4.1.2.3.1.3.4 Using Real-Time Emulation
              5. 4.1.2.3.1.3.5 Run the Code
          2. 4.1.2.3.2 Build 2: Closed current and voltage loop (Full PSFB)
            1. 4.1.2.3.2.1 Objective
            2. 4.1.2.3.2.2 Overview
            3. 4.1.2.3.2.3 Procedure
              1. 4.1.2.3.2.3.1 Build and Load Project
              2. 4.1.2.3.2.3.2 Debug Environment Windows
              3. 4.1.2.3.2.3.3 Run the Code
      3. 4.1.3 Test results
  10. 5Design and Documentation Support
    1. 5.1 Design Files
      1. 5.1.1 Schematics
      2. 5.1.2 BOM
    2. 5.2 Software
    3. 5.3 Documentation Support
  11. 6Terminology
  12. 7About the Author
  13. 8Revision History
Start CCS and Open a Project

To quickly execute this build, follow the following steps:

  1. Make sure that all jumpers on the board are correctly installed or removed as listed in the Hardware section.
  2. Hardware Set-up: Insert the F28004x controlCARD in the 100-pin DIMM connector. Connect a 12 V DC bench power supply between TP10 and TP11 with correct polarity. Connect an isolated 400V programmable DC power source to the 400 V input connector and 12 V electronic load to the 12 V connector (make sure that this load does not exceed the board ratings). Connect a USB cable between the PC and controlCARD. Do not turn ON any of the power supplies at this time.
  3. Open Code Composer Studio. Maximize Code Composer Studio to fill your screen. Close the welcome screen if it opens up.
  4. locate the solution package downloaded and import the project in CCS
  5. In the project window on the left, click the plus sign (+) to the left of Project. Your project window will look like the following:
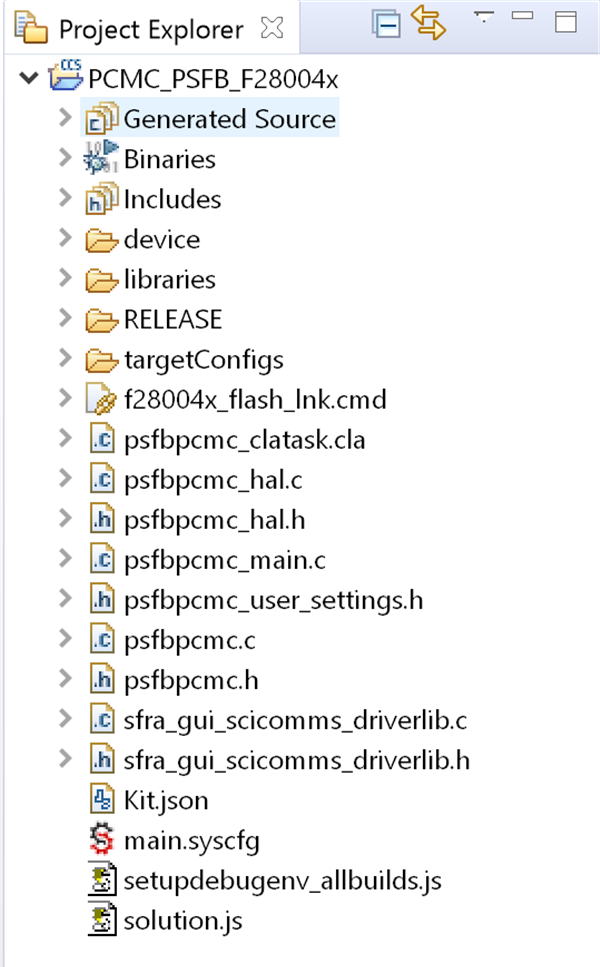
    GUID-20201007-CA0I-CLJK-LBNR-BTHQ8T7WRMJG-low.pngFigure 4-6 Project Window.