SWRA478D February 2015 – January 2019 CC1310 , CC1312PSIP , CC1312R , CC1314R10 , CC1352P , CC1352P7 , CC1352R , CC2640 , CC2640R2F , CC2640R2F-Q1 , CC2642R , CC2642R-Q1 , CC2650 , CC2650MODA , CC2652P , CC2652R , CC2652R7 , CC2652RB , CC2652RSIP
6.1 Test Setup
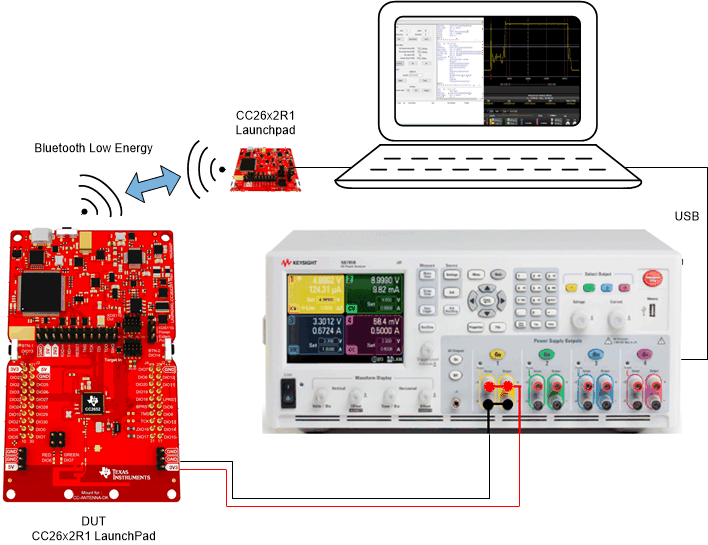
Make sure that the system is set up properly and review the steps described in Section 5. For reference, the full overview is illustrated in Figure 6-2. VDD is connected to the 3V3 pin on the LaunchPad.
When the DUT is correctly connected, the power supply is enabled by pressing the “On” button within the Agilent 14585A Control and Analysis Software. The power consumption measurements can be done by two separate functions: Scope or Data Logger. The Data Logger provides an average power consumption measurement over longer time, for example, minutes and hours, although the resolution is not as good as using Scope. This document focuses on doing measurements by using the Scope feature.
 Figure 6-2 DUT Test Setup
The Agilent N6705B powers the DUT as well as performs the current measurement.