SPRAD20 March 2022 AM2631 , AM2631-Q1 , AM2632 , AM2632-Q1 , AM2634 , AM2634-Q1
- Trademarks
- 1Introduction
-
2A Step-by-Step Guide to Running a Traction
Inverter
- 2.1 Create Real Time Debug Interface
- 2.2 Configure Control Peripheral and ADC Interrupt With Sysconfig
- 2.3 Configure Gate Driver Interface With MSPI
- 2.4 Get Samples From ADC and Read Samples Via CCS
- 2.5 Generate Space Vector PWM and Drive Motor in Open Loop
- 2.6 Close Current Loop With Mock Speed
- 2.7 Add Software Resolver to Digital Converter
- 2.8 Close Speed Loop With Rotor Speed
- 3A Brief Guide to Code Migration
- 4Summary
- 5References
2.1.2 Create Target Configuration File
For a control card in Figure 2-2, it offers both JTAG and UART ports in one USB port. Details on hardware connection can be found in AM263x Control Card User's Guide. It is necessary to create a target configuration file for the debug ports. A step-to-step guide is given in screen shots from Figure 2-3 to Figure 2-10. Briefly, a target configuration file is created and then configured with both JTAG and UART. The UART COM Port in Figure 2-10 should match PC Device Manager COM Port for JTAG probe Application/User UART. The Baud Rate in Figure 2-10 should be consistent with SoC UART Baud Rate configured in next step.
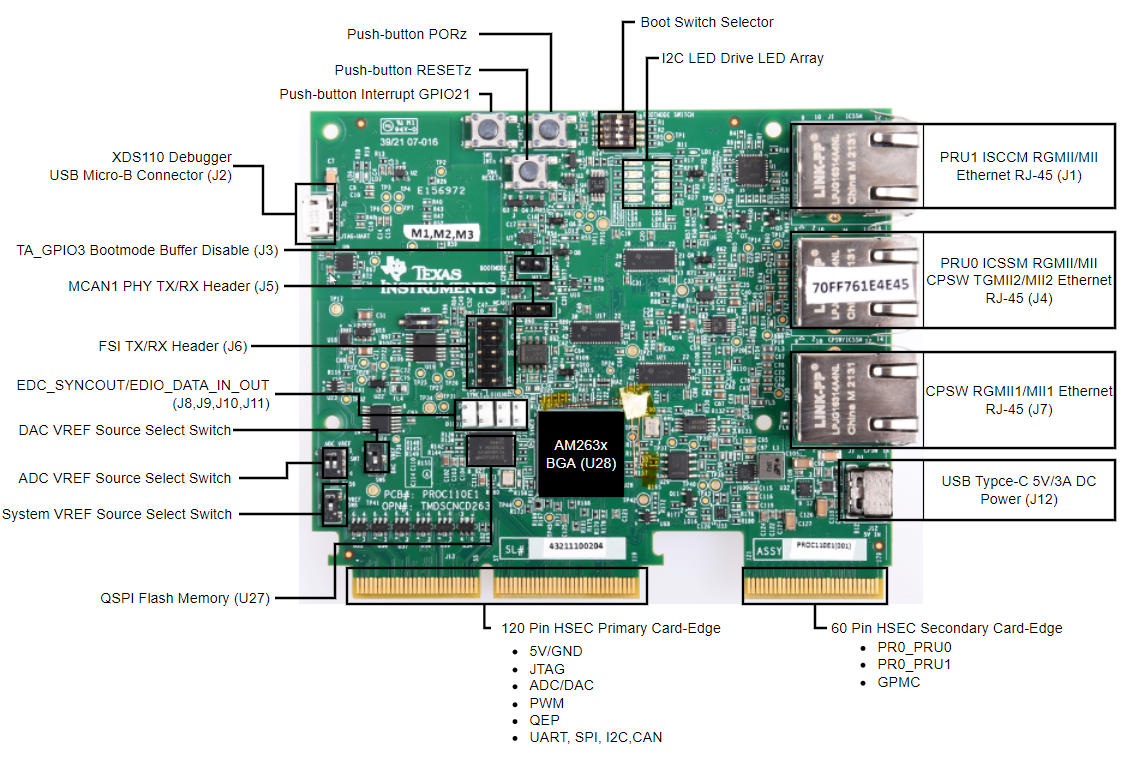 Figure 2-2 AM263x Control Card
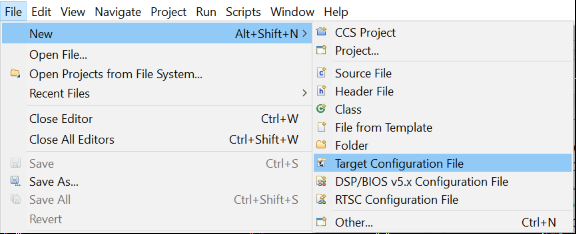 Figure 2-3 Create New Target
Configuration File
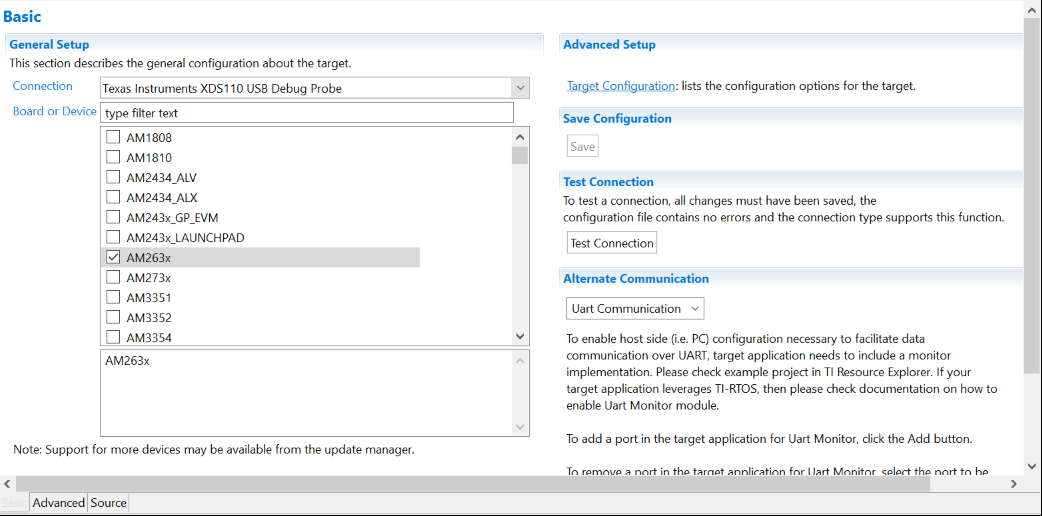 Figure 2-4 Select JTAG Connection and
Device
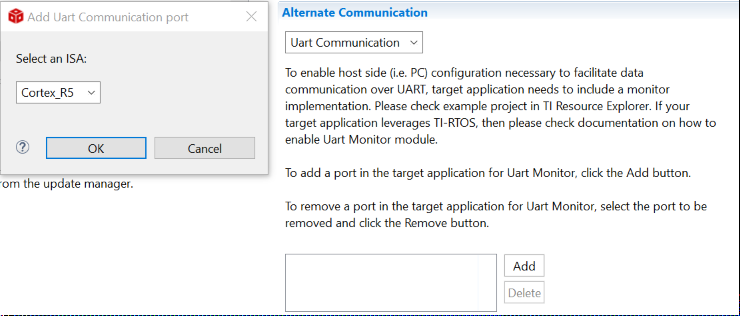 Figure 2-5 Add UART Communication
Port
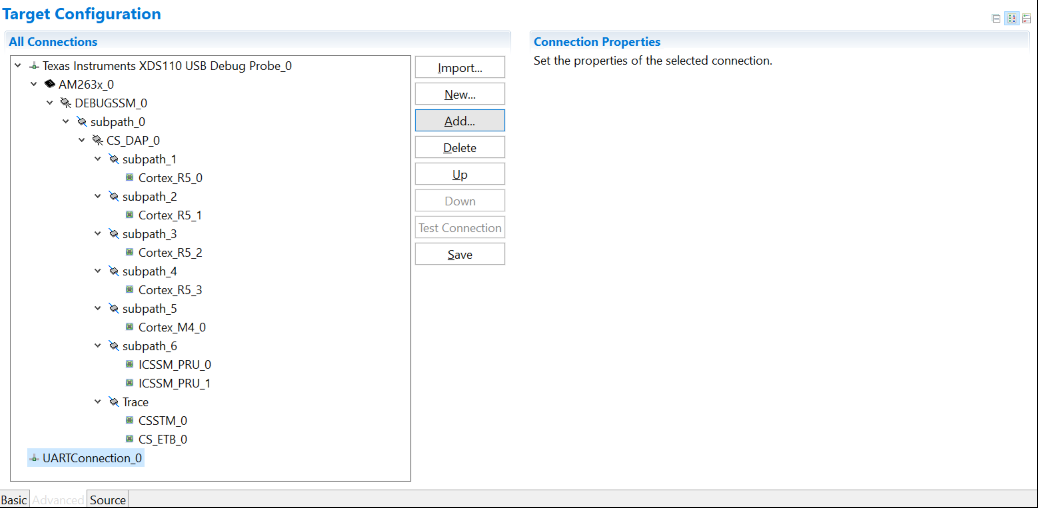 Figure 2-6 Open Advanced Target
Configuration
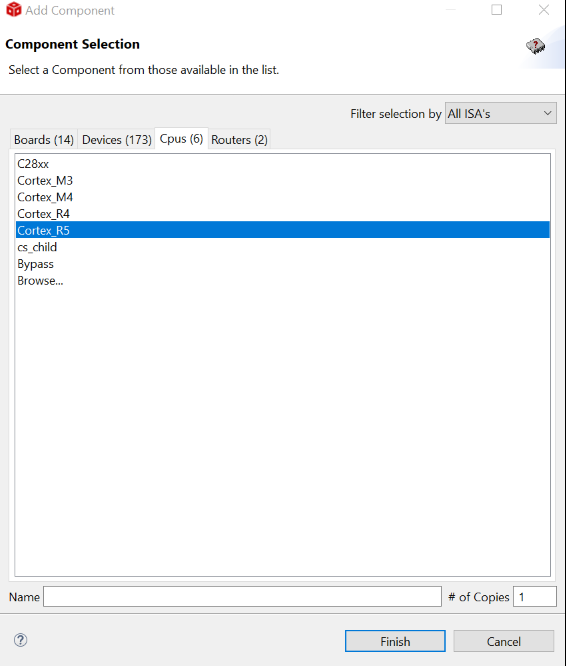 Figure 2-7 Add Component
 Figure 2-8 Select CPU Properties
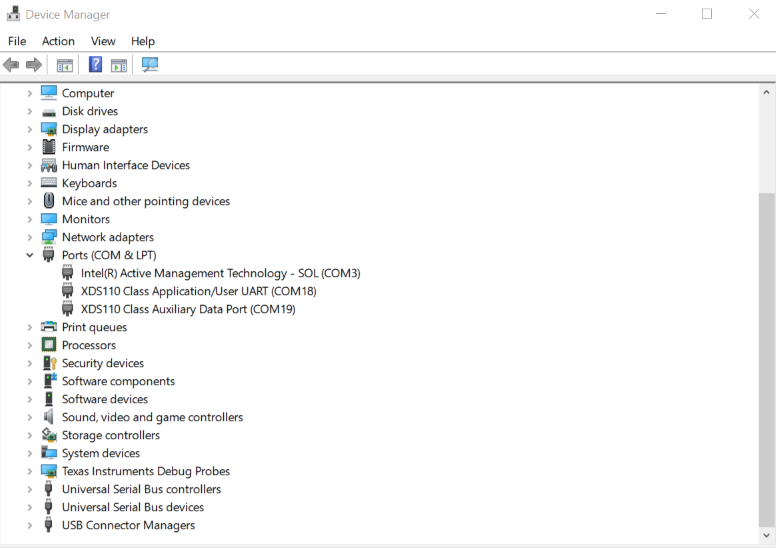 Figure 2-9 Find XDS110 UART COM
Port
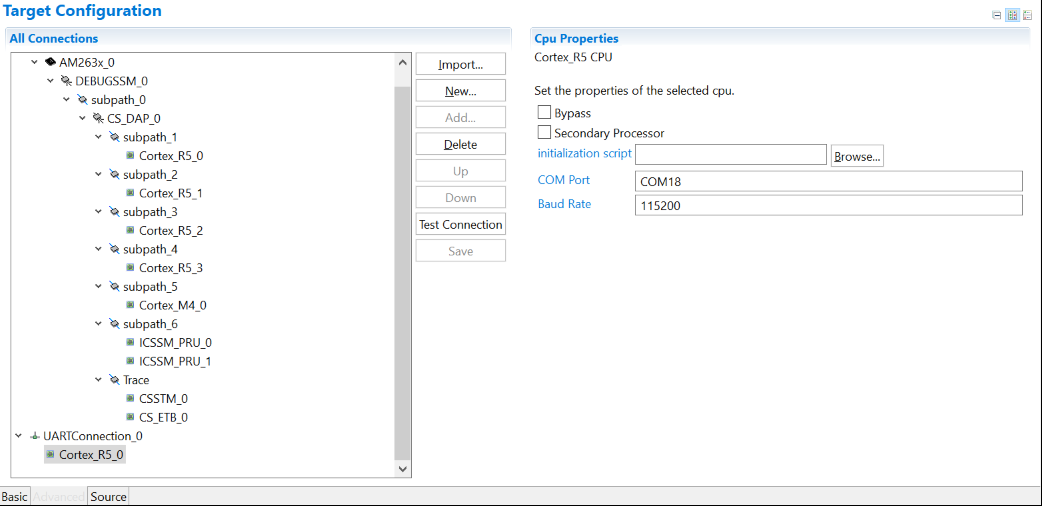 Figure 2-10 Update CPU Properties in
Advanced Target Configuration