JAJU732C June   2019  – July 2022


  1.   概要
  2.   Resources
  3.   特長
  4.   アプリケーション
  5.   5
  6. 1System Description
    1. 1.1 Key System Specifications
  7. 2System Overview
    1. 2.1 Block Diagram
    2. 2.2 Highlighted Products
      1. 2.2.1  UCC21530
      2. 2.2.2  AMC1311
      3. 2.2.3  AMC3302
      4. 2.2.4  AMC3306M05
      5. 2.2.5  LM76003
      6. 2.2.6  LMZ31707
      7. 2.2.7  OPA320
      8. 2.2.8  ISO7721
      9. 2.2.9  SN6501
      10. 2.2.10 SN6505B
      11. 2.2.11 TMP235
      12. 2.2.12 LMT87
      13. 2.2.13 TL431
      14. 2.2.14 LMV762
      15. 2.2.15 TMS320F280049 C2000 MCU
      16. 2.2.16 TMDSCNCD280049C
    3. 2.3 System Design Theory
      1. 2.3.1 Dual Active Bridge Analogy With Power Systems
      2. 2.3.2 Dual-Active Bridge - Switching Sequence
      3. 2.3.3 Dual-Active Bridge - Zero Voltage Switching (ZVS)
      4. 2.3.4 Dual-Active Bridge - Design Considerations
        1. 2.3.4.1 Leakage Inductor
        2. 2.3.4.2 Effect of Inductance on Current
        3. 2.3.4.3 Phase Shift
        4. 2.3.4.4 Capacitor Selection
        5. 2.3.4.5 Soft Switching Range
        6. 2.3.4.6 Switching Frequency
        7. 2.3.4.7 Transformer Selection
        8. 2.3.4.8 SiC MOSFET Selection
      5. 2.3.5 Loss Analysis
        1. 2.3.5.1 Design Equations
        2. 2.3.5.2 SiC MOSFET and Diode Losses
        3. 2.3.5.3 Transformer Losses
        4. 2.3.5.4 Inductor Losses
        5. 2.3.5.5 Gate Driver Losses
        6. 2.3.5.6 Efficiency
        7. 2.3.5.7 Thermal Considerations
  8. 3Circuit Description
    1. 3.1 Power Stage
    2. 3.2 DC Voltage Sensing
      1. 3.2.1 Primary DC Voltage Sensing
      2. 3.2.2 Secondary DC Voltage Sensing
    3. 3.3 Current Sensing
    4. 3.4 Power Architecture
      1. 3.4.1 Auxiliary Power Supply
      2. 3.4.2 Isolated Power Supply for Sense Circuits
    5. 3.5 Gate Driver
      1. 3.5.1 Gate Driver Circuit
      2. 3.5.2 Gate Driver Bias Power Supply
      3. 3.5.3 Gate Driver Discrete Circuits - Short-Circuit Detection and Two Level Turn Off
  9. 4Hardware, Software, Testing Requirements, and Test Results
    1. 4.1 Required Hardware and Software
      1. 4.1.1 Hardware
      2. 4.1.2 Software
        1. 4.1.2.1 Getting Started With Software
        2. 4.1.2.2 Pin Configuration
        3. 4.1.2.3 PWM Configuration
        4. 4.1.2.4 High-Resolution Phase Shift Configuration
        5. 4.1.2.5 ADC Configuration
        6. 4.1.2.6 ISR Structure
    2. 4.2 Test Setup
    3. 4.3 PowerSUITE GUI
    4. 4.4 LABs
      1. 4.4.1 Lab 1
      2. 4.4.2 Lab 2
      3. 4.4.3 Lab 3
      4. 4.4.4 Lab 4
      5. 4.4.5 Lab 5
    5. 4.5 Test Results
      1. 4.5.1 Open-Loop Performance
      2. 4.5.2 Closed-Loop Performance
  10. 5Design Files
    1. 5.1 Schematics
    2. 5.2 Bill of Materials
    3. 5.3 PCB Layout Recommendations
      1. 5.3.1 Layout Prints
    4. 5.4 Altium Project
    5. 5.5 Gerber Files
    6. 5.6 Assembly Drawings
  11. 6Related Documentation
    1. 6.1 Trademarks
  12. 7Terminology
  13. 8About the Author
  14. 9Revision History

Lab 1

Compile the project by selecting Lab 1: Open Loop PWM in the drop-down menu of Project Options from PowerSUITE GUI. This lab is intended to validate the PWM outputs and can be checked directly using TIDA-010054 HW or using the F2804X control card with a docking station.

Run the project by clicking the green run button in CCS.
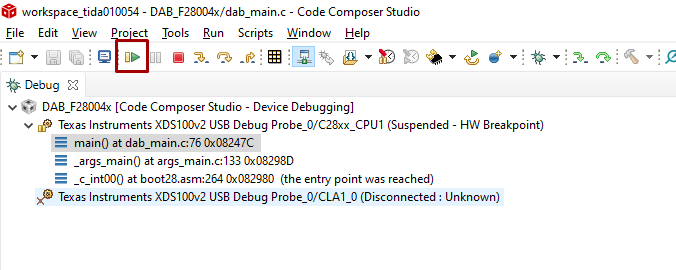
GUID-20210818-SS0I-VN1H-KCZC-ZVHDLLRW0NMV-low.png Figure 4-10 Run CCS

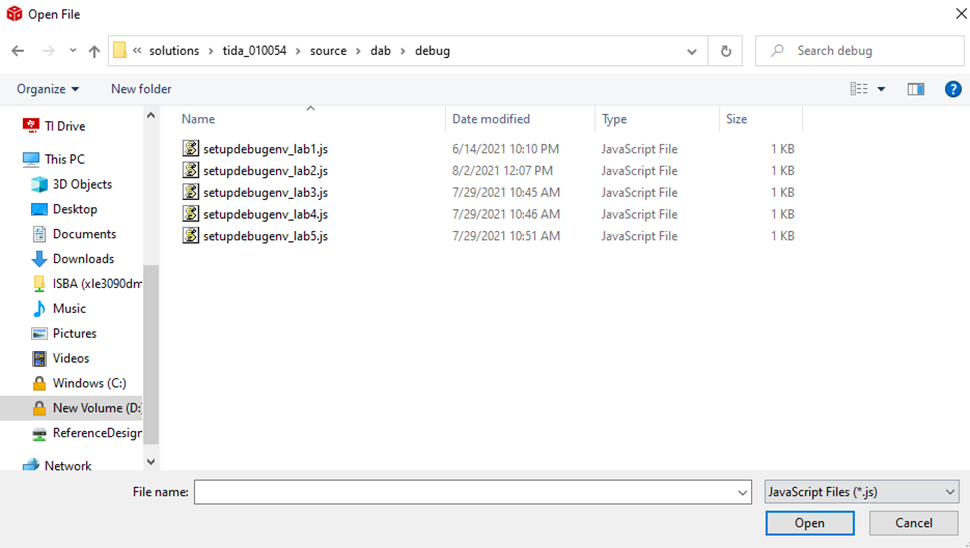
Populate the required variables in the watch window by loading javascript ' setupdebugenv_lab1.js' in the scripting console.

GUID-20210818-SS0I-R0PH-HXTH-PBNSRTDGXMZT-low.png Figure 4-11 Loading Labs
GUID-20210818-SS0I-72LX-CH1N-JFN4P0HPXMNQ-low.png Figure 4-12 Select a Lab
  1. After running the script, the watch window is populated with the variables in Figure 4-13.
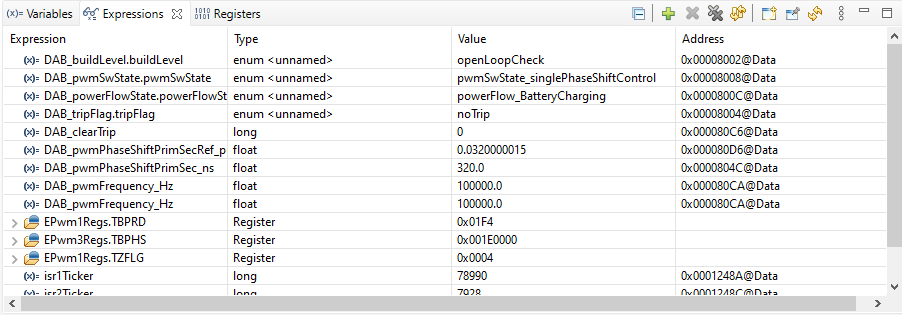
    GUID-20210818-SS0I-3LJZ-MGXR-07FPZMT7CQSS-low.png Figure 4-13 Watch Window
  2. Enable PWM by writing “1” to the DAB_clearTrip variable. (This variable resets to zero post writing and its normal)
  • Pass criteria for Lab1

    Connect probes on PWM1A (Q1), PWM1B (Q2), PWM3A(Q5), and PWM3B (Q6).

    1A and 1B are a complimentary pair, 3A is in sync with 1A with the specified phase shift, and the phase shift is controlled by the variable, DAB_pwmPhaseShiftPrimSecRef_pu.

    Check the following:

    1. Frequency is 100 kHz
      GUID-20210818-SS0I-2XRQ-WGNV-DCRVLKJ75WCK-low.png Figure 4-14 100 kHz PWM
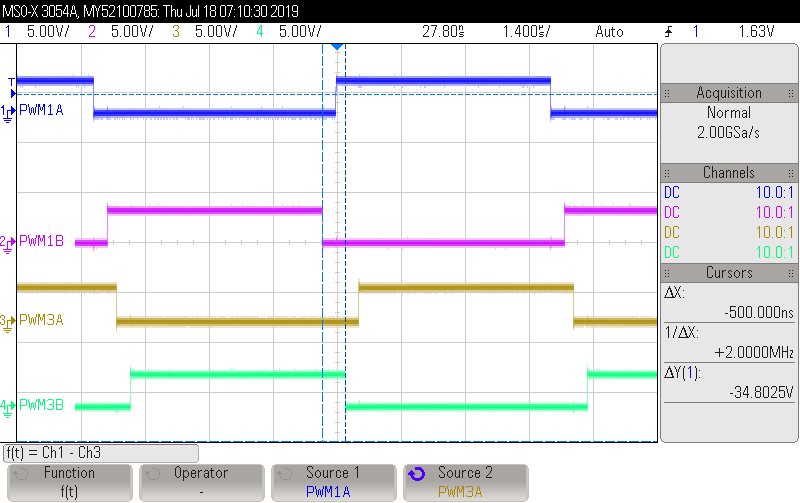
    2. Now change the phase shift to 0.05 → 500 ns, to see more observable phase shift
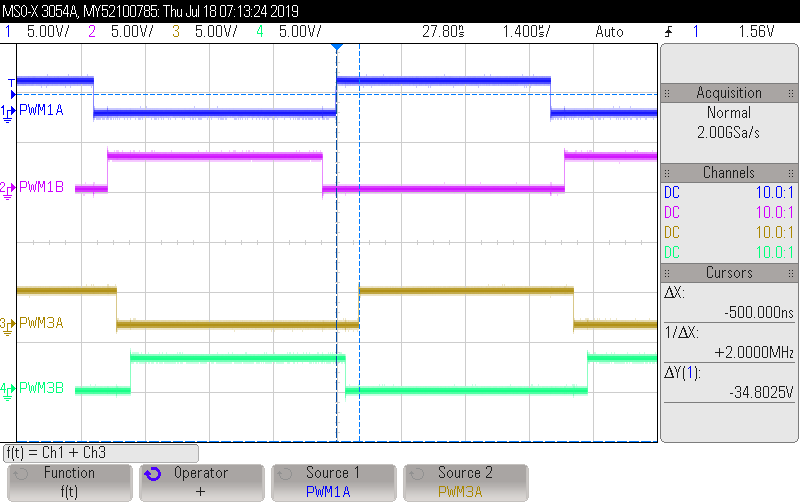
      GUID-20210818-SS0I-CW2H-QNR5-DJ1SGPQPNNJJ-low.png Figure 4-15 Phase Shift 500 ns
    3. Phase shift matches that specified by the variable on the oscilloscope. Check for non-clock ticks, that is, sub 10-ns internals of phase shift to verify high-resolution operation. In Figure 4-16 and Figure 4-17, the phase shift is measured using the oscilloscope to be approximately 500 ns for 500-ns setpoint and approximately 502 ns for a 502-ns setpoint, small jitter approximately 1–2 ns can be the measurement error.
      CAUTION: Phase shift is not recommended to be operated beyond 0.45 pu.
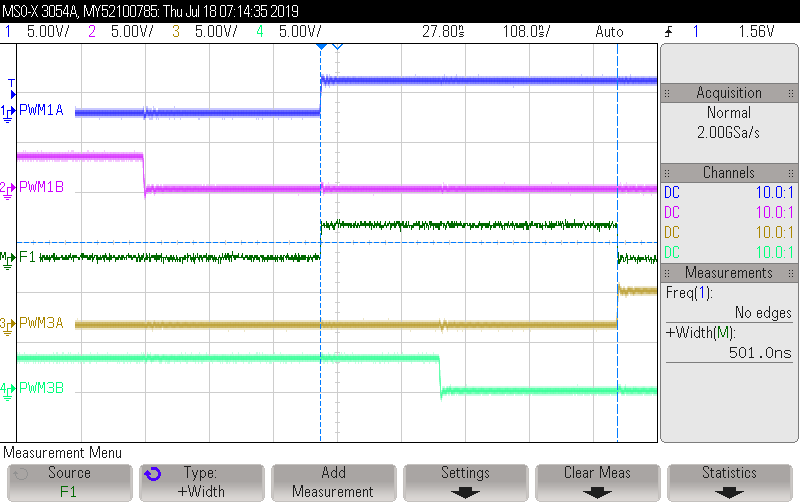
      GUID-20210818-SS0I-T8RF-NGMG-DDBNSCTRNBHV-low.png Figure 4-16 High Resolution Phase Shift 500 ns (1 ns Jitter Error)
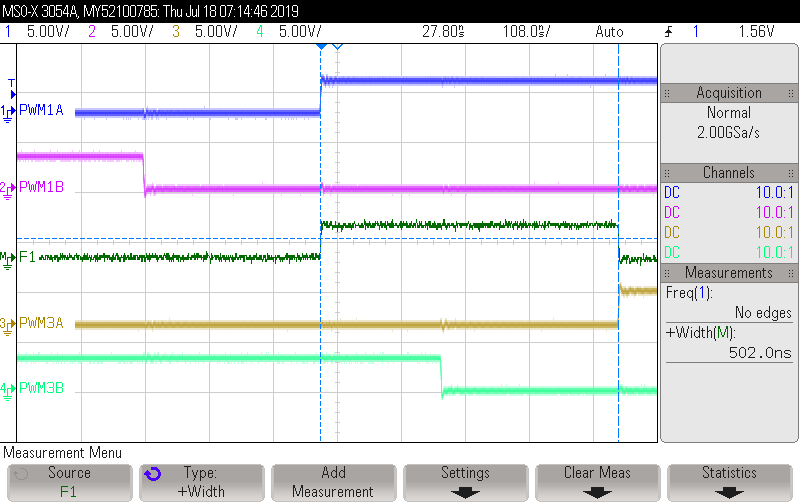
      GUID-20210818-SS0I-TFJV-RZDH-XF9FQN26XFXX-low.png Figure 4-17 High Resolution Phase Shift 502 ns
    4. Change the PWM probes to PWM1A, PWM1B, PWM2A, and PWM2B.
      • Verify PWM1A and 2B are in sync and in phase
      • Verify PWM1B and 2A are in sync and in phase
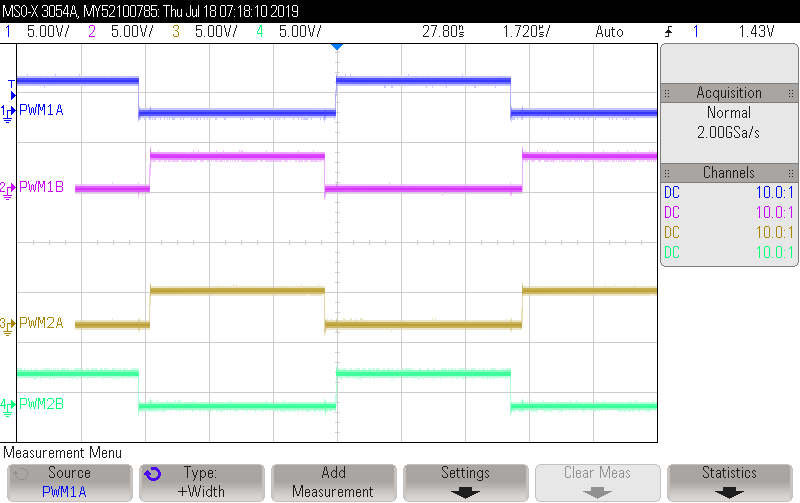
      GUID-20210818-SS0I-CHQ3-MH7V-6NXTCF85CM06-low.png Figure 4-18 PWM in Sync
    5. Verify that they remain in sync and in phase as the phase shift for sec side PWM is changed:
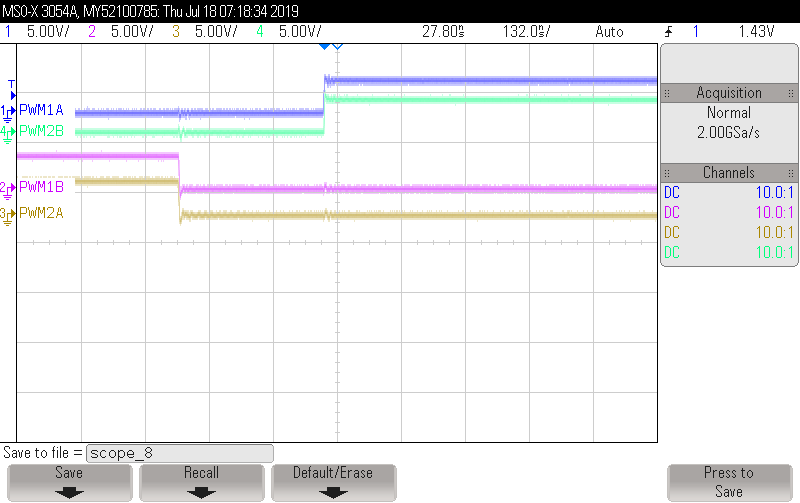
      GUID-20210818-SS0I-RT6C-H3ZM-PWM3LW4FQBSP-low.png Figure 4-19 PWM in Sync With Phase Shift