SWRA720 February 2022 CC1352P , CC1352P7 , CC1352R , CC1354P10 , CC1354R10 , CC2340R2 , CC2640R2F , CC2640R2F-Q1 , CC2640R2L , CC2642R , CC2642R-Q1 , CC2651P3 , CC2651R3 , CC2651R3SIPA , CC2652P , CC2652P7 , CC2652PSIP , CC2652R , CC2652R7 , CC2652RB , CC2652RSIP , CC2674P10 , CC2674R10 , CC2755R10
5 Configuring the CBTGo tests
The setup of the CBTgo software is only necessary if the intention is to remotely control the tester. This is highly recommended to generate test reports.
A very comprehensive reference is the Help menu of the CBTgo software (F1 key). It contains very thorough explanations about the process and each menu option.
First step is to set up the GPIB connection on the menu Configuration → Remote Port. In this setup, the National Instruments Controller USB to GPIB adapter was used.
The Searching button is useful to find out the address of the CBT device. If there is a cable problem, this procedure might cause CBTgo to run for a very long time or lockup (useful troubleshooting).
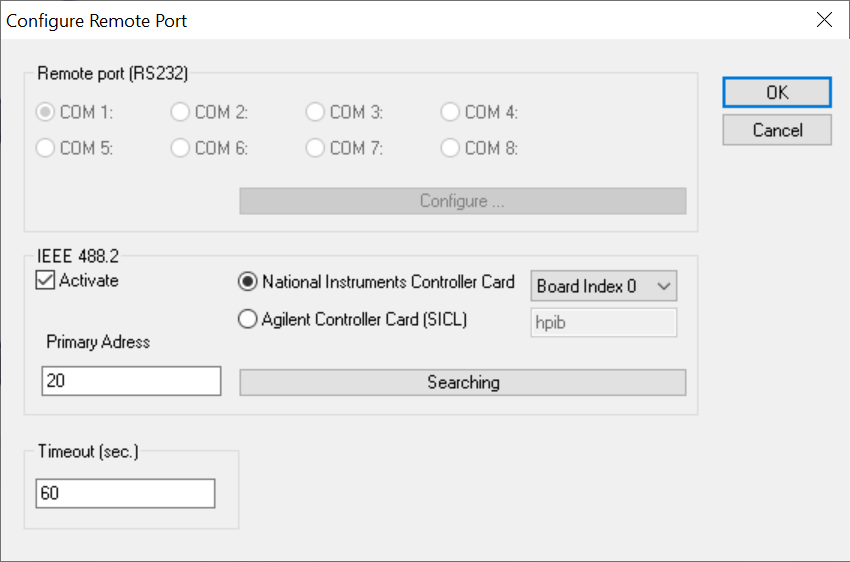 Figure 5-1 The remote GPIB port configuration
Go to menu Configuration → BT Low Energy device. This will setup the RS232 port to the DUT.
Select the CBT (COM1) and click on Configure to setup the UART settings (baud rate, flow control, start, stop and parity bits). The host_test uses 115200, 8N1 and no flow control.
Also, make sure the field EUT Protocol is set to HCI.
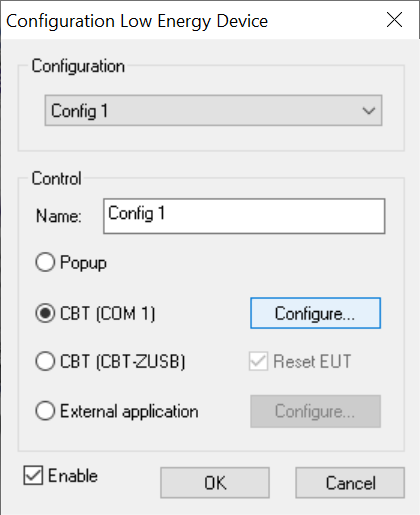 Figure 5-2 The remote RS232 port setup dialog box
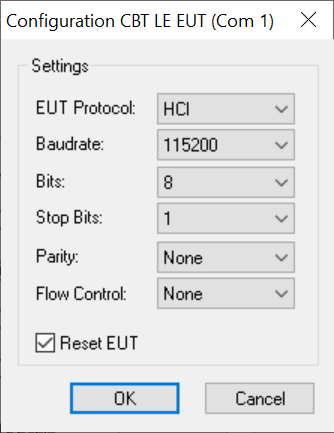 Figure 5-3 The control protocol setup dialog box
Go to menu Configuration → Measurement Report. This allows configuring the various formats to present the test results.
Several fields are self explainable (Operator, Comments, etc) and, in case of questions, the help reference (at User Interface → Configuration menu → Measurement Report) is very useful.
The Autosave Print Options controls the amount of information that will be present in the report. It is useful to select the option completely to get the full set of results. Also, if you have a printer driver that "Prints to PDF" (Adobe, Foxit, etc.) it is very useful to share a PDF file directly with customers.
The Autosave File Options controls the file type to save. The HTML format is the nicer one, although the Text or XML might be easier to feed into a script of parser to populate a spreadsheet.
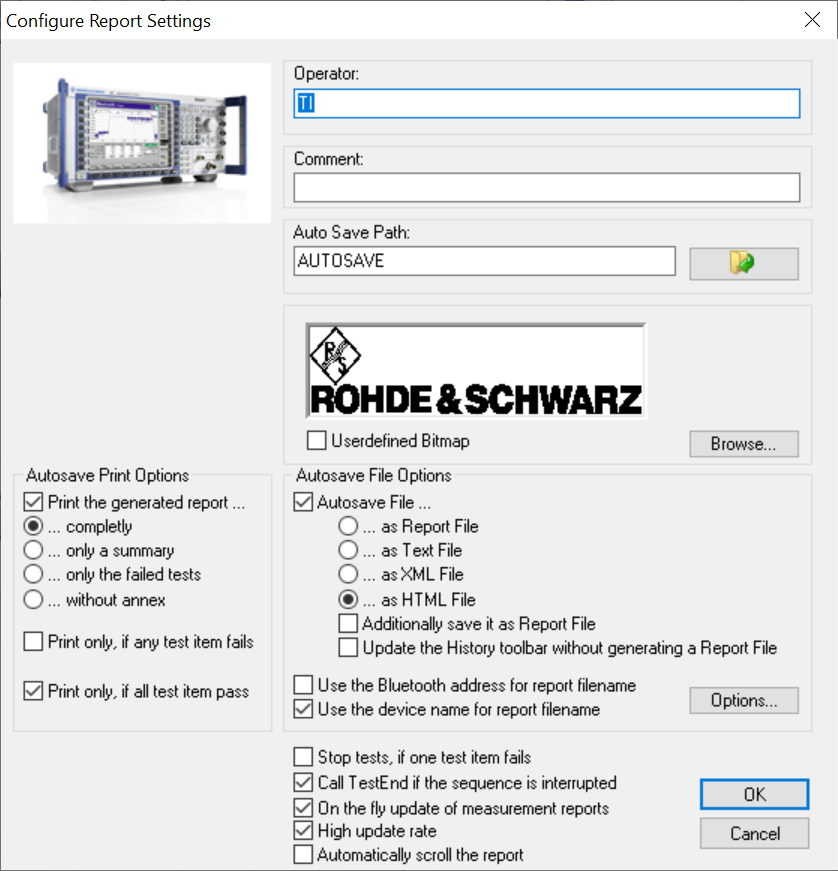 Figure 5-4 The measurement report setup screen
Go to menu Configuration → Configure Tests. That is where all the test steps will take place, including the initialization and termination of the sequence.
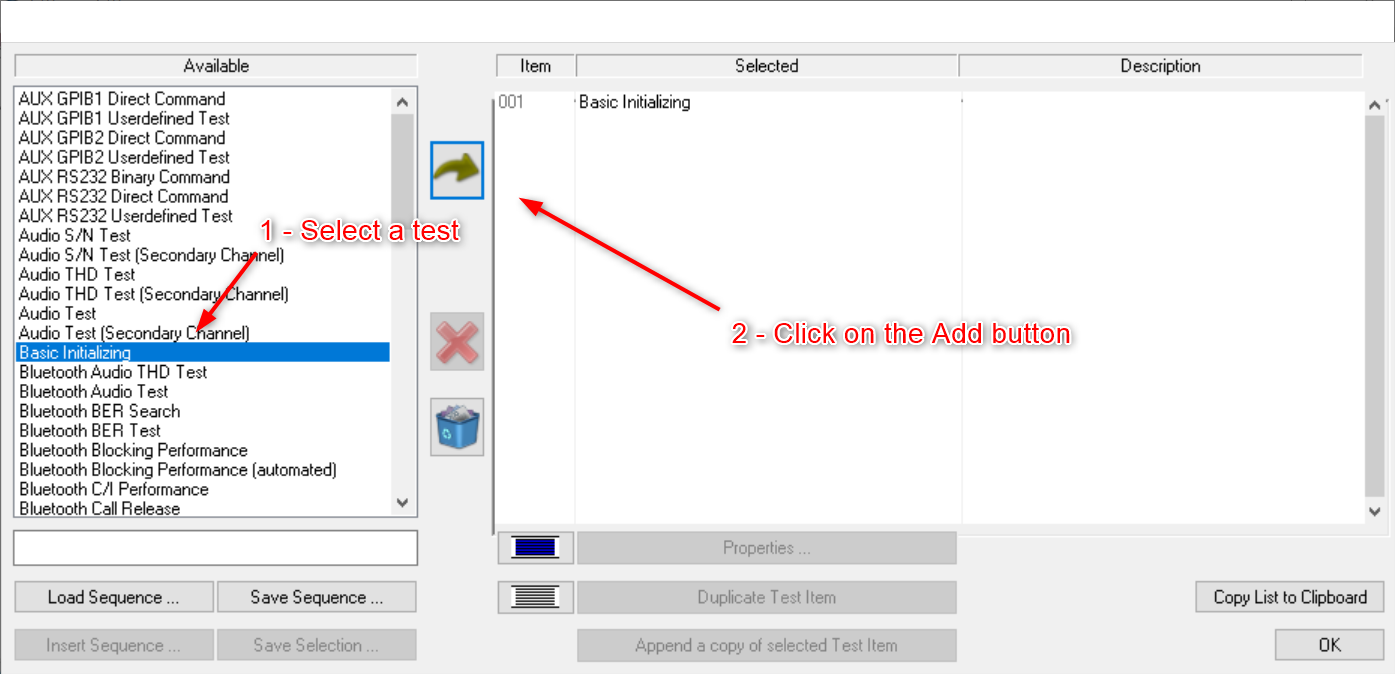 Figure 5-5 The Bluetooth test setup screen
The test sequence always starts with the Basic Initializing (which sets up the function groups to be tested)
For Bluetooth Low Energy, the second step is the Bluetooth Low Energy Connection Setup, which sets the RF connection parameters between the DUT and the CBT, including the external attenuator (mentioned in the prior section).
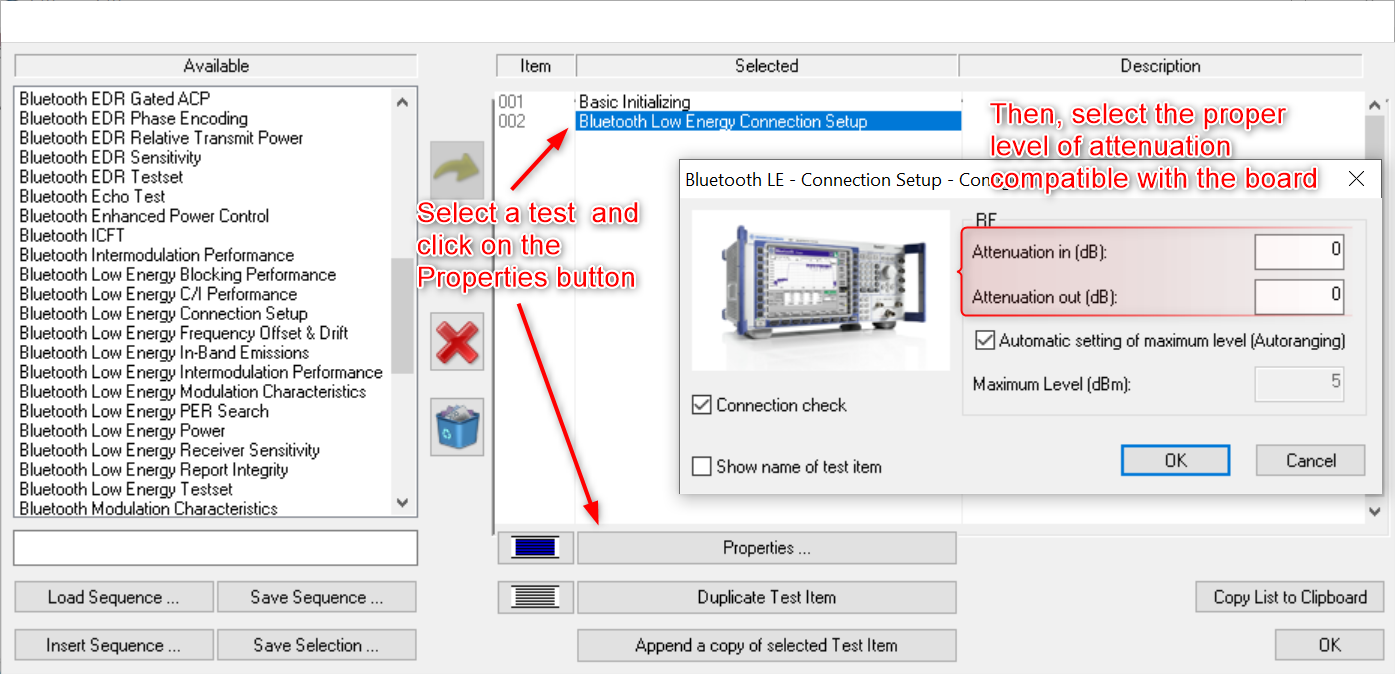 Figure 5-6 The Bluetooth test options dialog box
Keep adding test steps to the sequence and configuring their properties. Comprehensive description of each test is shown in the help reference (at Test Reference → Test Items)
Optionally, use one of the existing pre-defined Test Sequences by clicking on the button Load Sequence. It will contain a complete set of tests. Comprehensive description of each Test Sequence is shown in the help reference (at Test Reference → Test Sequences).
Once all is ready, simply click on the Play button at the top toolbar to initiate the tests.
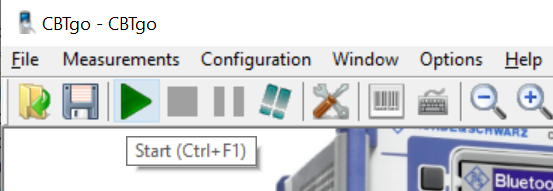 Figure 5-7 Starting the Bluetooth test