SPRUIQ5 May 2019 TMS320F280021 , TMS320F280021-Q1 , TMS320F280023 , TMS320F280023-Q1 , TMS320F280023C , TMS320F280025 , TMS320F280025-Q1 , TMS320F280025C , TMS320F280025C-Q1 , TMS320F280040-Q1 , TMS320F280040C-Q1 , TMS320F280041 , TMS320F280041-Q1 , TMS320F280041C , TMS320F280041C-Q1 , TMS320F280045 , TMS320F280048-Q1 , TMS320F280048C-Q1 , TMS320F280049 , TMS320F280049-Q1 , TMS320F280049C , TMS320F280049C-Q1 , TMS320F28374D , TMS320F28374S , TMS320F28375D , TMS320F28375S , TMS320F28375S-Q1 , TMS320F28376D , TMS320F28376S , TMS320F28377D , TMS320F28377D-EP , TMS320F28377D-Q1 , TMS320F28377S , TMS320F28377S-Q1 , TMS320F28378D , TMS320F28378S , TMS320F28379D , TMS320F28379D-Q1 , TMS320F28379S
3.4 Building and Loading the Project
The TI motor control software has incremental builds where different components and macro blocks of the system are pieced together, one-by-one, to form the entire system. (This build structure helps to easily debug and understand the system.)
- Open the file fcl_qep_f2837x_tmdxiddk_settings.h from the CCS Edit Perspective.
- Set the BUILDLEVEL to LEVEL1.
- Save this file.
- Open the fcl_qep_f2837x_tmdxiddk.c file.
- Navigate to the motorControlISR() (or MainISR() in general) function.
- Locate the following piece of code in incremental build 1.
- Confirm that the datalog buffers point to the correct variables.
- Right-click on the project name.
- Click Rebuild Project.
- Ensure the console window is error free.
- When the build completes, click
 (Debug).
 - Click the box next to CPU1.
- Load the output file into the device.
- Change to the debug perspective.
- Click Tools.
- Click Debugger Options.
- Click Program.
- Click Memory Load Options.
- Check Reset the target when loading or restarting the program to enable the debugger to reset the processor each time it reloads the program,.
- Click Remember My Settings to make this setting permanent,.
- Click
 (Enable silicon real-time mode).
 - If a message box appears, select yes to enable the debug events.
NOTE
After testing build 1, redefine BUILDLEVEL to LEVEL2 for the next level tests. Increment the BUILDLEVEL and perform the tests for each level until all builds are complete.
		DlogCh1=rg1.Out;
		DlogCh2=svgen1.Ta;
		DlogCh3=svgen1.Tb;
		DlogCh4=svgen1.Tc;
NOTE
These datalog buffers are large arrays that contain value-triggered data that can be displayed in a graph. In other incremental builds, variables may be put into this buffer to be graphed. The previous code is an example where the datalog buffers are pointed to the space vector generator module.
NOTE
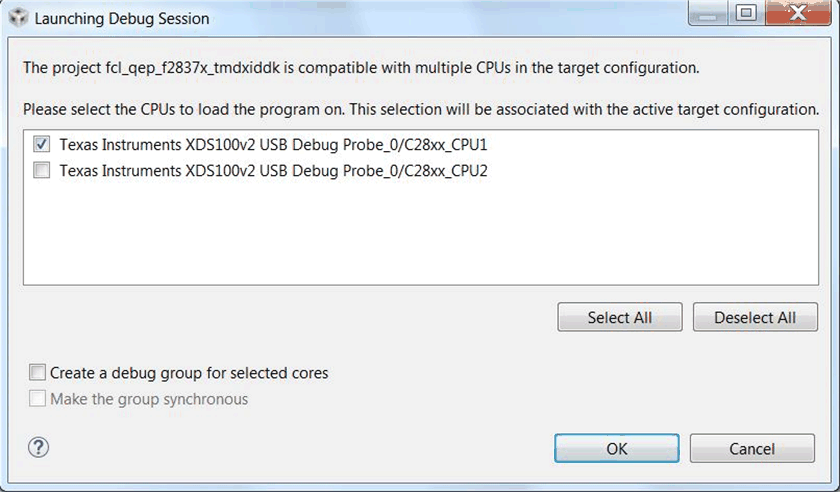
A window as shown in Figure 3-5 may pop up if this is the first time opening the debug window. The window requests that you select one of the two CPUs in F28379x with which to connect.
 Figure 3-5 Selecting the CPU to Connect
 NOTE
The IDE automatically connects to the target.
NOTE
Clicking this mode automatically selects ![]() (Enable polite real-time mode). This action lets you edit and view variables in real-time. Do not reset the CPU unless you disable these real-time options.
(Enable polite real-time mode). This action lets you edit and view variables in real-time. Do not reset the CPU unless you disable these real-time options.
NOTE
This action sets bit 1 (the DGBM bit) of status register 1 (ST1) to 0. The DGBM is the debug enable mask bit. When the DGBM bit is set to 0, memory and register values can pass to the host processor to update the debugger windows.