SWRU580 April 2021 CC2564C , CC2564MODA , CC2564MODN
- Trademarks
- 1 Introduction
- 2 A2DP (AUD) Demo Guide
- 3 A3DP Sink Demo Guide
- 4 A3DP Source Demo Guide
- 5 HFP Demo Guide
- 6 HFP Audio Gateway Demo Guide
- 7 HID Demo Guide
- 8 HSP Demo Guide
- 9 Map Demo Guide
- 10PBAP Demo Guide
- 11SPP Demo Guide
- 12SPPLE Demo Guide
- 13SPPDMMulti Demo Guide
- 14ANP Demo Guide
- 15HFP Demo Guide
- 16HTP Demo Guide
- 17PASP Demo Guide
- 18HOGP Demo Guide
- 19PXP Demo Guide
- 20FMP Demo Guide
- 21CSCP Demo Guide
- 22Revision History
11.2 Demo Application
This section provides a description of how to use the demo application to connect two configured board and communicate over Bluetooth. Bluetooth SPP is a simple Client-Server connection process. We will setup one of the boards as a server and the other board as a client. We will then initiate a connection from the client to the server. Once connected, we can transmit data between the two devices over Bluetooth.
Server setup on the demo application- We will setup the first board as a server. Perform the steps mentioned earlier in "Running the Bluetooth Code" section to initialize the application. Once initialized, note the Bluetooth address of the server. We will later use this to initiate a connection from the client.
- On the "Choose mode>" prompt, enter Server.
- You will see a list of all possible commands at this time for a server. You can see this list at any time by entering Help at the Server> prompt.
- Now we are ready to open a
server. To open a server, at the "Server>" prompt, enter Open 1. You
can replace 1 with any number between 1 and 30, as long as there is no server
open on that port. Once you see "Server opened: 1", you have a SPP server open
on port 1.
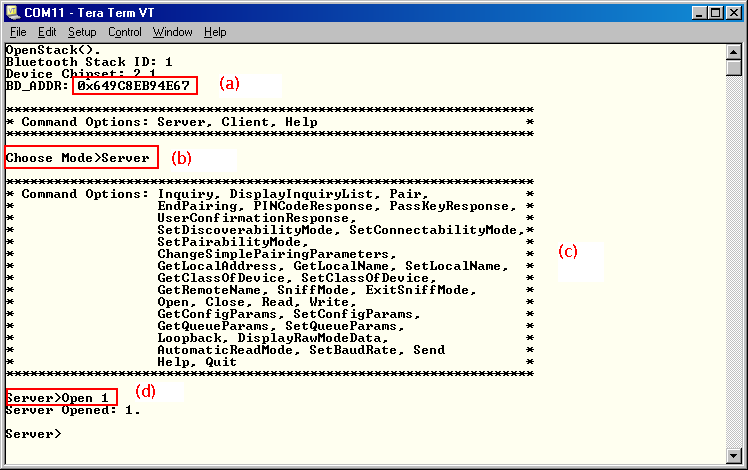 Figure 11-2 SPP Demo Server
Setup
- We will setup the second board as a client. Perform the steps mentioned earlier in "Running the Bluetooth Code" section to initialize the application. On the "Choose mode>" prompt, enter Client.
- You will see a list of all possible commands at this time for a Client. You can see this list at any time by entering Help at the Client> prompt.
- At the "Client>" prompt, enter Inquiry. This will initiate the Inquiry process. Once it is complete, you will get a list of all discovered devices.
- You can access this list any time
by choosing DisplayInquiryList at the Client prompt.
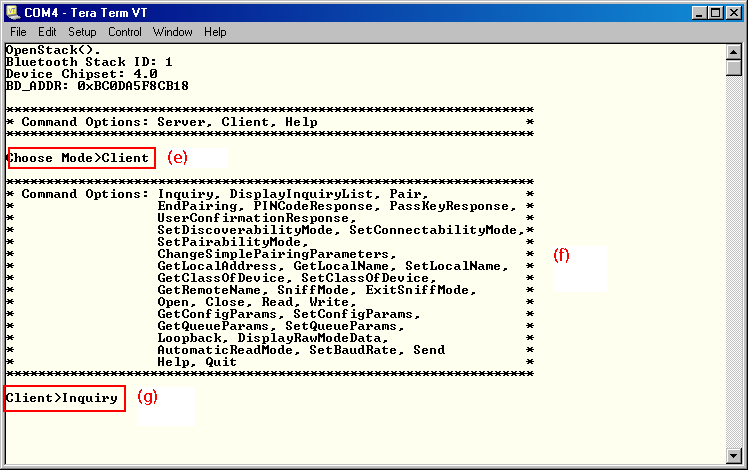 Figure 11-3 SPP Demo Client
Setup
- Note the index number of the first board that was configured as a server. [If the list is not on the screen, issue DisplayInquiryList command on the client to display the list of discovered devices again.]
- Issue a Open <index number> <server port number> command at the command prompt.
- Wait for SPP Open confirmation.
l) When a client successfully connects to a server, the server will see the open
indication.
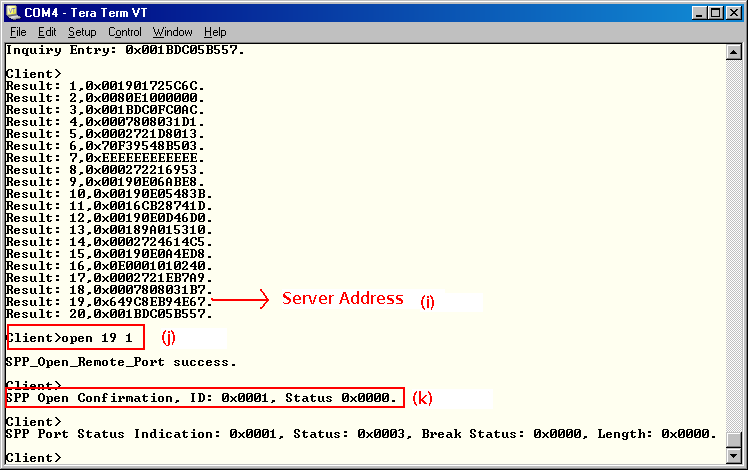 Figure 11-4 SPP Demo Client
Connection
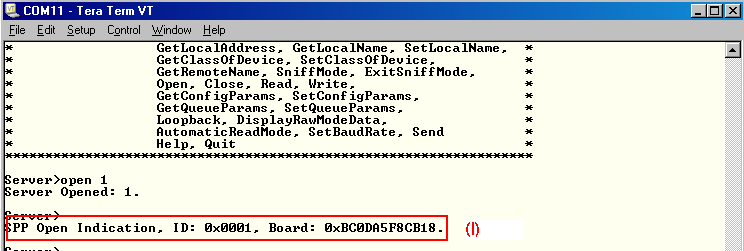 Figure 11-5 SPP Demo Server
Connection
- Now we have a SPP connection established and both devices are ready to transmit data to each other.
- On Client or Server you can send some data to the remote side by issuing a Write command. This command sends a hardcoded test string to the other side.
- The remote side will receive a data indication
- The user can read the data by issuing a Read command.
- The connection can be closed on
either side by issuing the close command. In the example the client closes the
connection and the server receives a close indication.
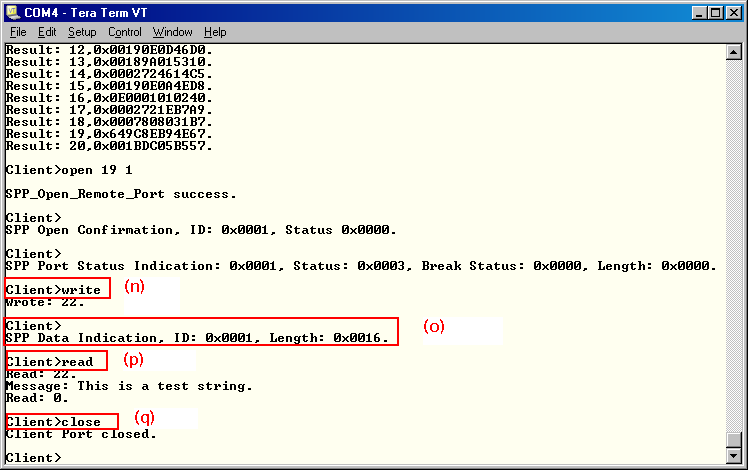 Figure 11-6 SPP Demo Client
Connection and Data Transfer
 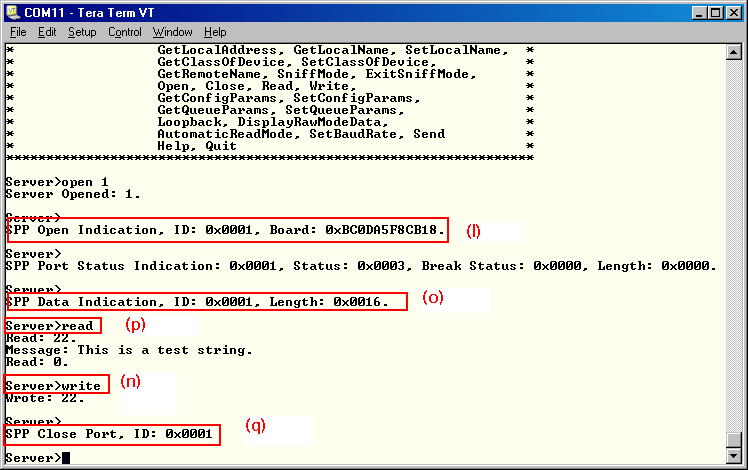 Figure 11-7 SPP Demo Server
Connection and Data Transfer
We will demonstrate a SPP connection using Blueterm. Blueterm is an app that can be used to connect an Android device to the SPPDemo. For more about the app refer to BlueTerm-Google Play.
- Open a server port on the
MSP430.
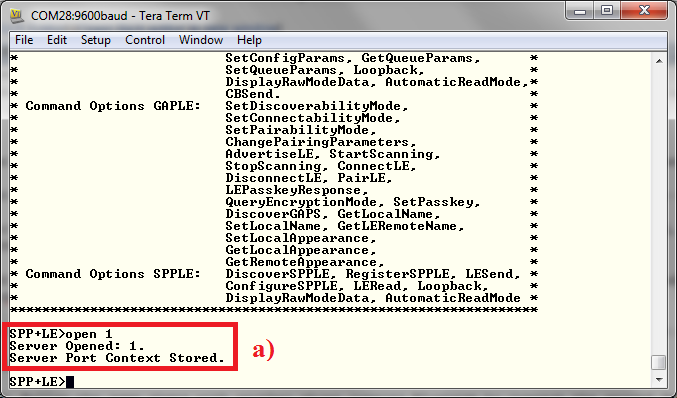 Figure 11-8 SPP Demo Multiple
SPP
 - To connect to the device, open
blueterm, press the menu button and hit the connect icon.
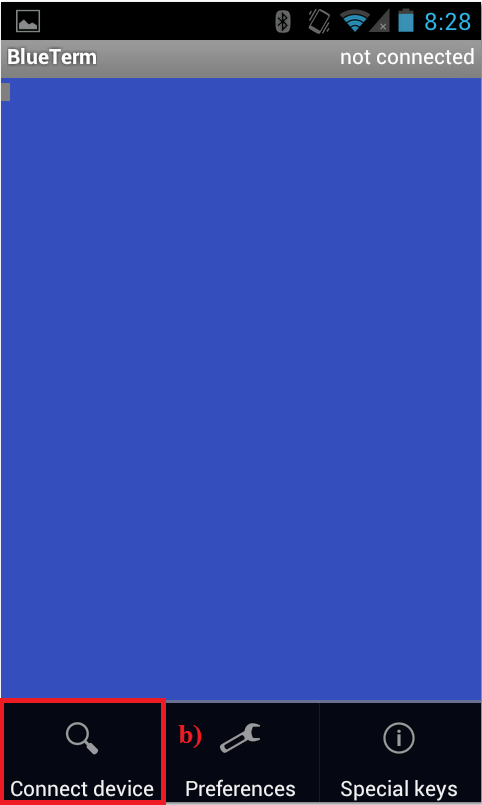 Figure 11-9 SPP Demo Connect on
Blueterm
 - The app should show a list of
paired devices. If the device is not already paired, select scan. It should
search for available bluetooth devices.
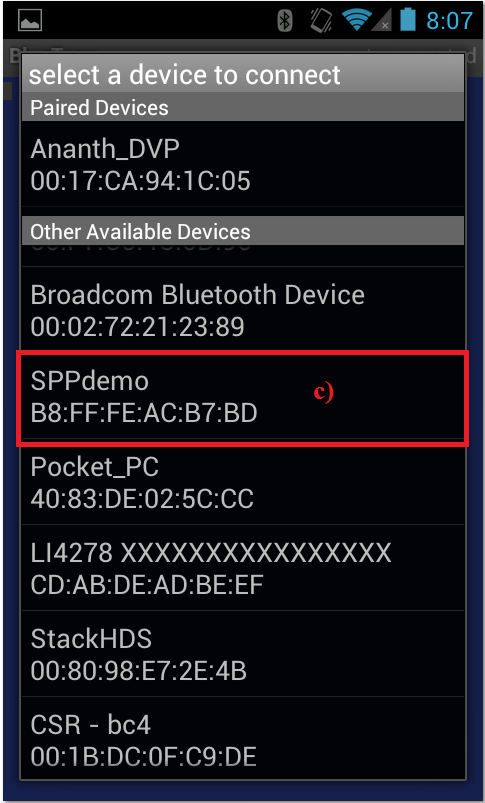 Figure 11-10 SPP Demo Available
devices
 - Select and Pair it with the
device running the SPPdemo. If it needs a pincode enter a pincode on the
app/phone. The MSP430 will prompt for a PINCodeResponse. Type
PINCodeResponse <the pin code you used for the phone> in the
prompt. It will pair and you should see an open indication on the MSP430.
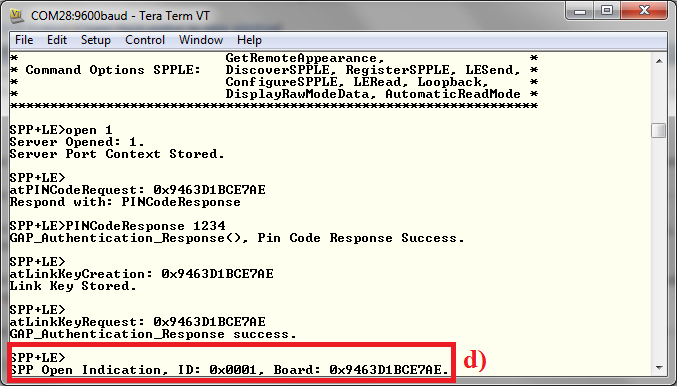 Figure 11-11 SPP Demo MSP430
PINCodeResponse
 - The two devices are now
connected. Data can be sent/received from the two devices as shown here.
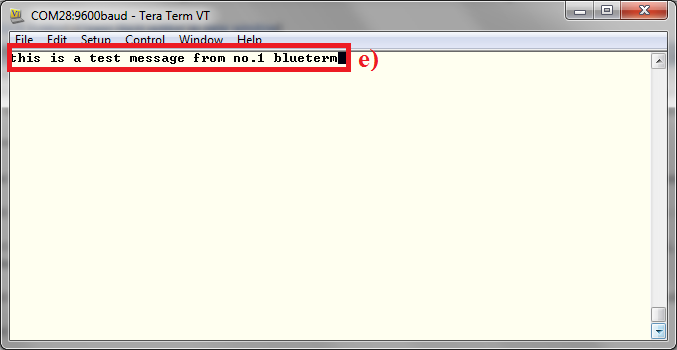 Figure 11-12 SPP Demo Test
Terminal
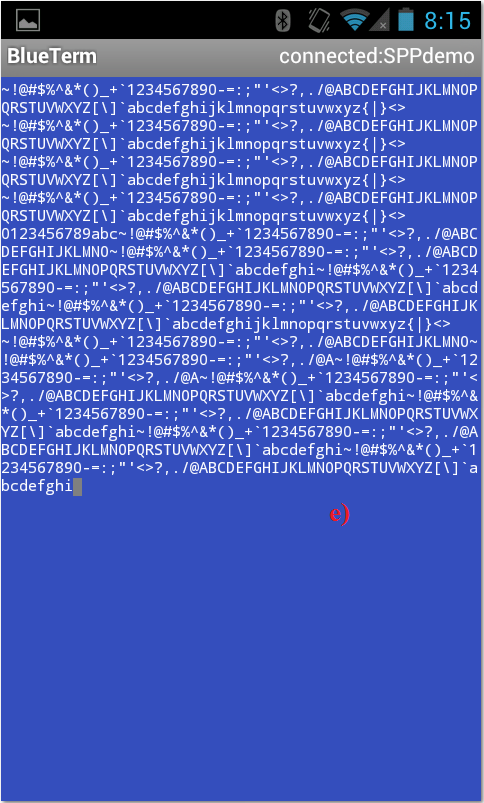 Figure 11-13 SPP Demo Test Terminal
2
An example communication:
SPP+LE>write

Wrote: 76.


SPP+LE>

Transmit Buffer Empty Indication, ID: 0x0001


Here is the Server side (who is receiving the data):


SPP+LE>

SPP Data Indication, ID: 0x0001, Length: 0x0026.


SPP+LE>read

Read: 31.

Message: ~!@#$%^&*()_+`1234567890-=:;"'<

Read: 7.

Message: >?,./@A

Read: 0.


SPP+LE>

SPP Data Indication, ID: 0x0001, Length: 0x0026.


SPP+LE>read

Read: 31.

Message: BCDEFGHIJKLMNOPQRSTUVWXYZ[\]`ab

Read: 7.

Message: cdefghi

Read: 0.
So we have:
31+31+7+7=76.